Parsware Platform
Drawing screens instead of coding them
A Studio app is a screen you draw on a canvas and then tell what each part is. Saving turns the drawing into a real web page that reads and writes your records. Here's what that means, and when to draw a screen instead of laying out a form.
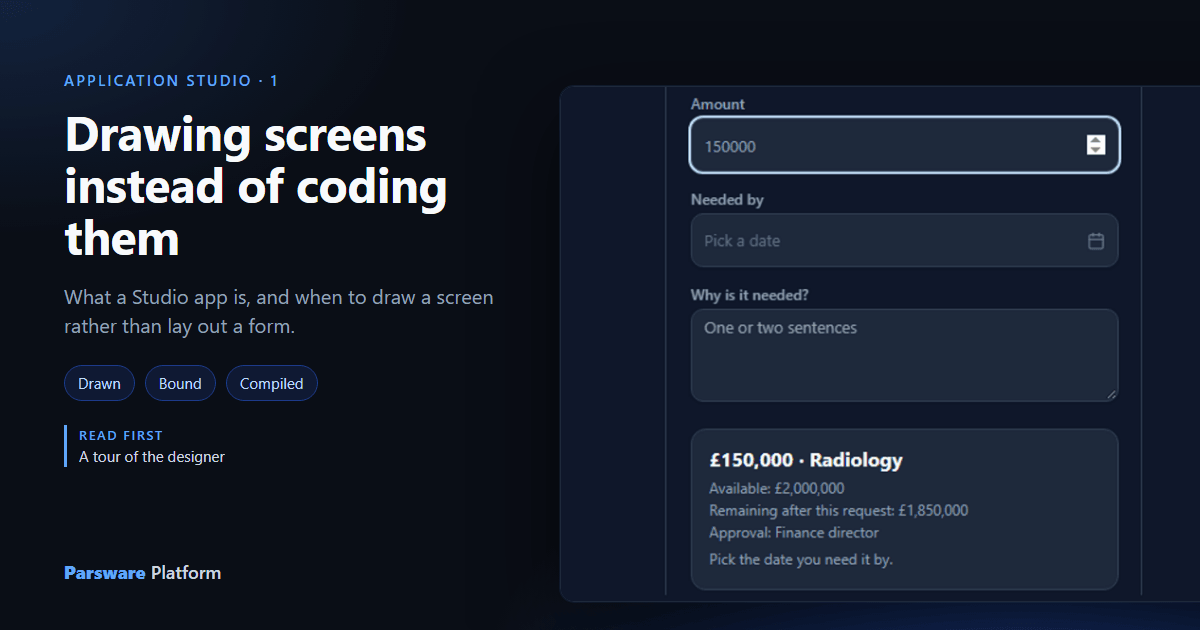
Most of a business application is lists and forms: a list of requests, a form with twenty fields, a related list underneath. Parsware builds those for you from your tables, and that's what a model-driven app is. But some screens aren't a list or a form. A phone screen for raising a request. A home page that says hello and shows what's waiting. A dashboard. A step-by-step form for somebody who uses it twice a year.
For those, Parsware lets you draw the screen. This is an Application Studio app, or a Studio app for short: screens drawn on the same canvas as reports, then told what each part is, then saved into a real web page that reads and writes your records. This article explains what that means, how it differs from a model-driven form, and how to choose between them. The rest of this series shows each part step by step.
One application, both kinds of screen
The clearest way to see the difference is an application that uses both. The Capital planning
sample (studio-capital-planning) is a whole capital-funding process: six tables, an approval
process, two reports, and a phone screen. Import it with its demonstration data, and it's in the
Platform Shell's app list:
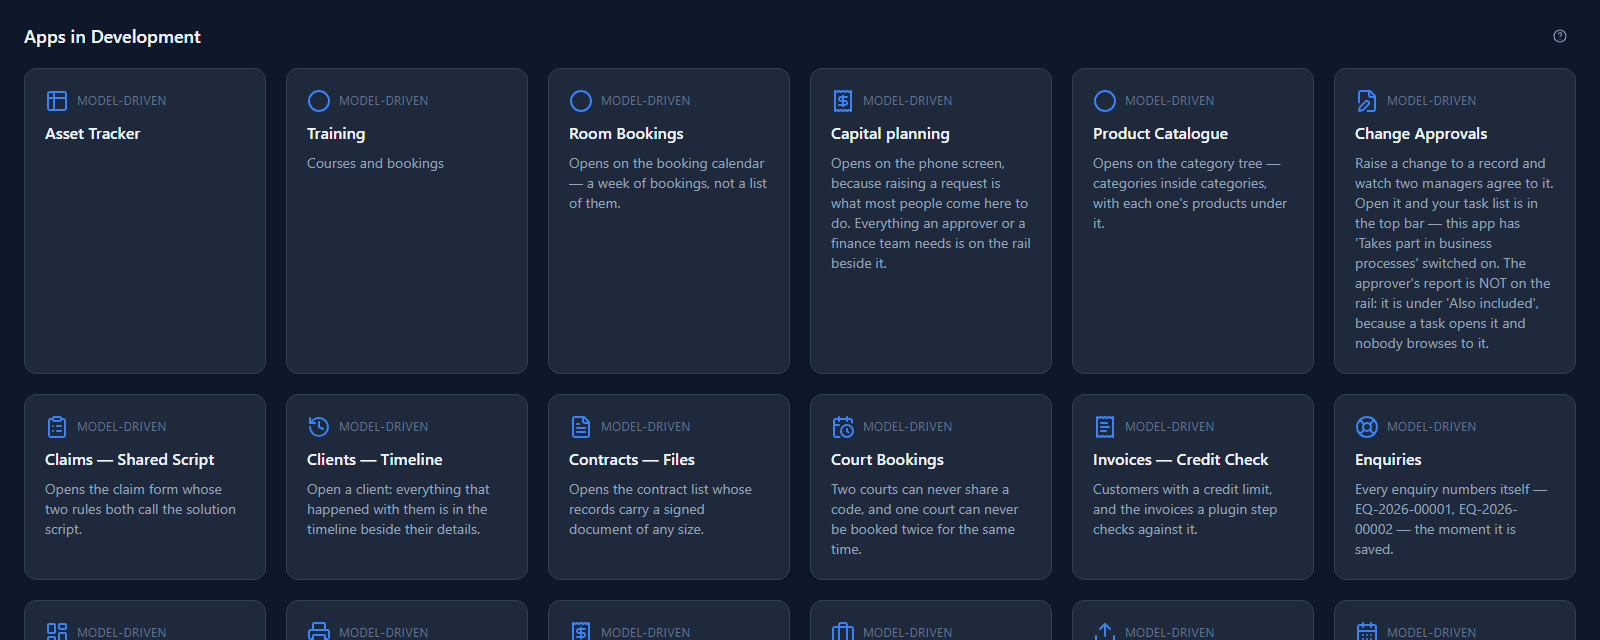
Open Capital planning. It's a model-driven app, with its navigation down the left: requests, programmes, budget lines, approval history, the thresholds that decide who approves what. But it doesn't open on a list. It opens on a drawn screen, because raising a request is what most people come here to do:
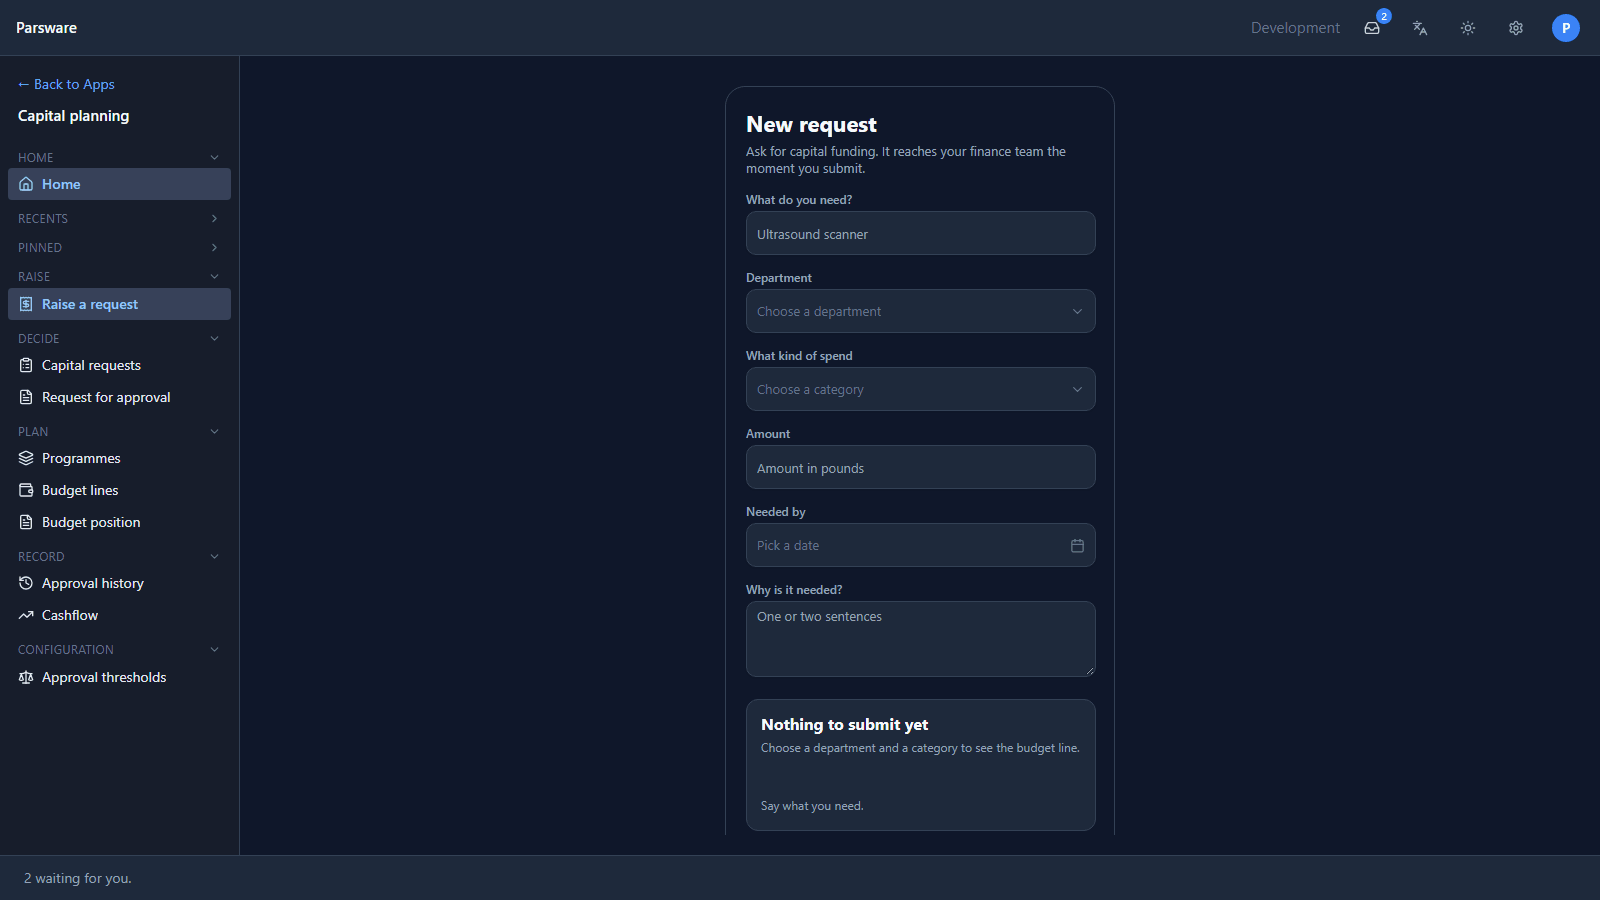
That screen is phone-shaped on purpose. It's 390 pixels wide and stays in the middle of a wide window, because the people raising requests mostly do it from a phone.
A screen that answers as you type
Fill it in. Pick Radiology and Medical equipment, and the two choices name one budget line. Type an amount, and the panel above the button answers straight away:
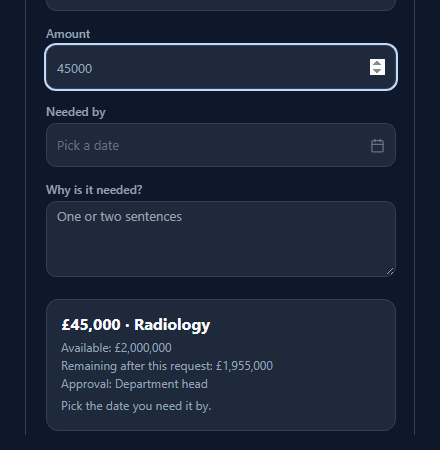
It shows what the line has left, what's left after this request, and who will approve it. Change the amount to £150,000 and the approver changes:

The amount crossed a band in the Approval thresholds table. Nobody wrote "over £100,000 goes to the finance director" into the screen: the screen reads the bands from a table the finance team edits, and works out which one the amount falls in. Move a band and the screen follows, with nothing rebuilt. If you ask for more than the line has, the panel says how much you're over and the Submit button stops working.
This is the reason the screen is drawn. A requester who taps Submit and waits finds out an hour later that the line was empty or that the request needed a director. A screen that tells them while they type saves that round trip, and it isn't a form: it's a form plus a running answer, laid out for a phone.
The same records, as lists and forms
Now press Capital requests in the navigation:
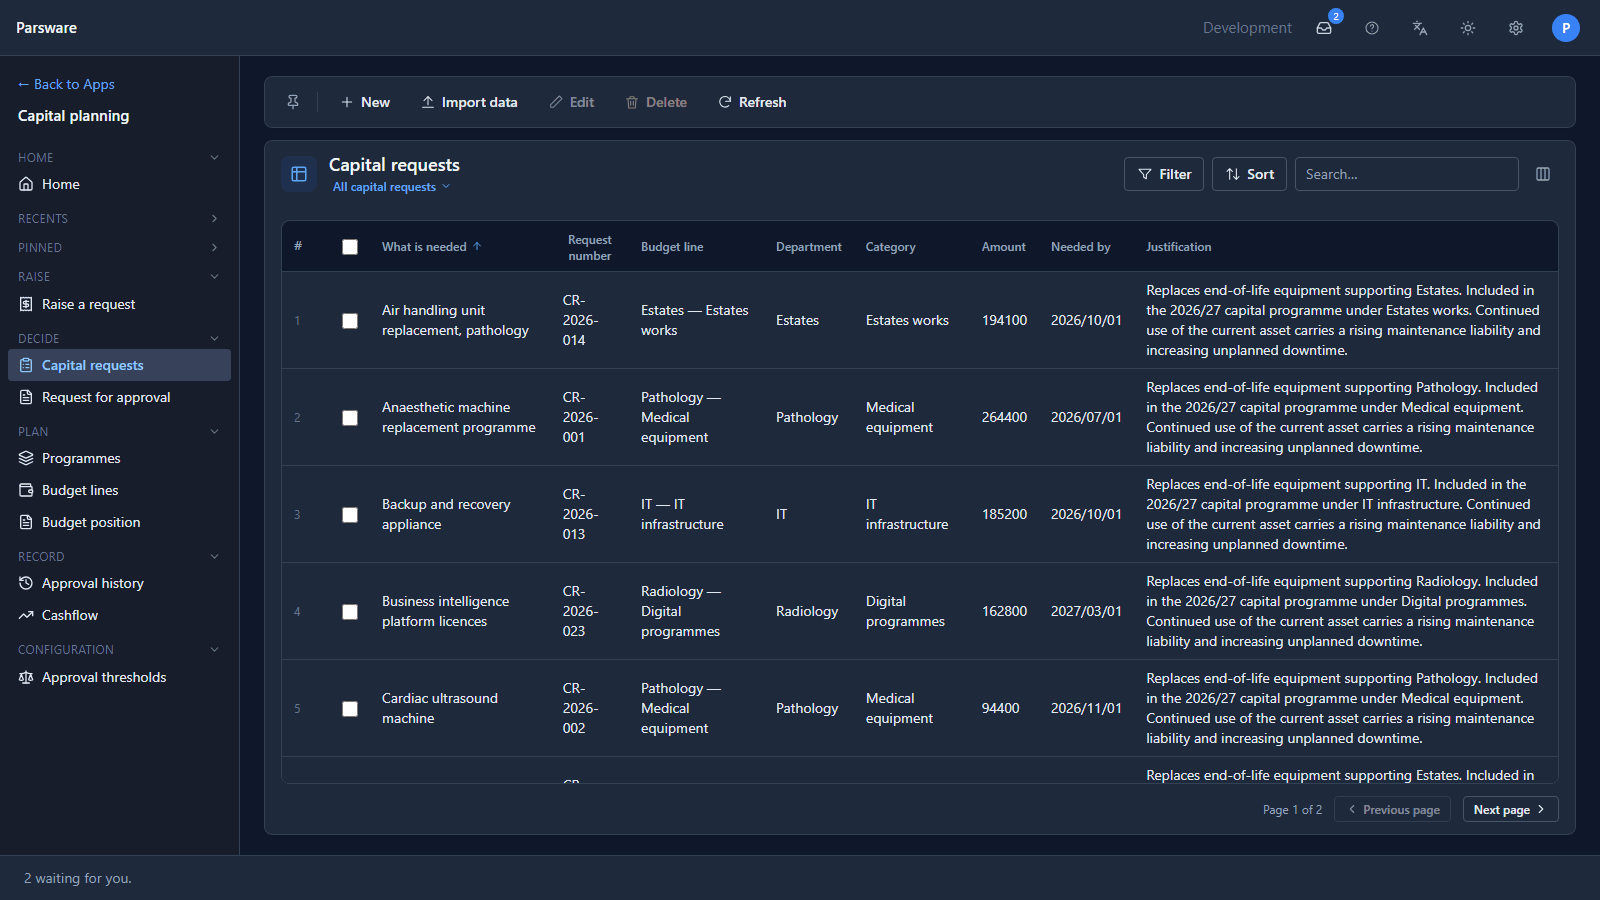
These are the same records, in a model-driven view. Open one and it's a model-driven form, with the request on one side and the decision on the other:
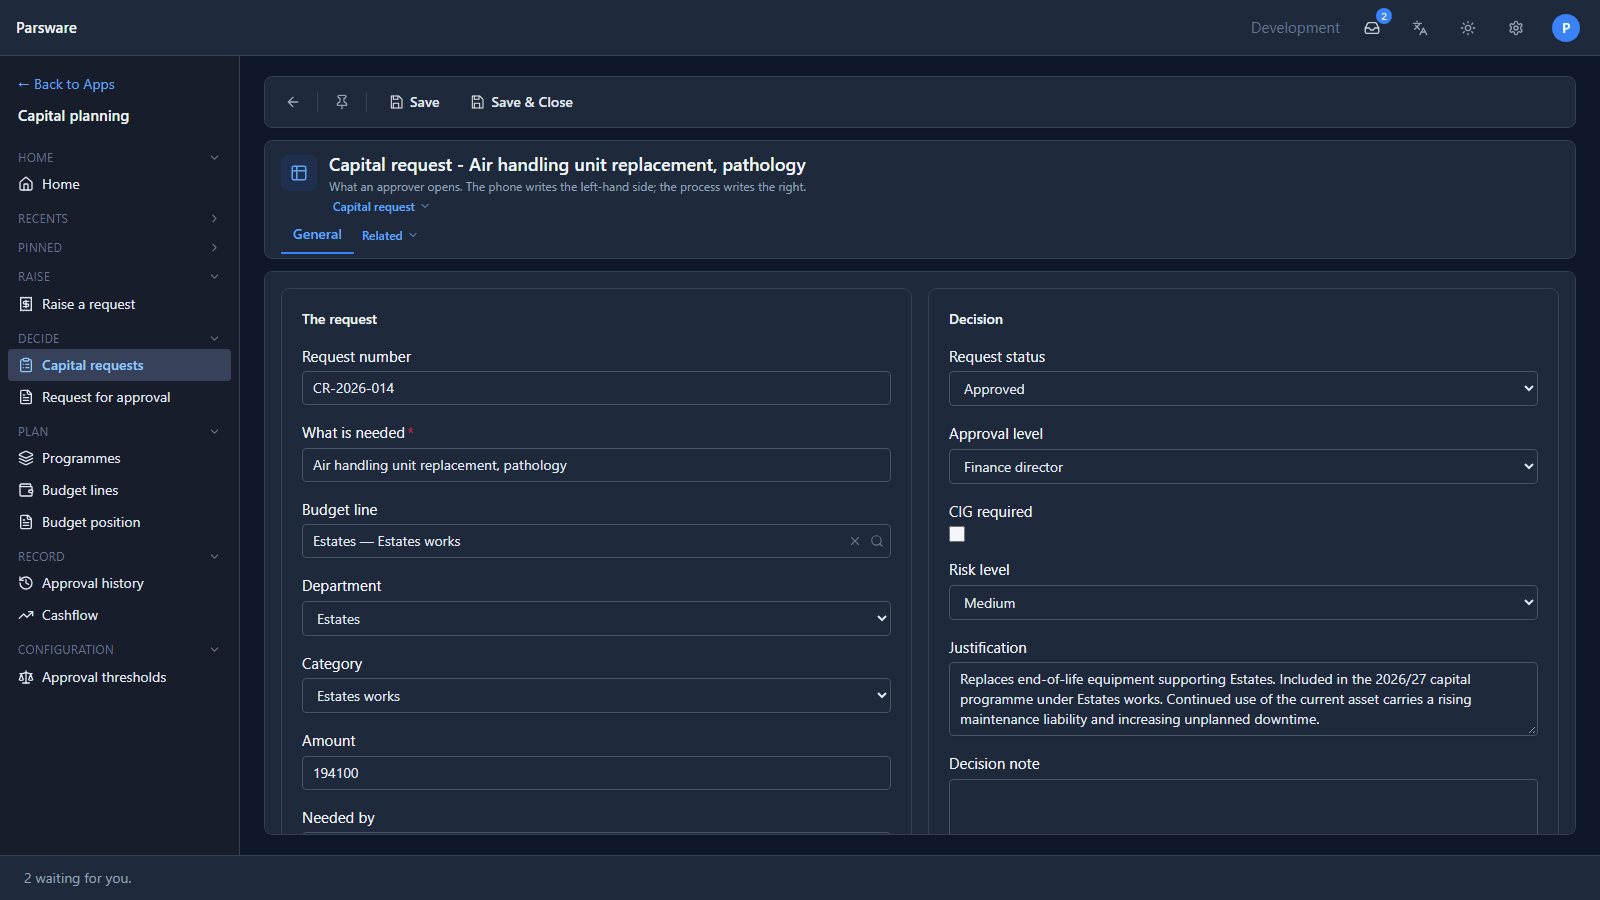
Nobody drew this list or this form. They come from the table, its views and its form design, and they're right for the job: an approver wants every request in a sortable, filterable list and every field on one page. The finance team wants budget lines in a grid. The drawn screen would be the wrong tool for that work, just as a twenty-field form would be the wrong tool for a phone.
That's the whole decision, and the sample makes it twice. Lists, forms and records with many fields: model-driven. A task-shaped screen with its own layout: drawn.
What a drawn screen is made of
Open the sample's solution in the maker portal, go to Studio apps, select Capital request and press Design:
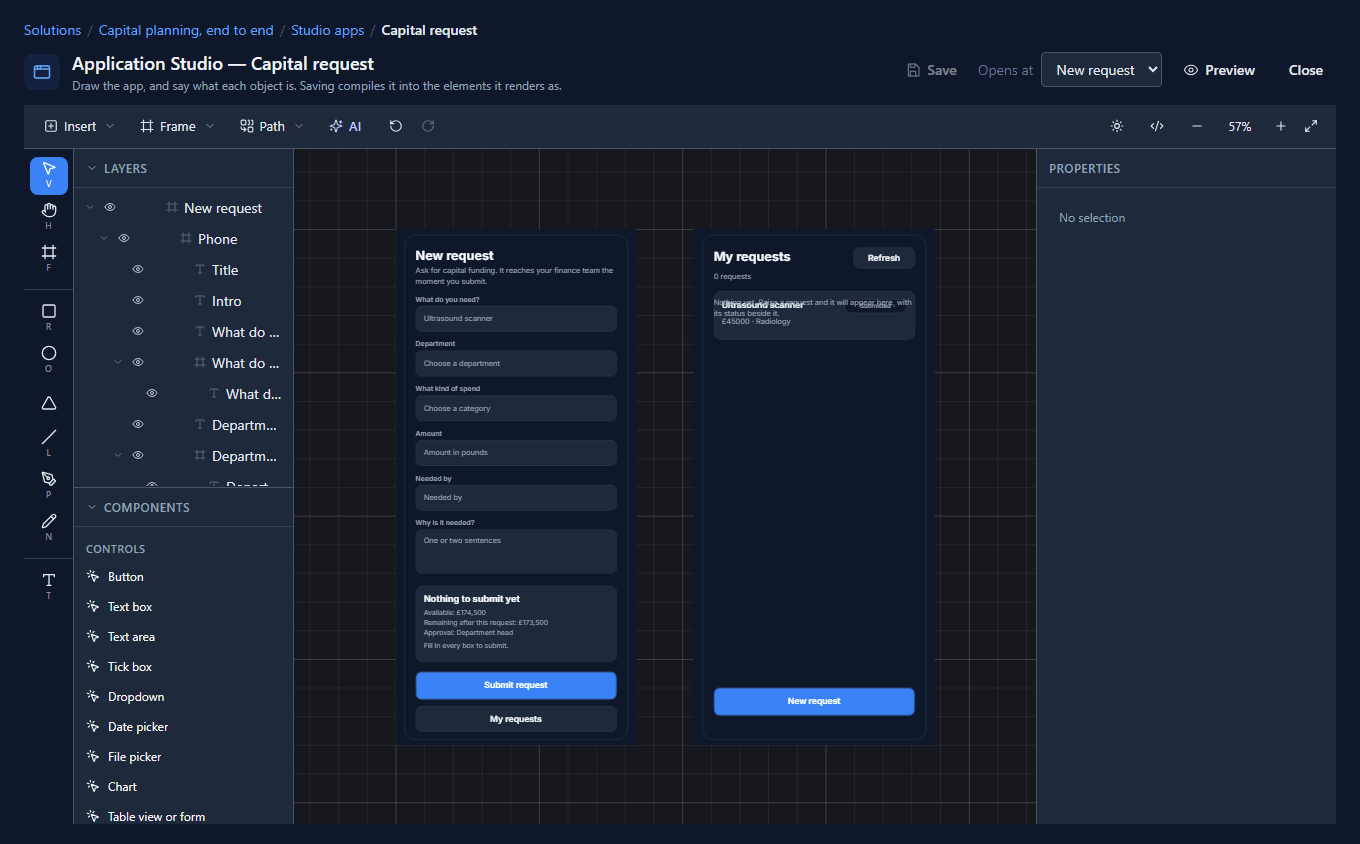
That's the Graphic Designer, the same canvas reports are drawn on. Everything in the Graphic Designer series applies: frames, shapes, text, auto layout, constraints, shared styles, components. A Studio app adds four things on top.
1. Each part says what it is
Select anything and the inspector's Screen tab asks one question: This object is…
- The screen: the frame everything else is inside. Each frame marked this way is one screen of the app, named after the frame.
- A heading, a paragraph, a region, a list, a list item, a link: what the part means. A heading and a paragraph can look identical on the canvas; only you know which is which, and the difference is what a screen reader announces.
- A control: a Button, Text box, Text area, Tick box, Dropdown, Date picker, File picker, Chart, Table view or form, or My tasks. These aren't drawings of controls. They're the platform's real controls, sized and placed where you drew them: a date picker opens a real calendar, and a Persian one in a Persian session.
A part you don't tag is graphic: drawn, but saying nothing about what the screen contains.
2. Bindings: values that follow the screen
A binding is one expression that decides a property: a text's words, a control's value, whether something is shown or enabled. The panel above Submit is a handful of bindings, each reading the screen's state:
- Remaining after this request is the budget line's remaining money minus the amount.
- Submit is enabled when the amount is no more than what's left.
A binding runs again whenever something it reads changes. You never write "when the amount changes, update the panel"; you write what the panel says, and it stays true.
3. Handlers: things that happen
A handler is a few lines that run when something happens: a button is pressed, a value changes, the screen opens, a timer ticks. The capital request screen loads the budget lines and the threshold bands when it opens, works out the approver when the amount changes, and creates the request when Submit is pressed. A handler can read and write records, move to another screen, open a drawer or a dialog, and show a message.
Bindings and handlers are written in BS Lang, the same scripting language as business rules and processes, in the same editor, with the same completion and error checking. You write them on the code page, which lists everything on the selected part you could write something for and marks which ones you have.
4. Saving turns the drawing into a page
When you press Save, the designer compiles the drawing. Each part becomes a real element of a web page: a heading becomes a heading, a list becomes a list, a button becomes a button. Its position, size, colours and text come from the drawing; its behaviour comes from your bindings and handlers. The drawing and the compiled page are both kept, and both travel in the solution.
If something on the screen can't work, Save says so and names the part: a button with no words, a binding that changes something rather than just reading it, two screens with the same name.
Things you get without asking
Because the screen is compiled rather than painted, it inherits things a picture of a screen couldn't have:
- Theme and dark mode. Draw with theme colours, such as surface, text, border and primary, and the screen follows each person's light or dark choice and the tenant's accent colour.
- Languages and right to left. Positions are stored as start and end rather than left and right, so a screen opened in Persian or Arabic mirrors itself. Dates follow the session's calendar.
- Security. A screen reads and writes records as the person using it, through the same checks as every other part of the platform. A drawn screen can't show a record that person isn't allowed to see.
- Real controls. Keyboard, focus, screen readers, autofill and the mobile keyboard all work, because the controls are the browser's and the platform's own.
- Solutions. A Studio app is a solution component like a table or a form. It moves from Development to Test to Production the same way.
Where a Studio app runs
A Studio app can be used in four places:
- On its own, from the app list. Show it in the app list and it gets its own tile, like Capital request and Support desk in the sample list.
- Inside a model-driven app, as a page in its navigation. That's what Capital planning does: a drawn screen as the home page, with the model-driven lists beside it.
- Filling the whole window, with no platform bar around it. The app then draws its own bar, with the signed-in person, the colour mode and sign-out.
- As a portal page for people outside your organisation. That's covered in the Portals series.
When to draw, and when not to
Draw a screen when:
- It's shaped like a task, not like a record. Raise a request, check in a visitor, approve the next item in a queue.
- It's for a phone, or for somebody who uses it rarely and needs to be led through it.
- It should answer while it's filled in: totals, remaining budget, who approves, what's missing.
- It's a landing page or a dashboard: a welcome, the numbers that matter, what's waiting.
- It needs to look like your product rather than like the platform.
Use a model-driven app when:
- The job is working through records: find, sort, filter, open, edit, related lists, bulk actions.
- There are many fields and the layout's job is to fit them in, not to guide anybody.
- You want it now. A table, a view and a form give you a working app in minutes, and they get better as the platform does without you redrawing anything.
Most real applications are both, like Capital planning: model-driven for the people who manage the records, and one or two drawn screens for the people who only touch them.
What this series covers
This is the first article in the Application Studio apps series. The next articles build on it one part at a time: your first Studio app, a welcome screen, what each part of a screen is, making a screen react, showing records on a screen and paging through them, a form that saves a record, moving between screens, drawers and dialogs, links, a file picker, a screen that updates itself, a dashboard, your tasks on a home screen, components shared across screens, a phone app, and Studio apps inside a model-driven app and on their own. It ends with the whole of Capital planning, walked through.
Try it
Import Capital planning, end to end with its demonstration data, and open Capital planning from the Shell. Fill in a request and watch the panel change as you type an amount. Then open Capital requests to see the same records as a list and a form, and open the Capital request app in the designer to see how the screen is drawn.
Next: your first Studio app.