Parsware Platform
Views: the lists people work in
A view is a list of a table's records, and it's where most people spend their day. Choose its columns, put them in order, give a column a width, and decide which list an app opens on.
People open a record to change it, but they find it in a list. That list is a view: which columns it shows, in what order, and what it shows first. A table can have as many views as there are ways of looking at it.
In Build your first table and view the Asset table got its first views. Here we add one for the people who buy the equipment, make it the one the app opens on, and look at what people can change for themselves. Every picture is the real product.
Columns, in order
Open the table, choose Views, and press New. Give the view a name, Purchases, and a logical name. Your publisher's prefix is added for you.
Every view starts with the table's primary column, Name. Drag fields from Available fields into View columns, and drag the chips along the row to change their order. The row of headings under the chips shows the columns as the list will.
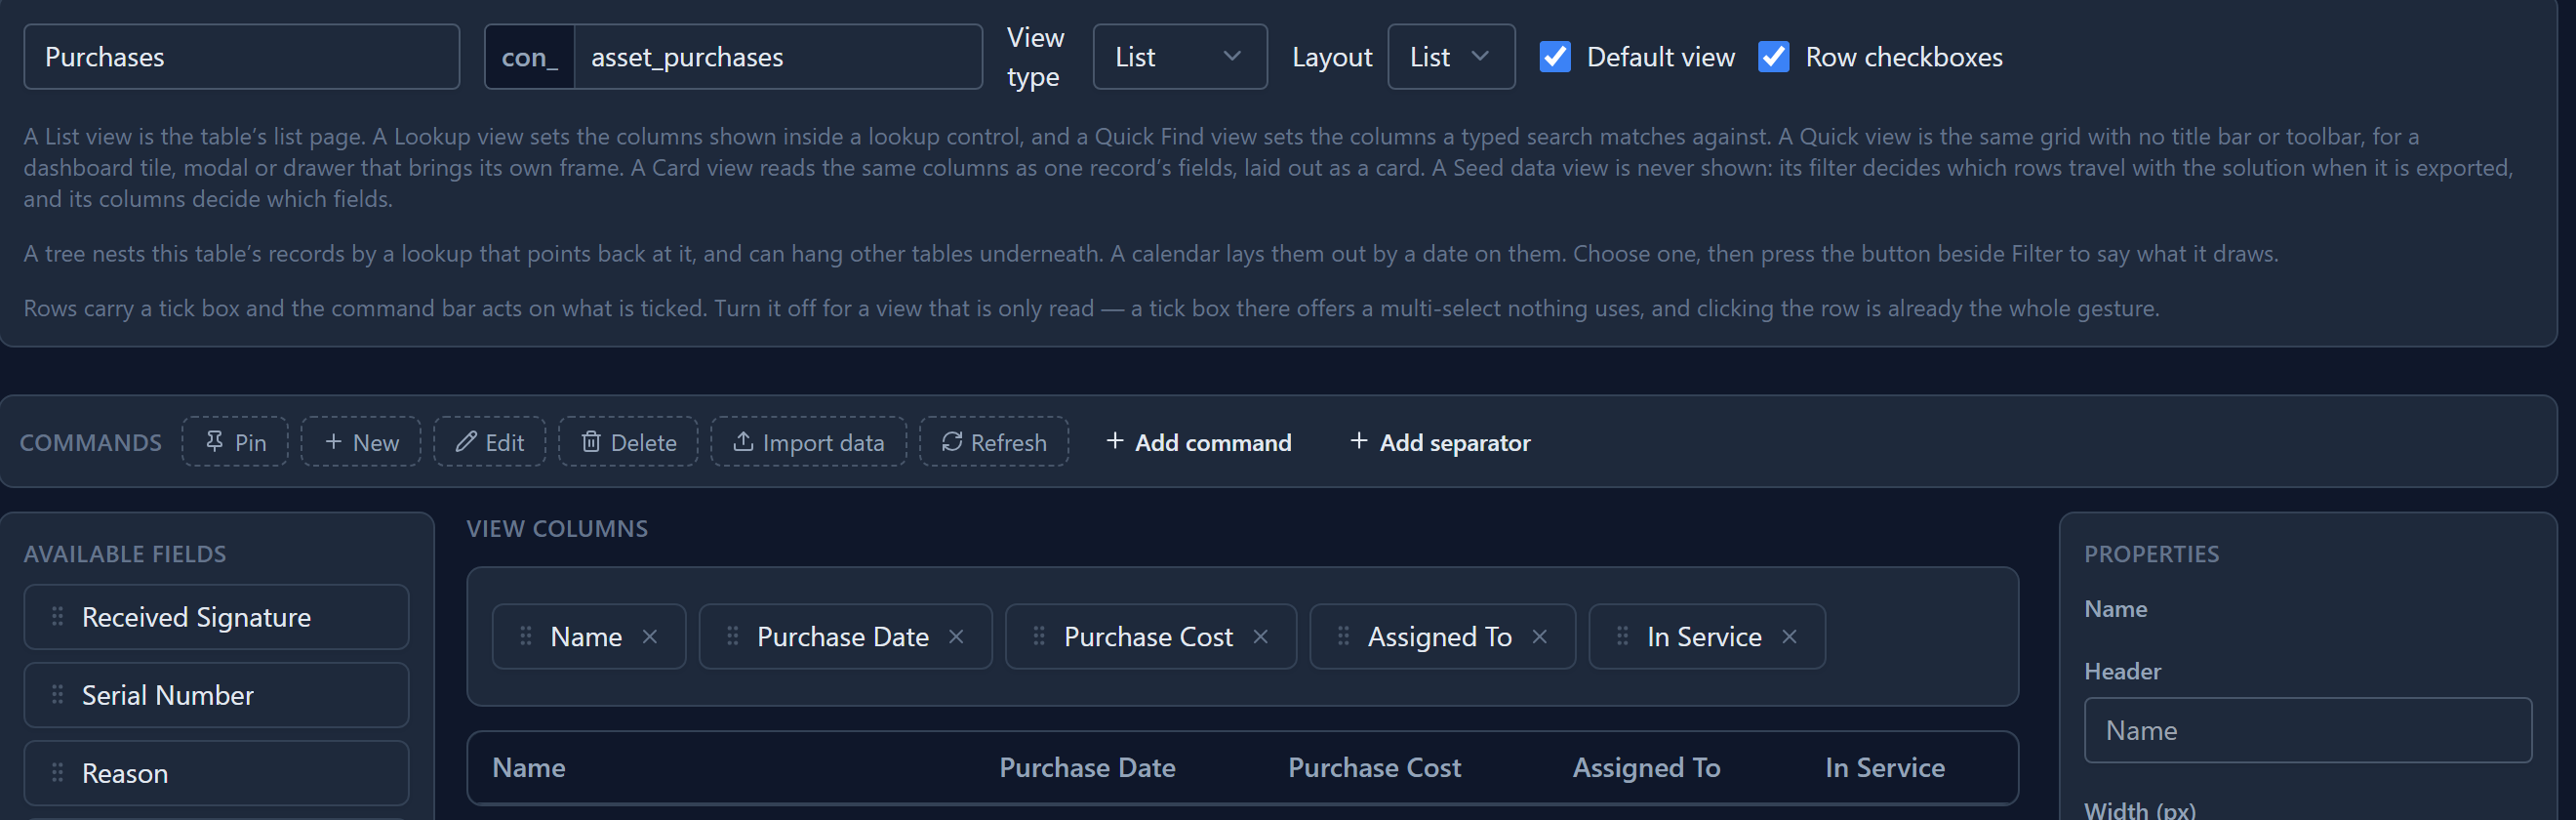
A chip's × takes the column out of the view. The field stays on the table.
A width for a column
Select a chip and the Properties panel shows that column. Width (px) fixes its width. Leave it on Auto and the column sizes itself to what's in it. We gave Name 260 pixels, because asset names are long and it's the column people read first.
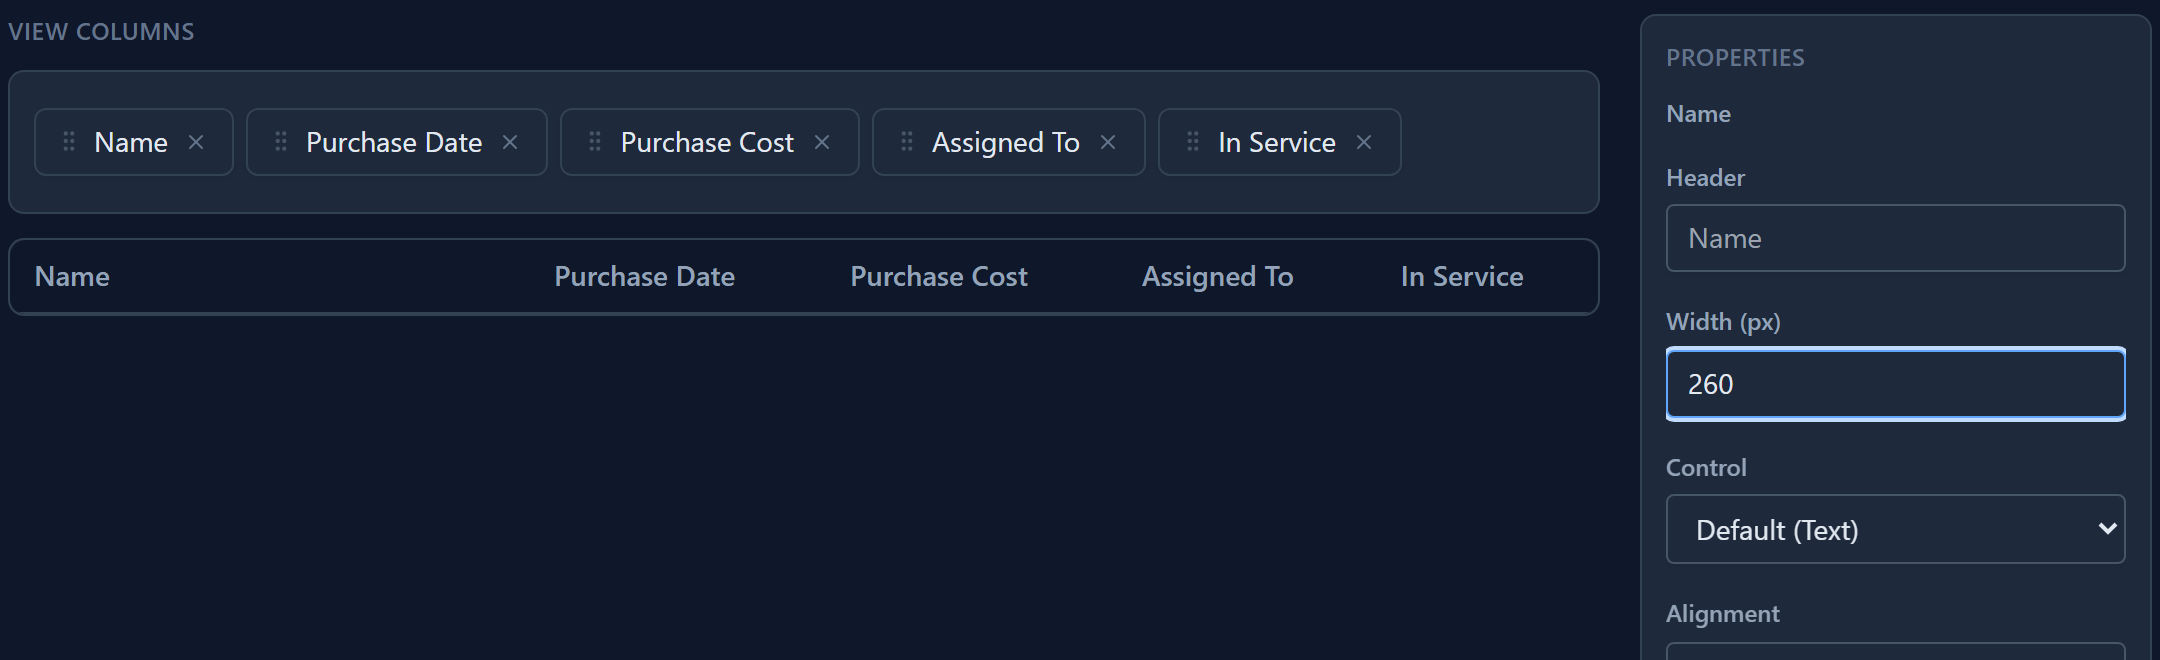
The same panel sets the column's header, format, control and alignment. Those have their own article, View column properties.
The default view
Tick Default view and save. A table has one default list view, so the tick moves from whichever view had it before. The Views page shows which one it is now:

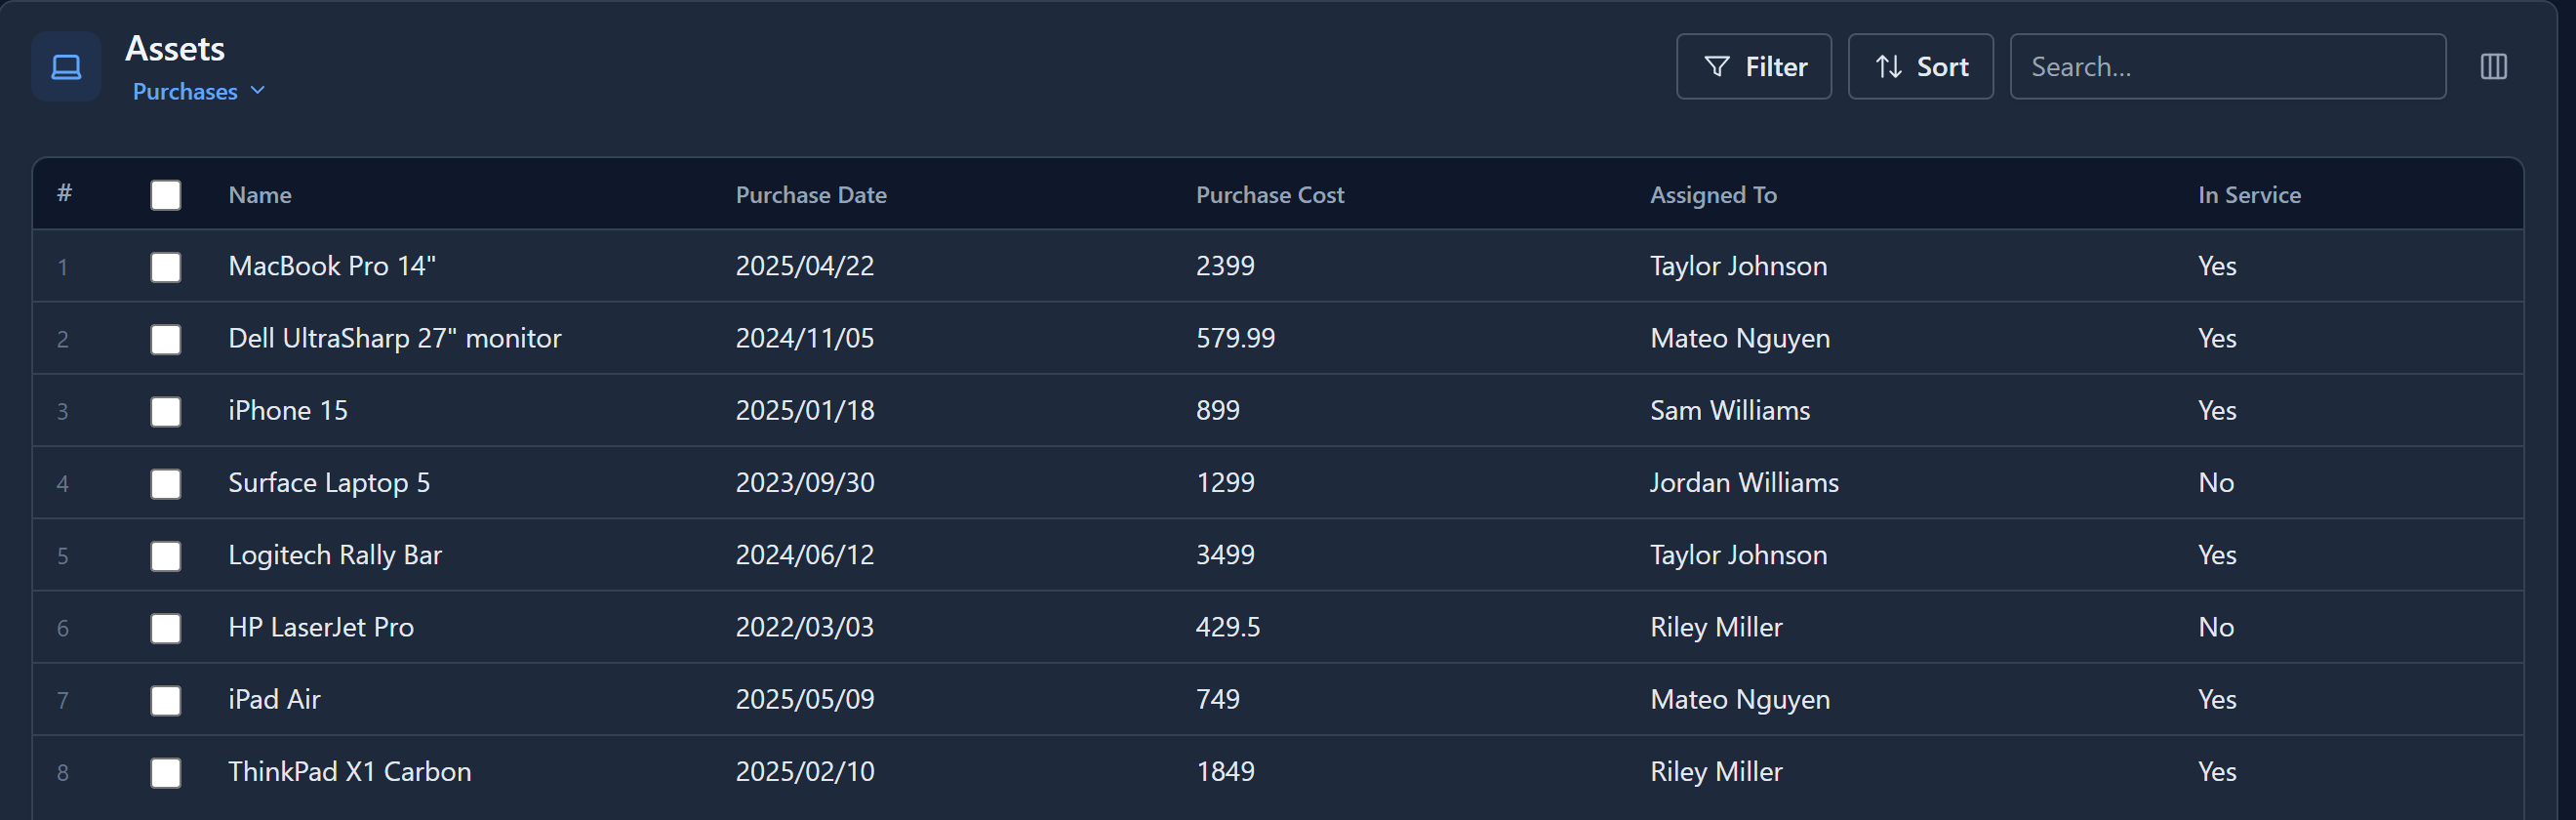
The default is the list a table opens on in an app. Open Assets in the Asset Tracker app and it's on Purchases:
Switching views
The view's name under the table's name is a switcher. It lists the table's other list views, with a tick beside the one that's open:
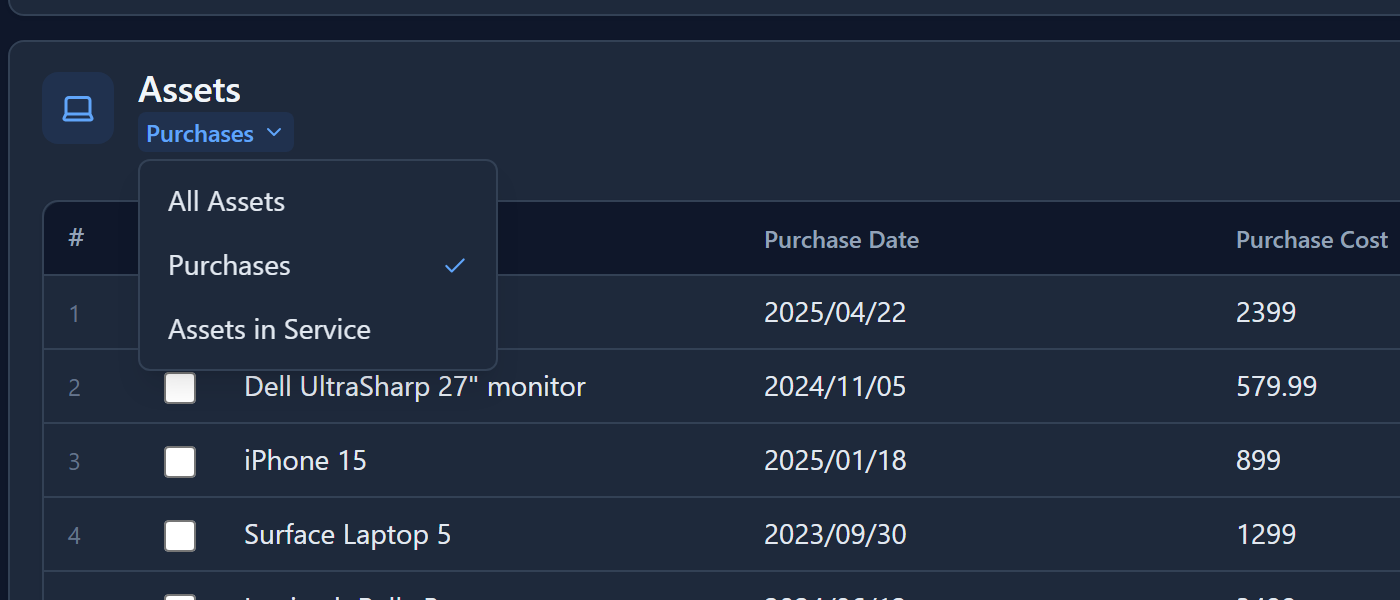
Only List views are offered here. A table's lookup and quick find views are used inside pickers and searches, so they don't appear in this list.
Which views an app offers is the app's choice, the same way it chooses its forms: its Forms and views button offers every view of the table, or only the ones you pick.
What people change for themselves
Without touching the view, anyone can sort, filter and search the list. Sort opens a panel of sort levels: here, newest purchase first.
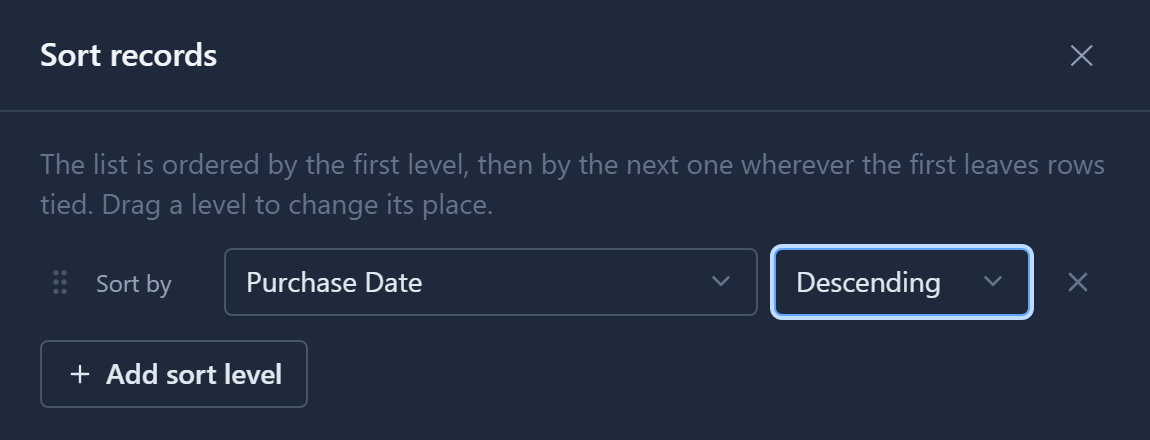
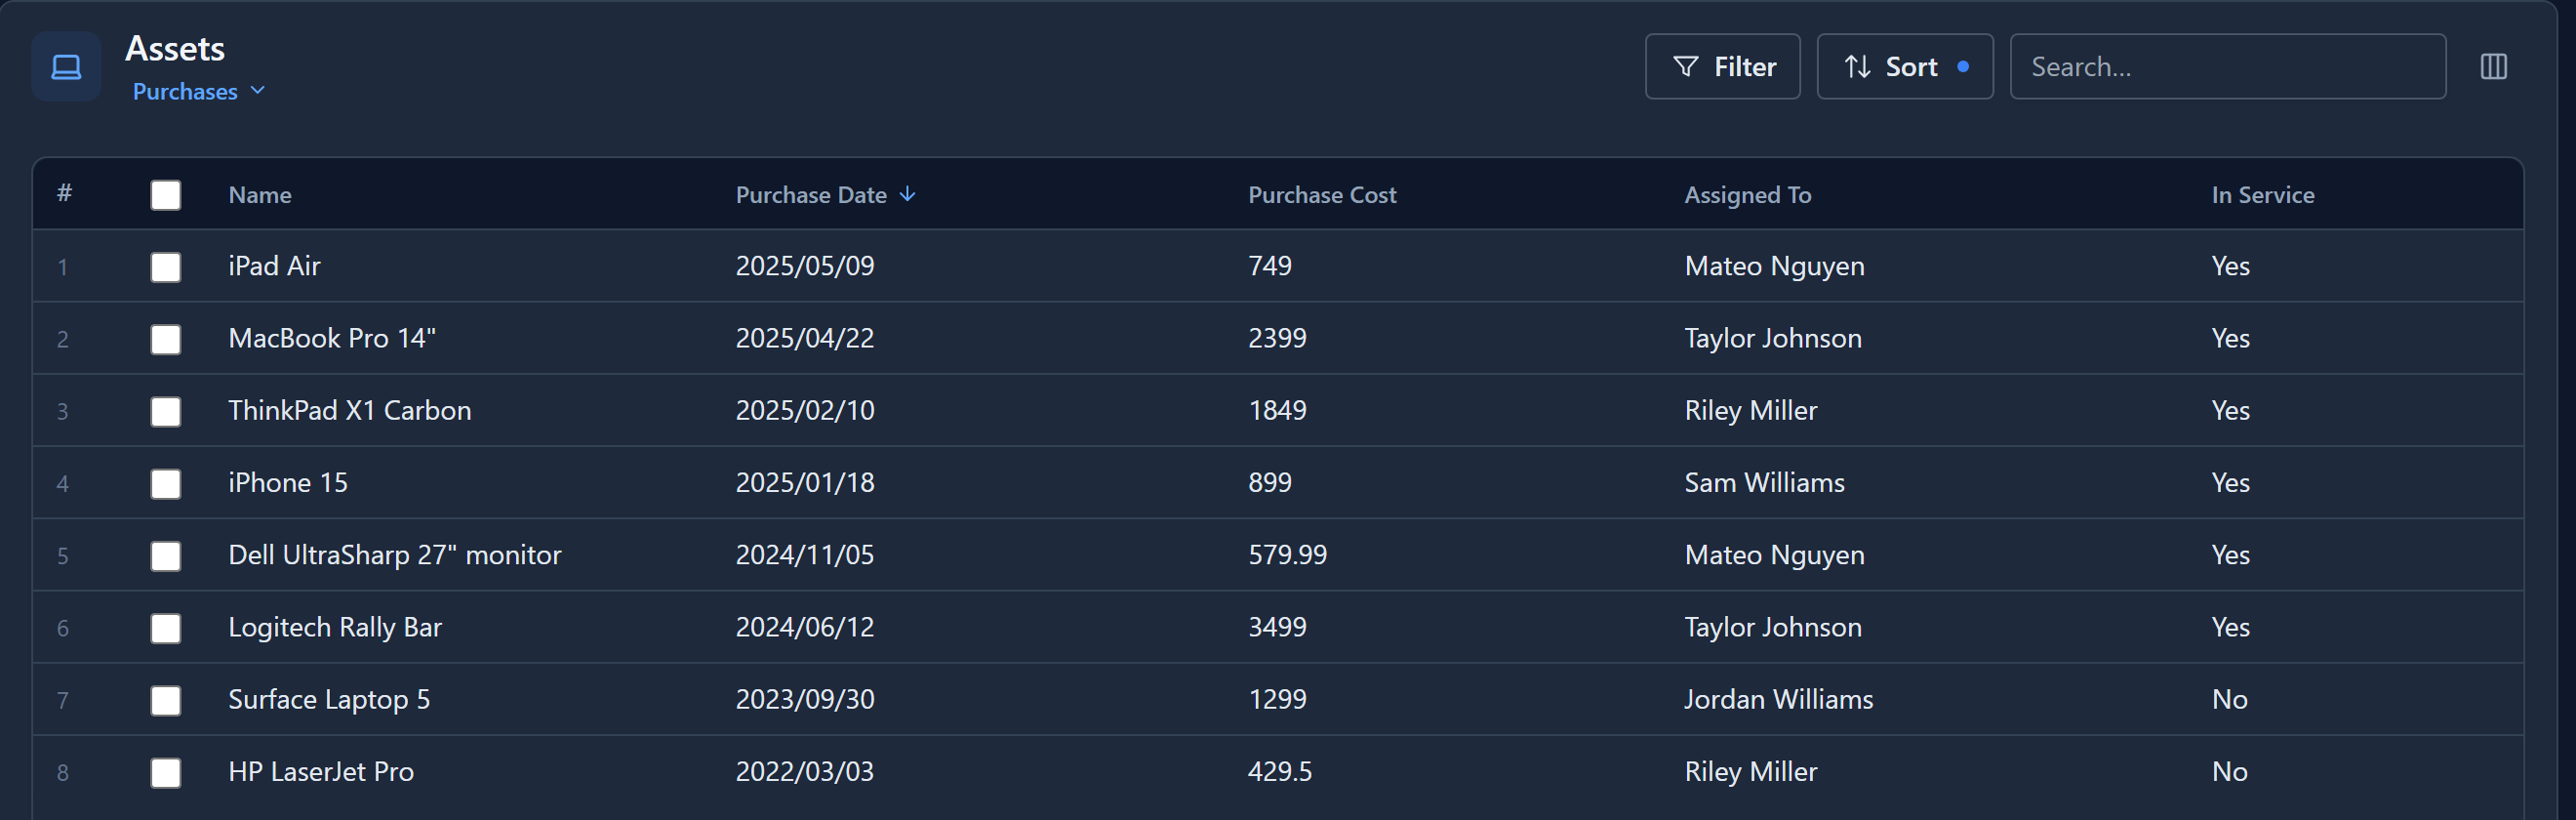
Add another level to break ties, and drag the levels to change which one counts first. Clicking a column heading sorts by it too, and Shift+click adds it as another level. The Columns button at the end of the header chooses which of the table's fields are shown. None of this changes the view: it's how one person is reading the list right now, and Reset in the Sort panel goes back to the view's own order.
What's saved
A view is saved as a document and checked against the view schema, so every column has to be a field on the table. It belongs to your solution and moves with it to Test and Production.
Next: view column properties, which set how each column is shown.