Parsware Platform
A tour of the Graphic Designer
Studio screens and reports are drawn on one canvas, the Graphic Designer. Here's where everything is: the toolbar, the tool rail, the layers and components on the left, the inspector on the right. Touring it, we fixed two small things in its right-click menu.
این مقاله فقط به انگلیسی در دسترس است.
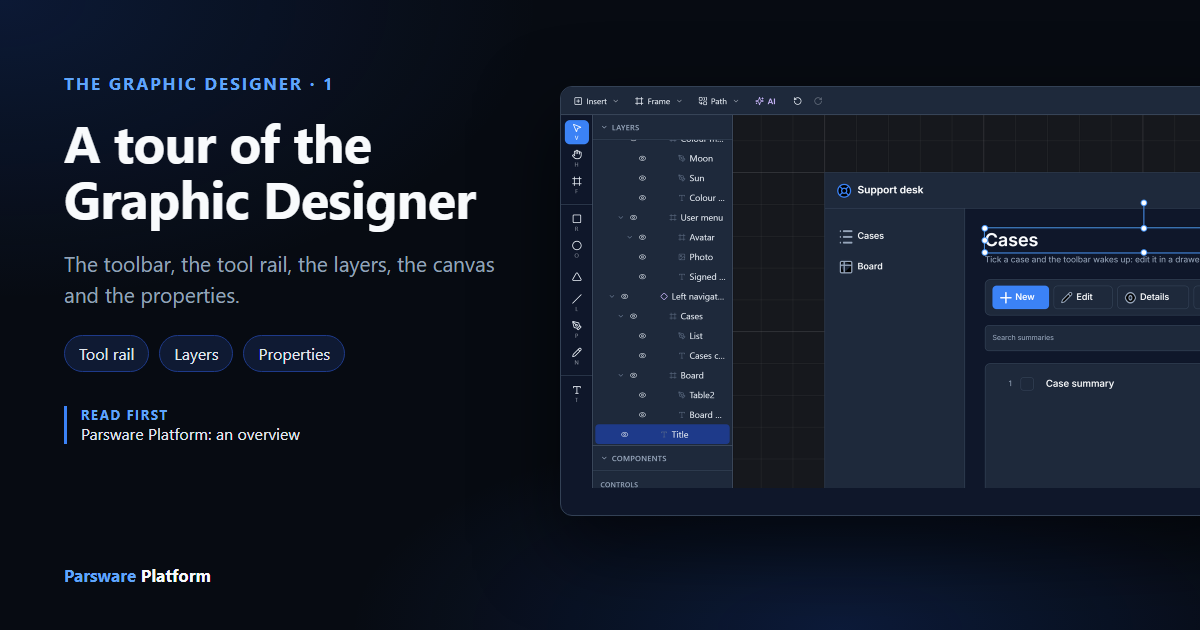
Parsware has one drawing canvas, the Graphic Designer. A Studio app's screens are drawn on it, and so are reports. Learn it once and you can do both: the tools, the panels and the keys are the same whichever you're drawing.
This article is the map. The rest of the series takes each part in turn. We opened the Starter
app sample from samples/solutions/studio-starter-app, a small support desk with a list of cases,
a board and a detail screen.
Where it opens
In the maker portal, open the solution, then Studio apps. Tick the app and select Design. (A report opens on the same canvas from Reports.) The designer opens inside the maker portal, under the breadcrumb, with the app's own commands in its title bar: Save, Opens at (the screen people land on), Preview and Close.
Fullscreen, at the right end of the toolbar, gives the drawing the whole window. That's how we took these pictures:
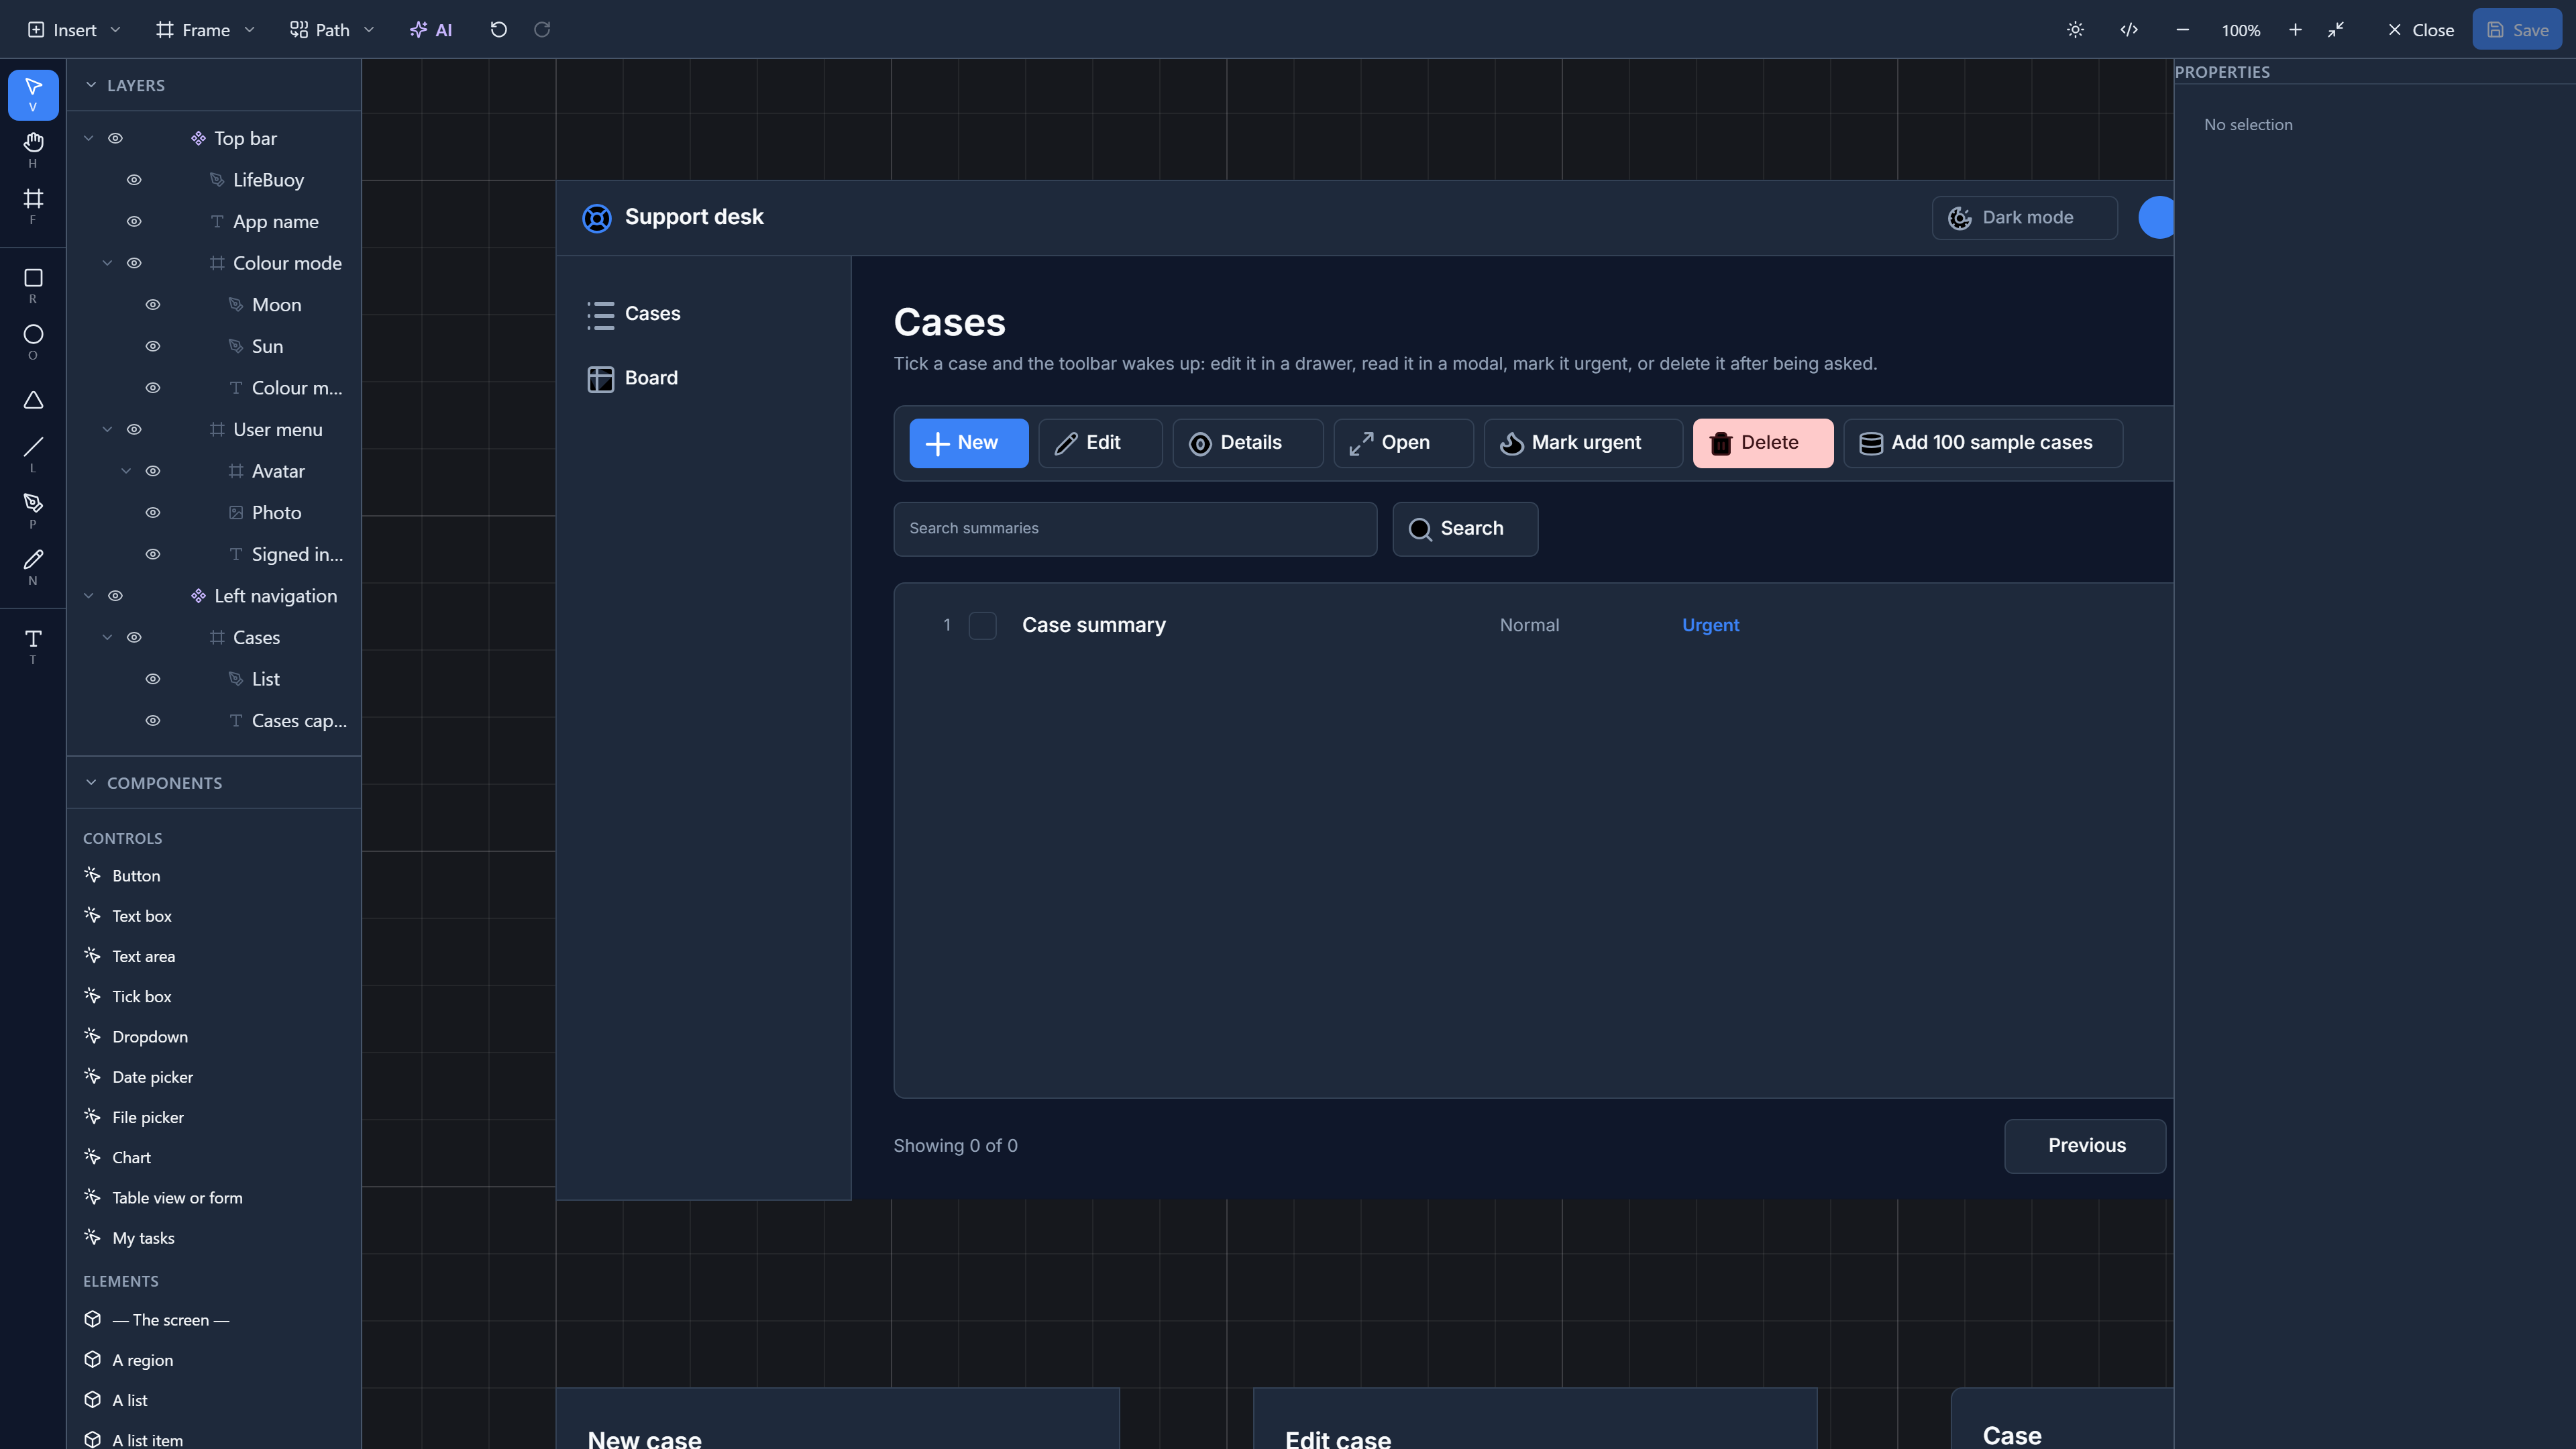
Five areas, left to right: the tool rail, the Layers and Components panels, the canvas, and the Properties panel. The toolbar runs along the top.
The toolbar
From the left:
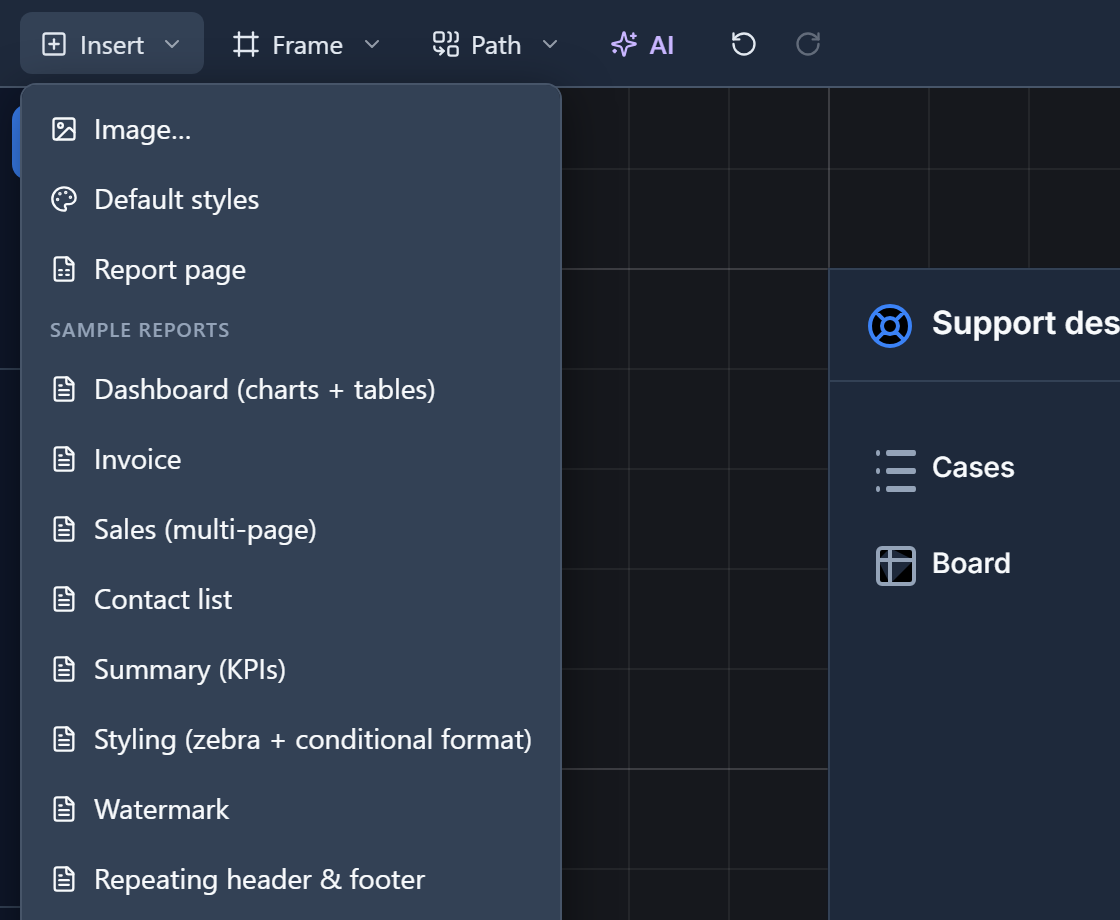
- Insert adds an image, a set of default styles, or a report page, and offers the sample reports to start from.
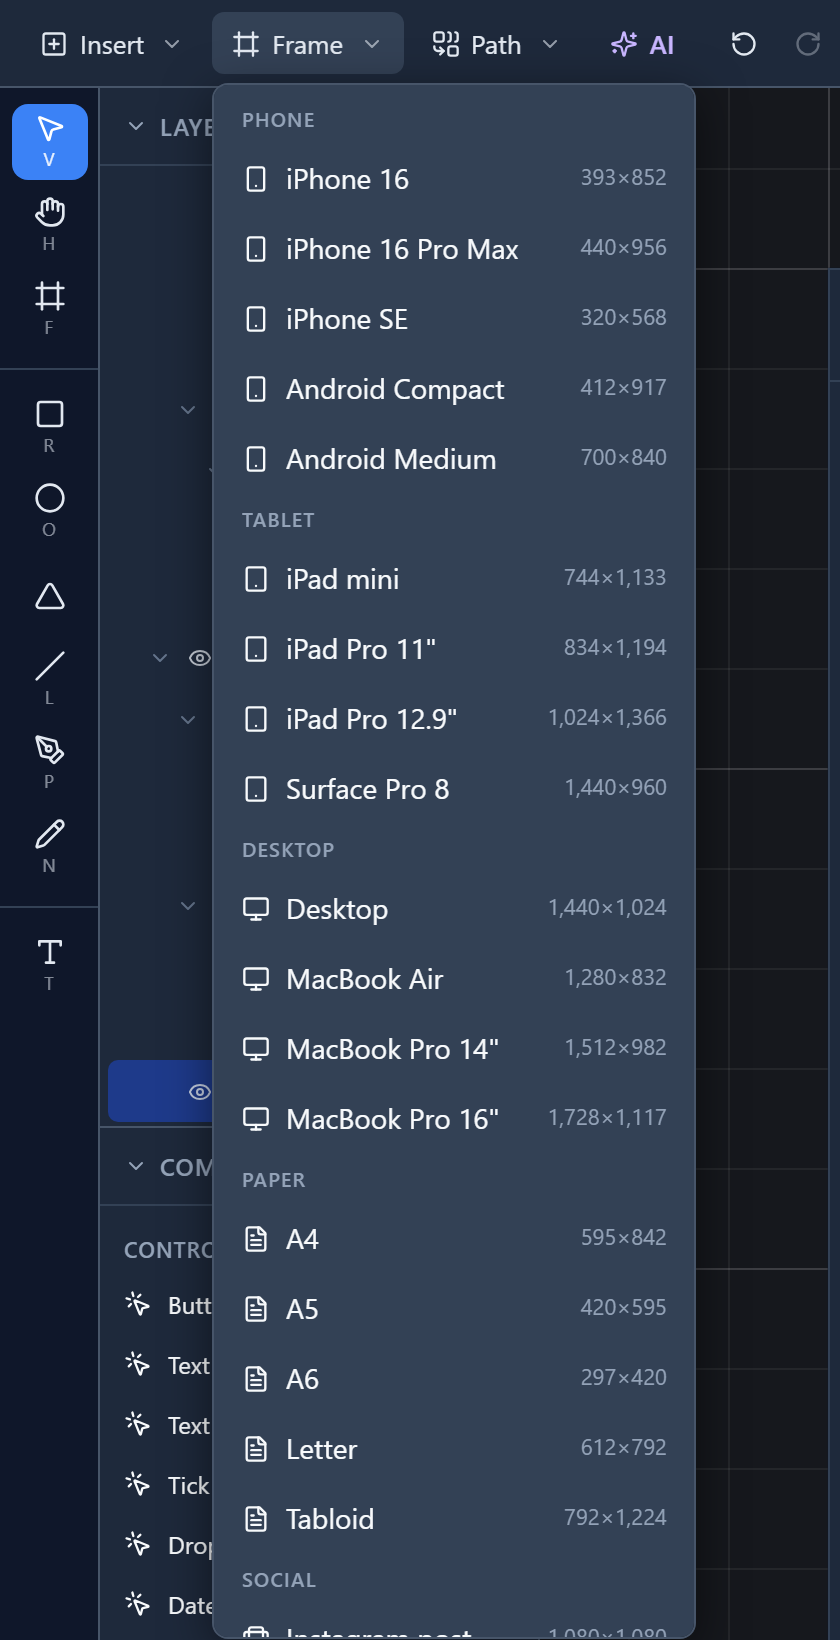
- Frame adds a frame at a preset size: a phone, a tablet, a desktop, a sheet of paper.
- Path combines the selected shapes into one.
- Undo and Redo.
At the right end: a light or dark preview of the drawing, Write code (the drawing as text, which you can edit), zoom out, the zoom level (select it to go back to 100%), zoom in, and Fullscreen.
The tool rail
Down the left edge, one button per tool, each with its key:
| Tool | Key | Draws or does |
|---|---|---|
| Select | V | Selects, moves and resizes |
| Hand | H | Moves the view around |
| Frame | F | A frame: a screen, a page, or a box that holds other things |
| Rectangle | R | A rectangle |
| Ellipse | O | An ellipse or a circle |
| Triangle | A triangle | |
| Line | L | A straight line |
| Pen | P | Curves, point by point |
| Pencil | N | A freehand line |
| Text | T | Text |
Press the key and the tool is chosen, so you rarely need the rail once you know them.
Layers
Everything on the canvas, as a tree. A frame holds the things inside it, so the tree shows which box each object is in. Each row has a name, an eye to hide it, a padlock to lock it, and a target to draw on that object alone when several are stacked.
Select something on the canvas and the tree opens to it. Select a row and the canvas selects it. Right-click a row and you get the same menu as on the canvas.
In the picture above, the tree starts with Top bar and Left navigation. They're components: drawn once and placed on every screen. We'll come to those later in the series.
Components
Under the layers, the things you can place:
- Controls: a button, a text box, a text area, a tick box, a dropdown, a date picker, a file picker, a chart, a table view or form, and a task list. These work when the app runs; they're not drawings of controls.
- Elements: the parts a screen is made of (the screen, a region, a list, a list item…).
- Your own components, once you've made some.
The canvas
Everything you draw. Frames sit on it side by side: the Support desk has its Cases screen, its Board and its Case screen next to each other, and the drawers and modals below them. A grid fills the space between.
Properties
Select something, and the panel on the right shows its properties. We selected the Cases heading:
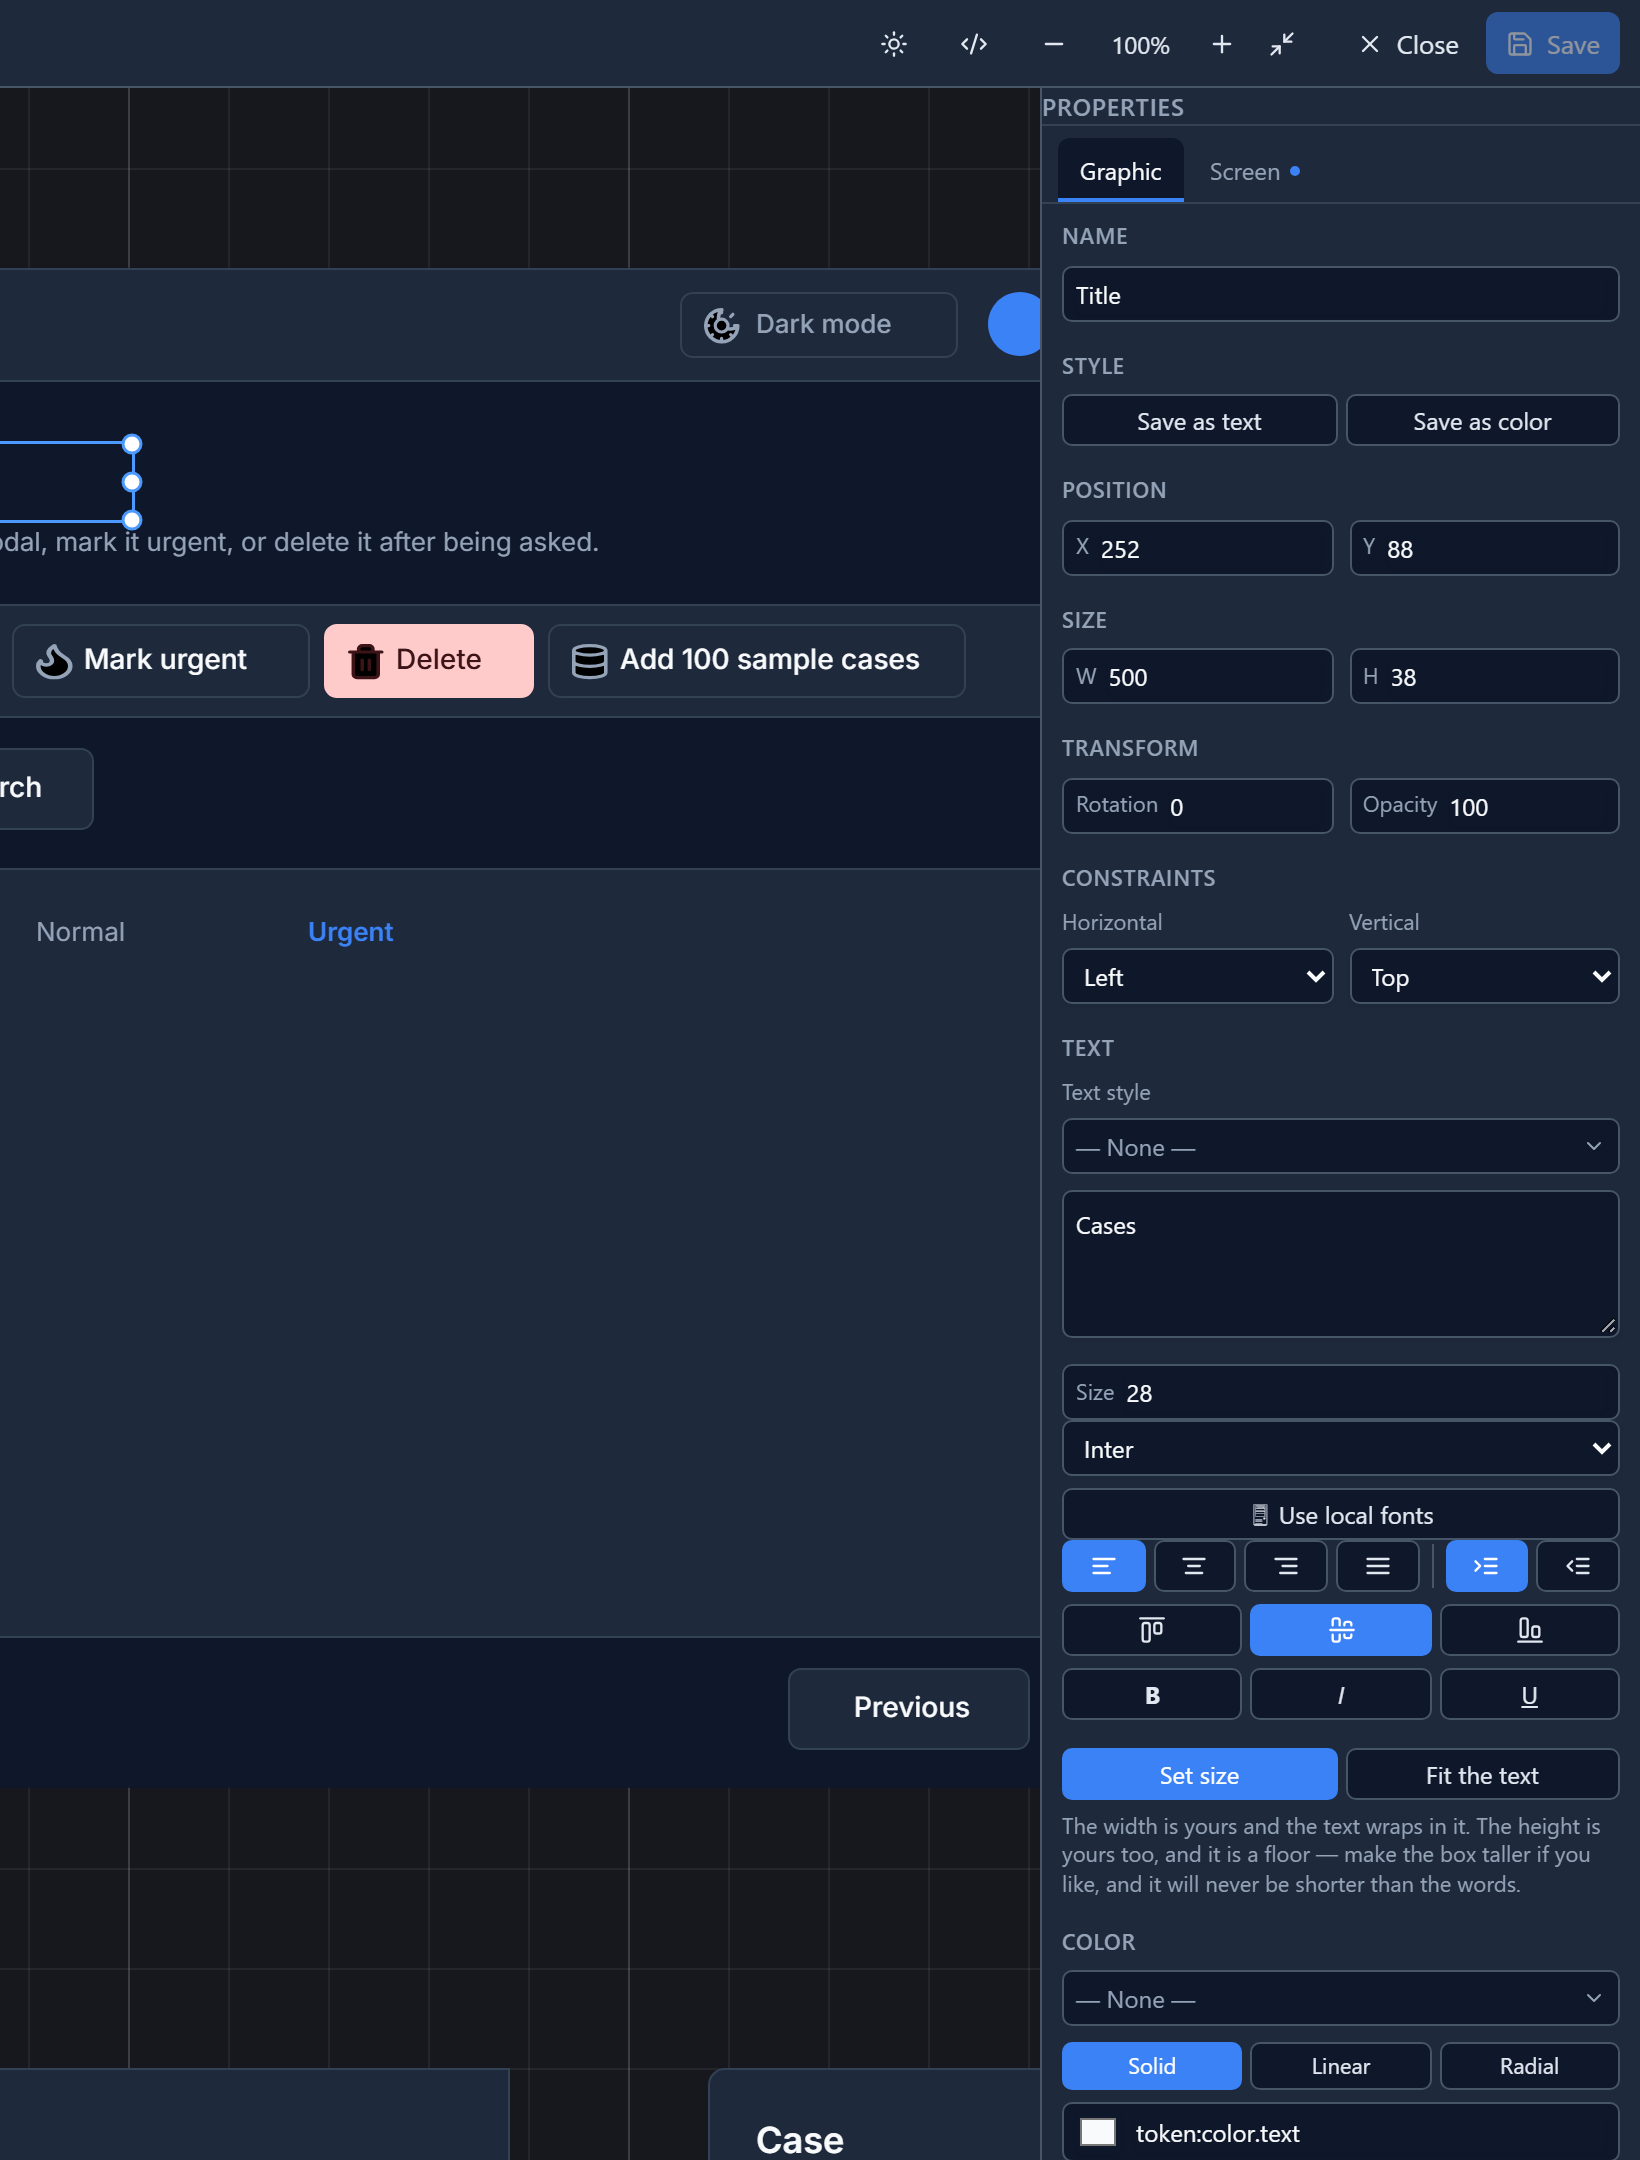
The Graphic tab is how it looks: its name, position and size, rotation and opacity, how it holds on to the edges of its frame when the frame is resized (Constraints), and, for text, the words, the font and the size.
The Screen tab is what it is:
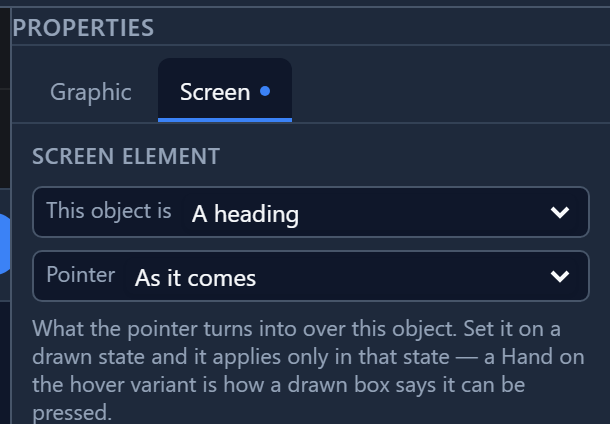
A heading and a paragraph can look identical on the canvas. Saying which one it is decides what a screen reader announces, and what the finished screen does with it. A drawing that's only meant to be seen is left blank.
The right-click menu
Right-click on the canvas for the commands that act on the selection:
![The right-click menu over the heading: Select layer, Bring to front Ctrl+Shift+], Bring forward Ctrl+], Send backward Ctrl+[, Send to back Ctrl+Shift+, Flip horizontal and vertical, Create component, Lock, Duplicate Ctrl+D, Delete Del
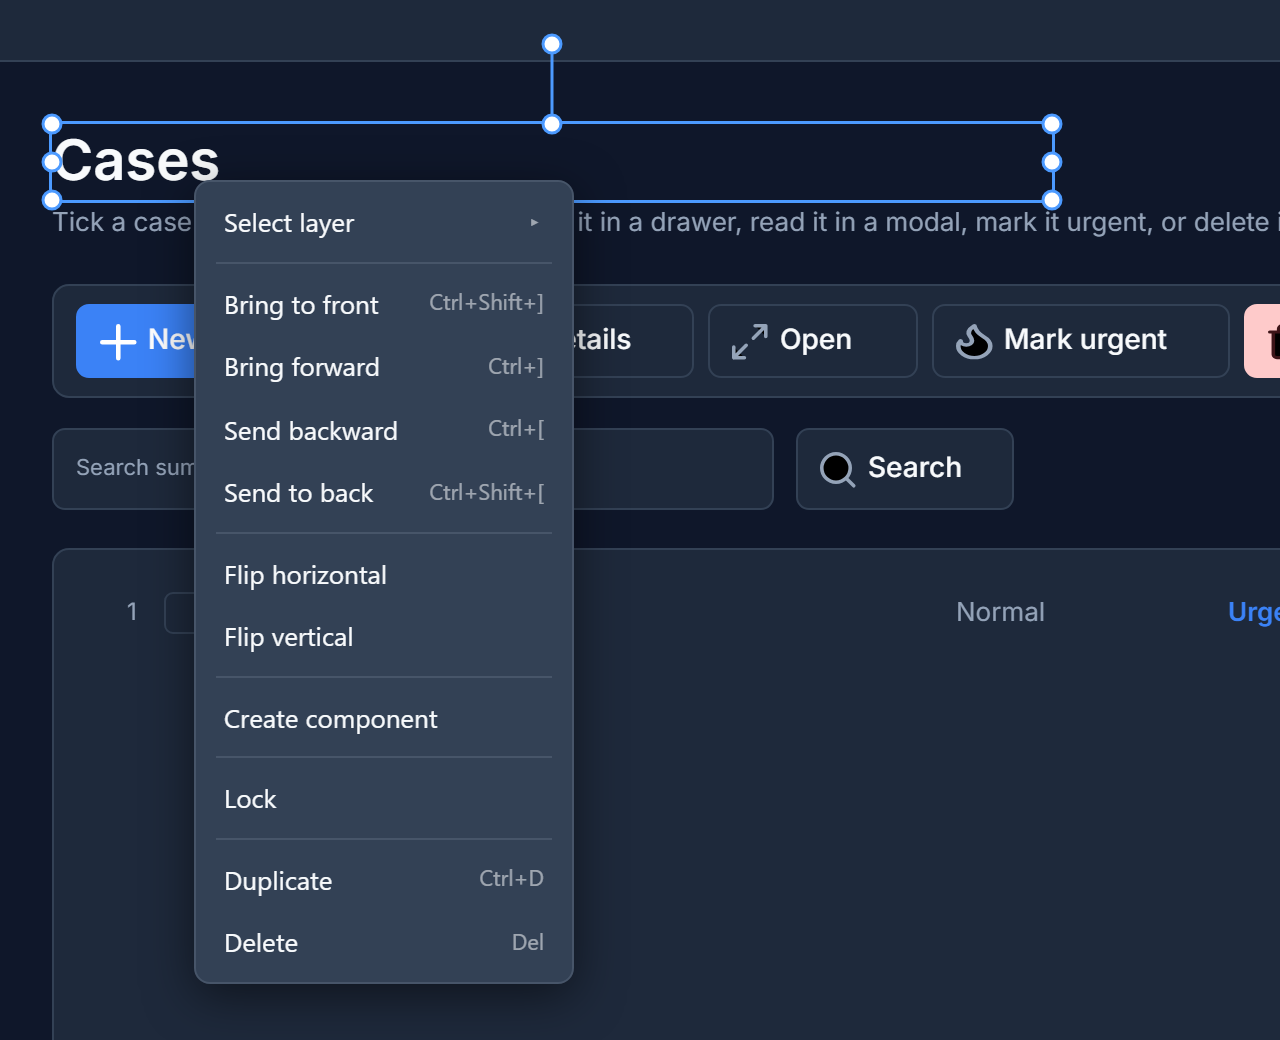
Select layer lists every object under the pointer, top first: the way to reach something buried under something else.
Two things are new. The menu wrote its shortcuts the Mac's way on every computer, ⌘⇧], so on
Windows it showed a key the keyboard doesn't have. It now writes them for the computer you're on:
Ctrl+Shift+] here, ⌘⇧] on a Mac. And in fullscreen, Escape used to leave fullscreen and
leave the menu open. Escape now closes the menu first; press it again to leave fullscreen.
Try it
Import the Starter app sample, open Support desk in the designer and go fullscreen. Select the Cases heading, read both tabs of its properties, then right-click it. Find the same heading in Layers.
Next: moving around the canvas: panning, zooming and the keys that do it.