For Power Apps
A drawn screen on a form
A model-driven form is a column of fields. Sometimes a record needs something else beside them, such as guidance, a checklist, or a panel with its own buttons. With Parsware you draw that part as a Studio screen and put it on the form, where it sits with the record's fields and moves between screens without the form reloading.
هذا المقال متاح بالإنجليزية فقط.
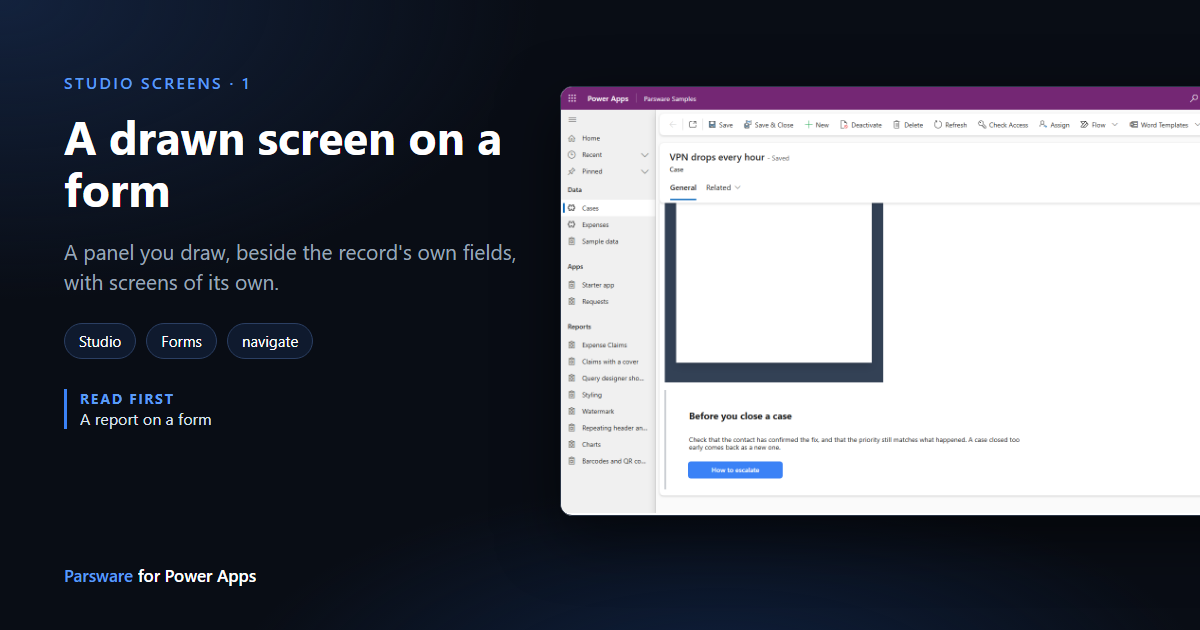
A model-driven form is very good at one thing: a column of fields, each bound to a column of the table. Anything else you want on a record, such as guidance, a checklist or a panel with its own buttons, has to be built somewhere else.
With Parsware you draw that part. A Studio screen is a page you draw in the Parsware designer, with text, buttons and other controls, and scripts that make them do things. Placed on a form, it sits right beside the record's own fields.
We'll put a two-screen panel on the Case form: a reminder of what to check before closing a case, and a button that shows how to escalate one.
1. Draw the screen
In Parsware Studio, open Designs, press New, name the design Case checklist, set Kind to App and save. Then open it in the Designer.
A new app design starts with a Styles board: its colours and text styles. The screens go next to it:
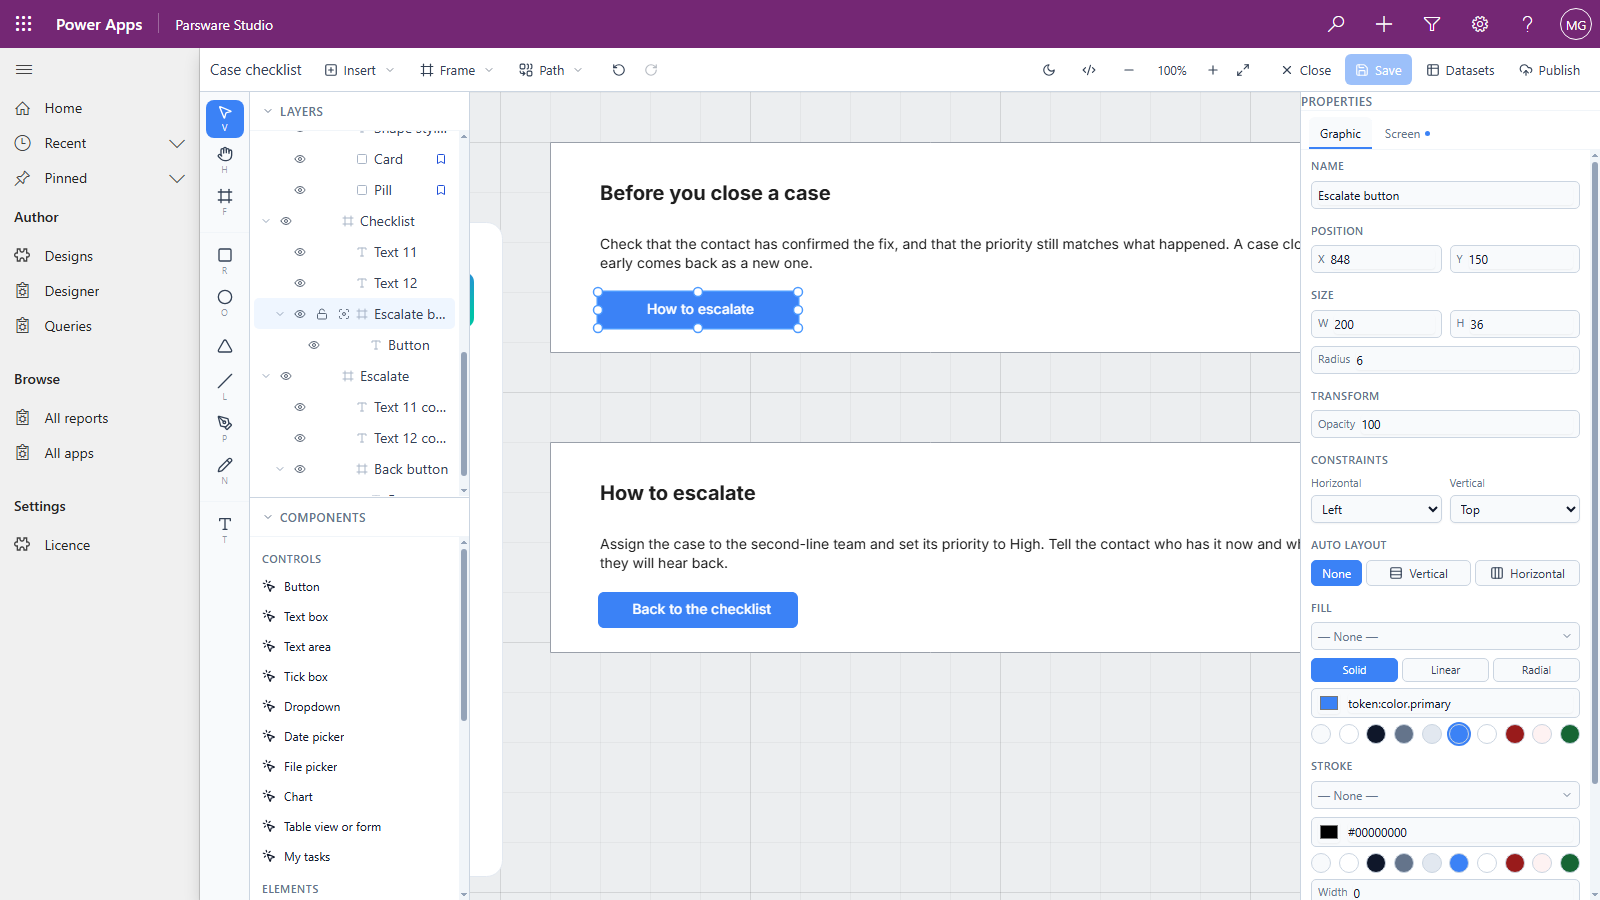
- Press Frame in the toolbar and pick any preset, then set its size in the Graphic tab. Draw it to the size of the space it'll fill. Ours is 760 × 210, about the width of a form section.
- On the Screen tab, set This object is to The screen. That's what turns a frame into a screen, and the frame's name, Checklist, into the screen's name.
- Add the words with the Text tool: a heading and a paragraph. On the Screen tab, mark them A heading and A paragraph, so the finished page says what they are.
- Drag a Button from Components onto the screen. Its caption is the text inside it; ours says How to escalate.
2. Make the button do something
Select the button and press </> in the toolbar. The code page lists everything you can
script on it: bindings (values it reads) and when this happens (things it reacts to).
Choose Pressed and write:
navigate("Escalate");
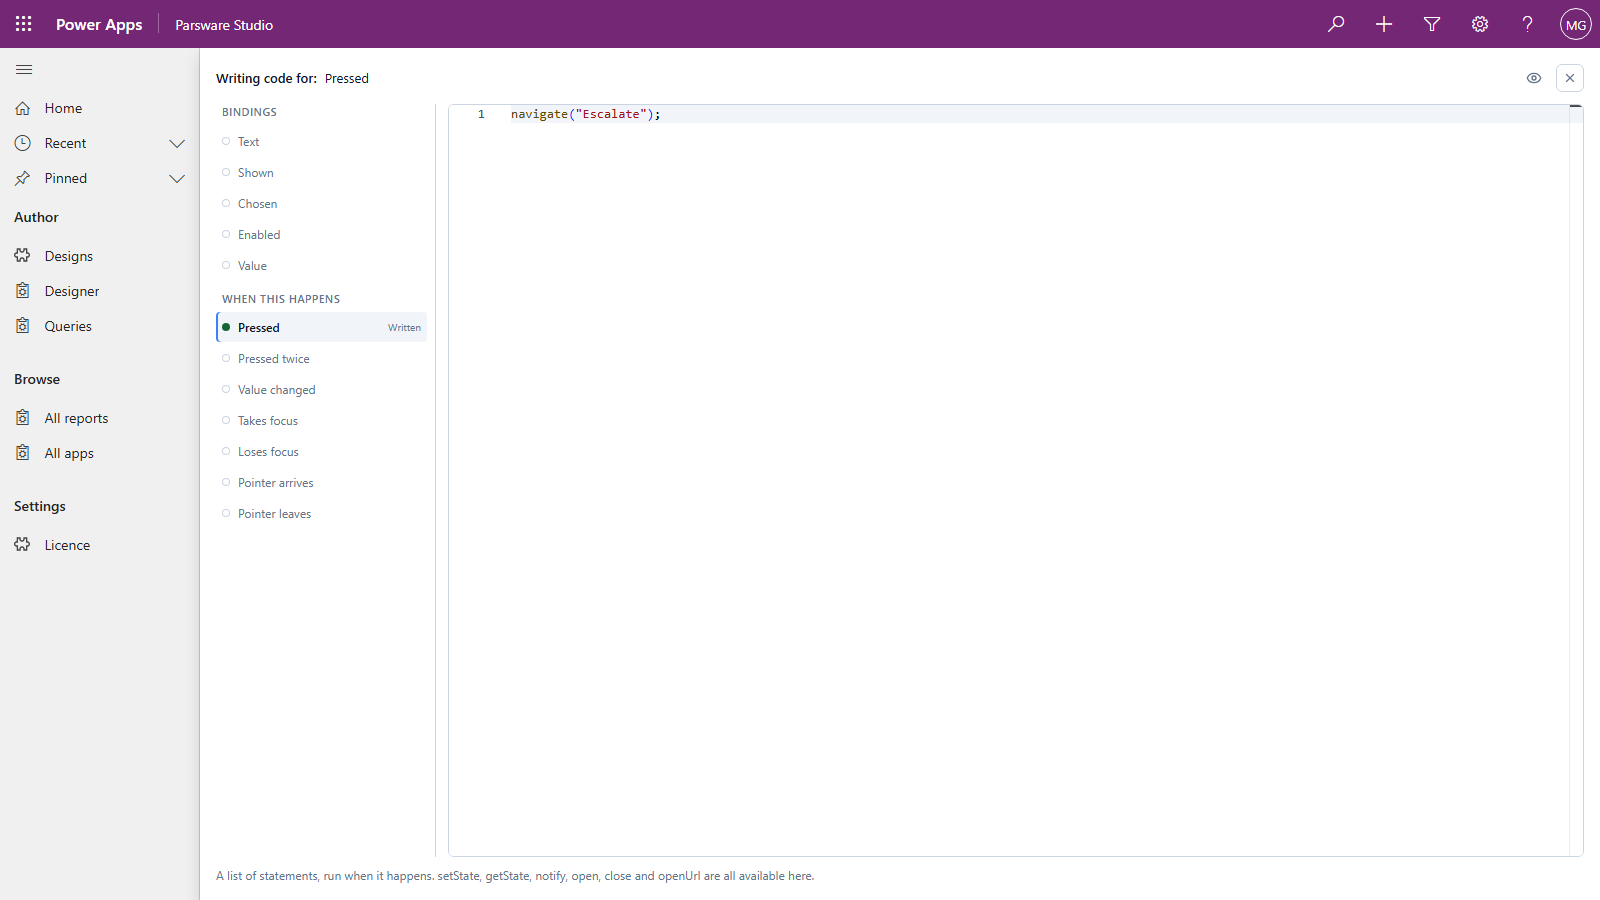
navigate moves to another screen of the same design, by name. So we need an Escalate
screen. The quickest way is to select the Checklist frame, press Ctrl+D to duplicate it,
rename the copy Escalate, and change its words. On its button, Pressed is
navigate("Checklist");, back again.
Save, then Publish into your solution (ours is Case reports), as in Publish: drafts versus what users see.
3. Give it a column to sit on
A code component on a model-driven form always sits on a column. We added a single line of text column named Checklist to the Case table, in the same solution. The screen never reads it; it's only somewhere to put the component.
4. Put it on the form
Open the Case table's main form in the form designer and add the Checklist column where the panel should go. With it selected:
- Tick Hide label. The panel is the whole field.
- Under Components, press + Component and choose Parsware Runtime. (If it isn't in the list, Get more components adds it once per environment, as in A report on a form.)
- Under Design, type Case checklist as a static value. Leave the other columns empty.
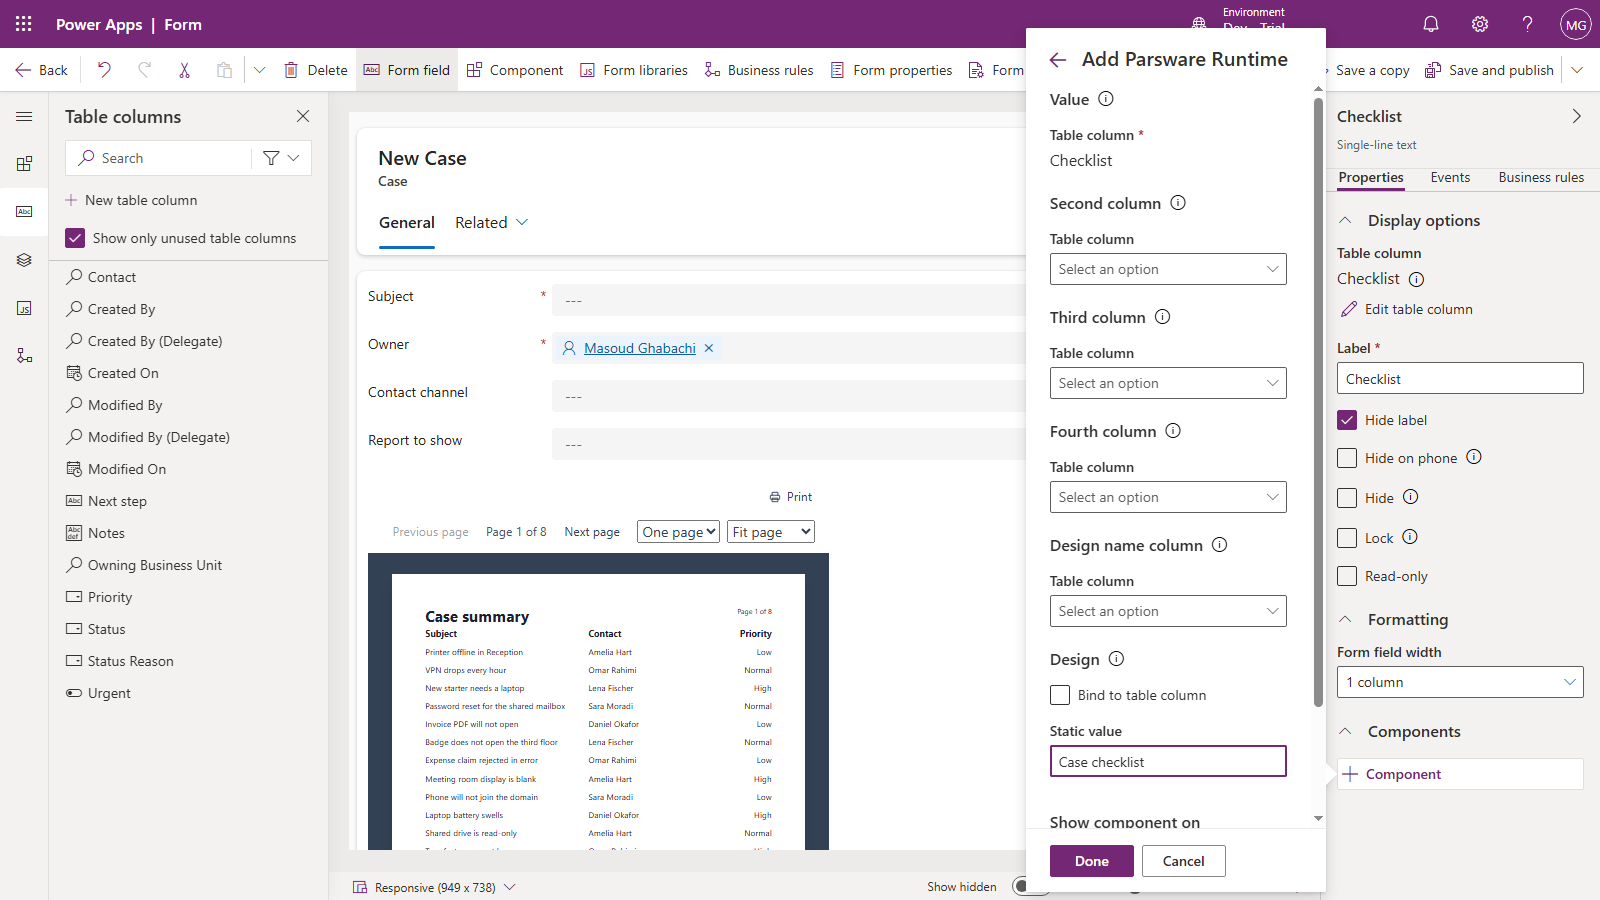
Press Done. The form designer draws the screen in place:
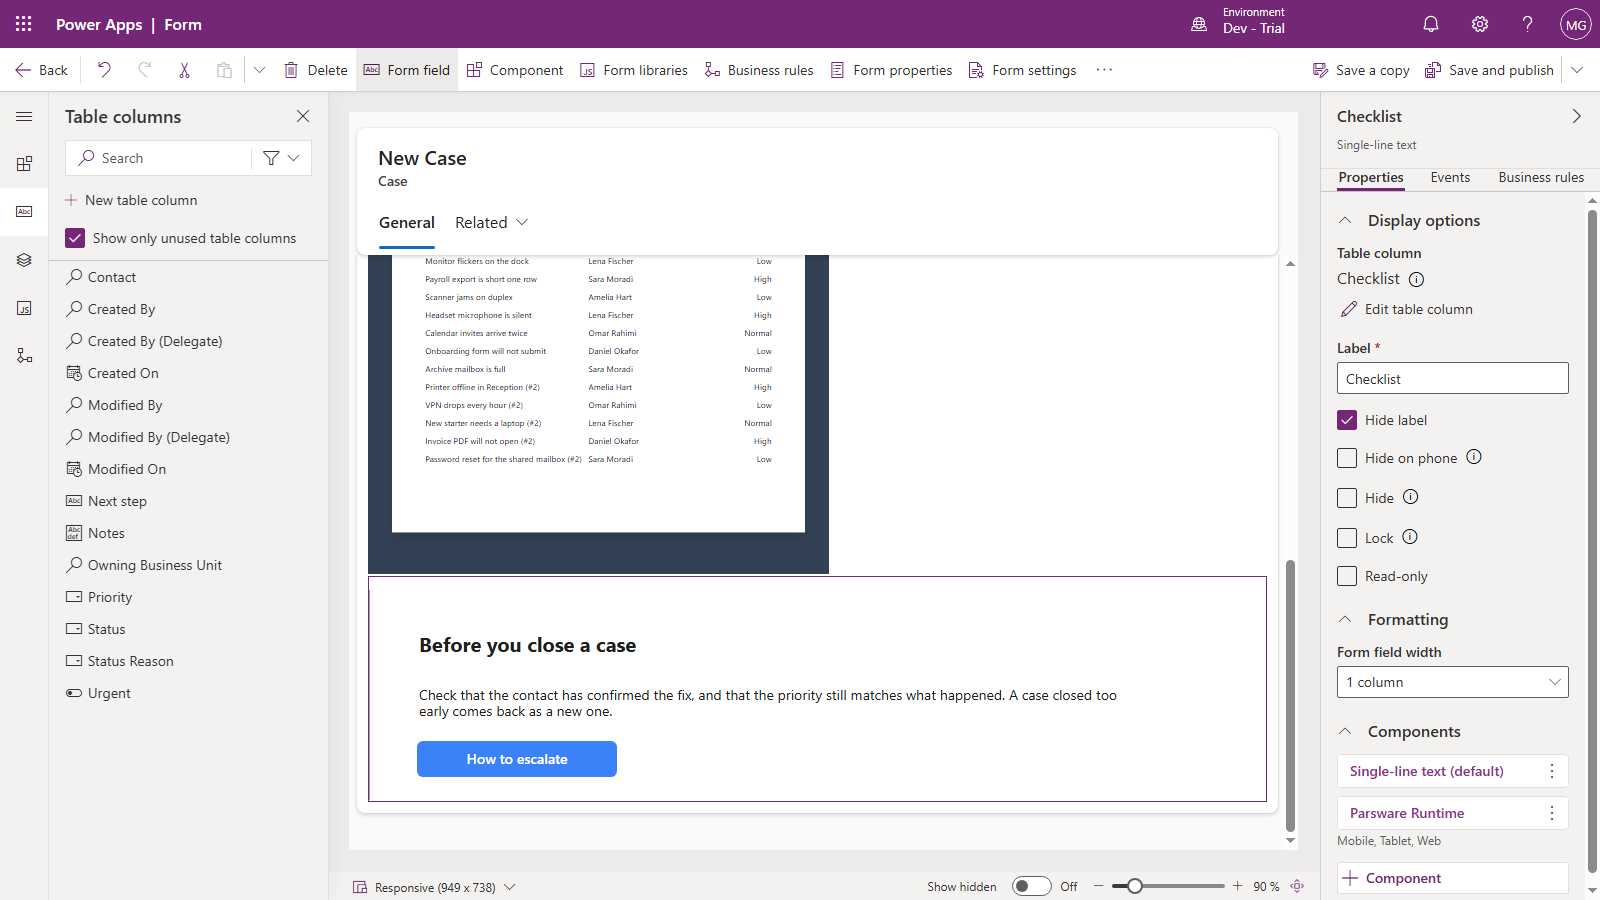
Press Save and publish.
5. Open a case
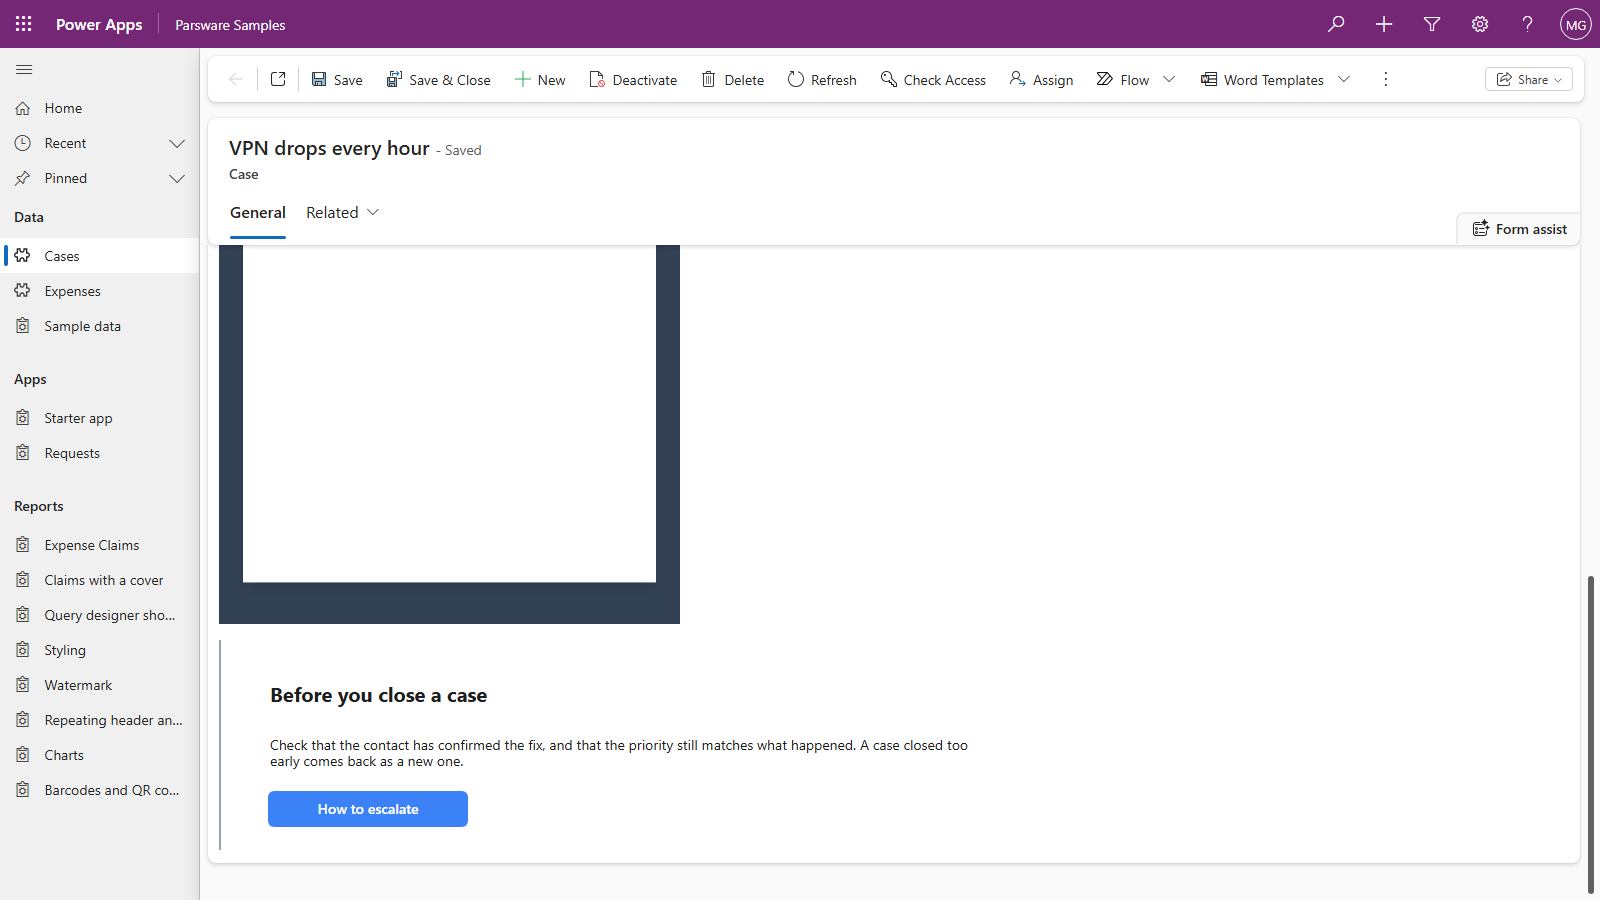
Press How to escalate:
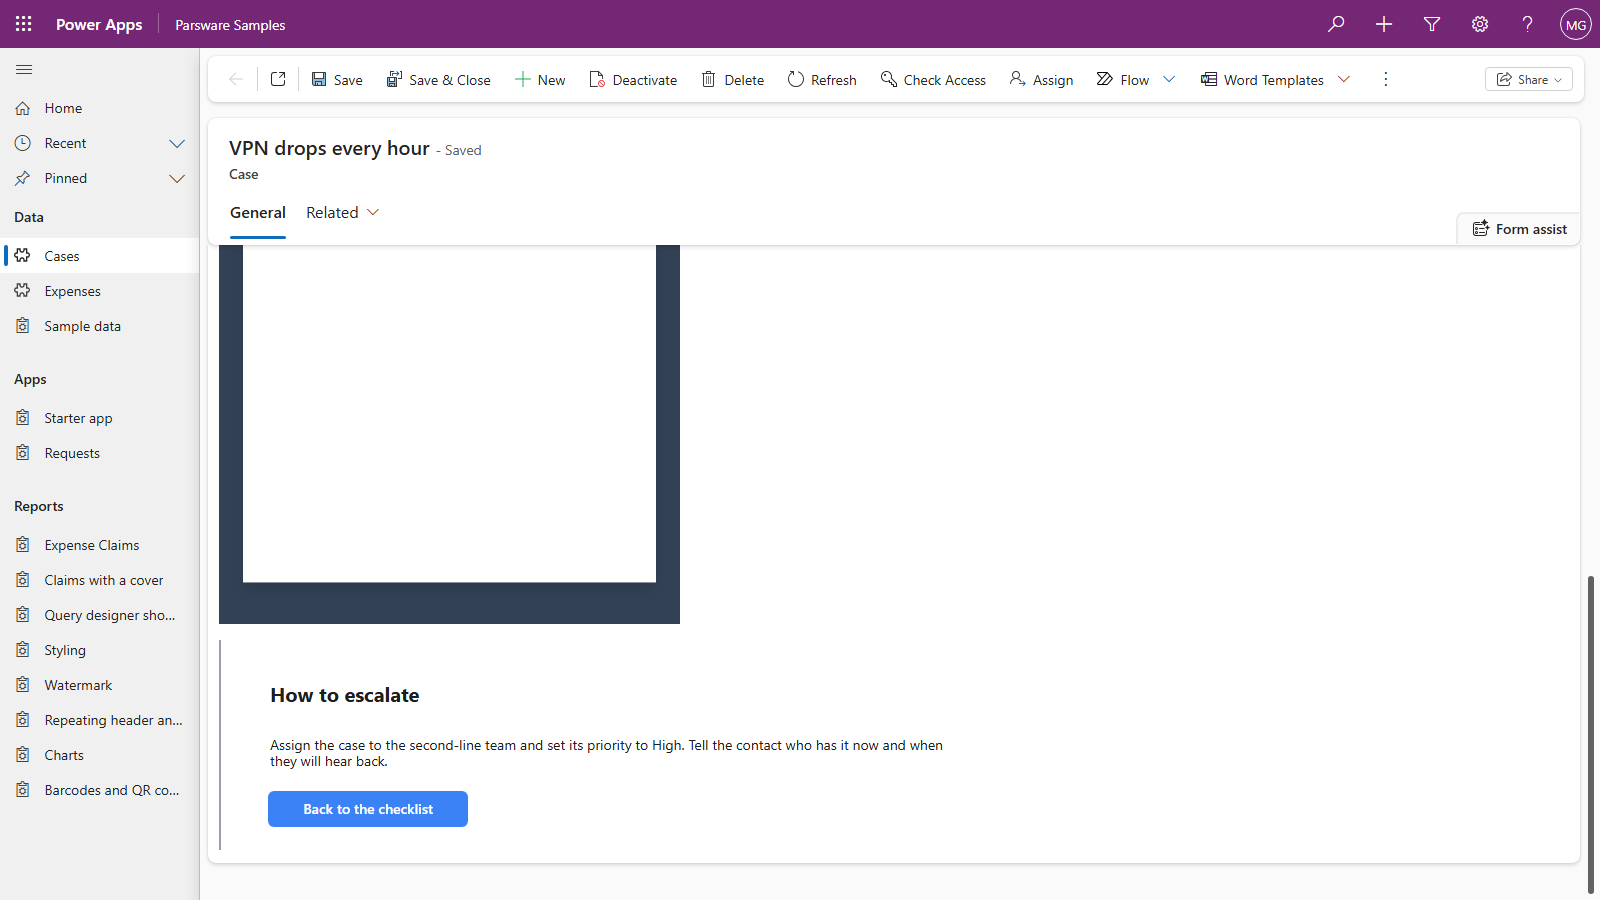
The panel changed screens and the form didn't reload: the record still says Saved, and nothing else on the page moved. Back to the checklist returns.
Good to know
- It's drawn at the size you drew it. Our 760-pixel screen takes 760 pixels of a wider section, as in the pictures. Draw it for the narrowest screen your readers use.
- Only a published design reaches the form. Saving changes your draft only.
- The screen doesn't know which record it's on yet. It can load rows with its own queries, but there's no "this case" for it to read. A screen that works with the record's own values sits on those values' columns, which is the next article.
- A painted button keeps its paint. A button you fill with a colour, like the blue ones here, stays that colour under the pointer, so its label stays readable. (Before runtime 0.44 it turned almost white on hover and the white label vanished.)
Next
A drawn field: a screen that draws one field of the form, and writes the column it sits on. The whole series is in the reading list.