Parsware Platform
A tour of the process designer
A business process in Parsware is drawn, not coded. Lanes for who does the work, shapes for the steps, arrows for the order. We opened the leave-approval sample and went round the designer: the palette, the outline, the canvas, the properties panel, and the problems panel that checks the process as you draw.
Dit artikel is alleen in het Engels beschikbaar.
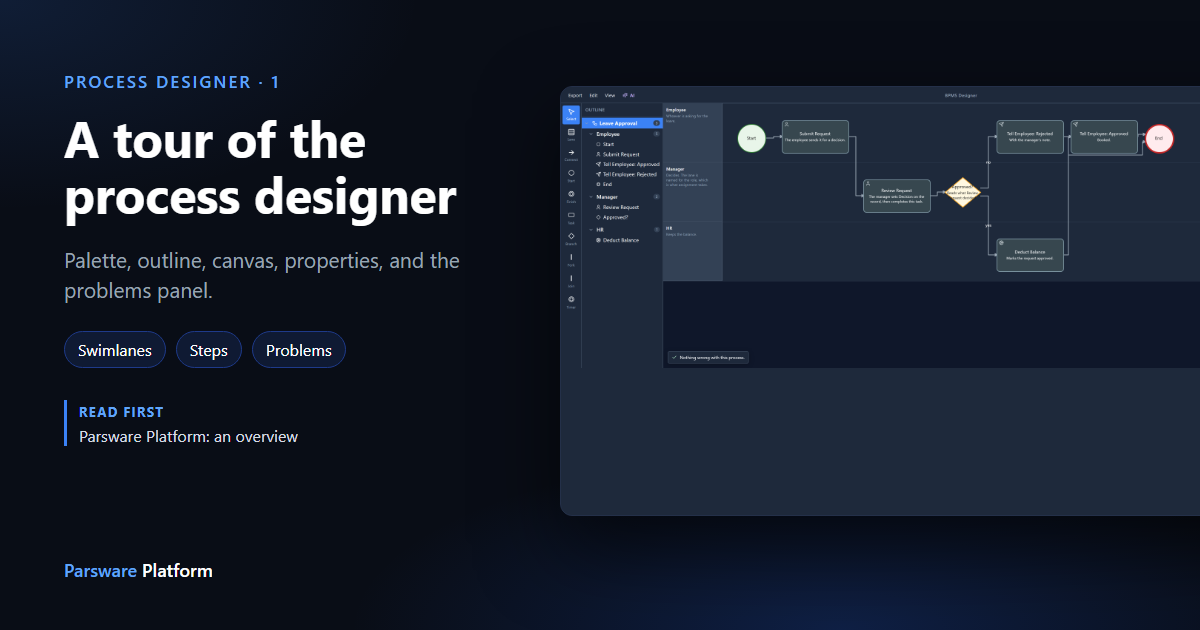
Some work is a single save: a record is created, a rule checks it, done. Other work takes days and several people. An employee asks for leave, a manager decides, HR updates the balance, and the employee hears back. That's a process, and in Parsware you draw it.
This is the first of a series on the process designer, one part at a time. It's a tour: what's on
the screen and what each part is for. We used the Leave Approval sample. Import it from
samples/solutions/bpms-leave-approval-process to follow along.
Where it lives
A process belongs to a solution, like a table or a form. Open the solution, choose Processes, and open Leave Approval:
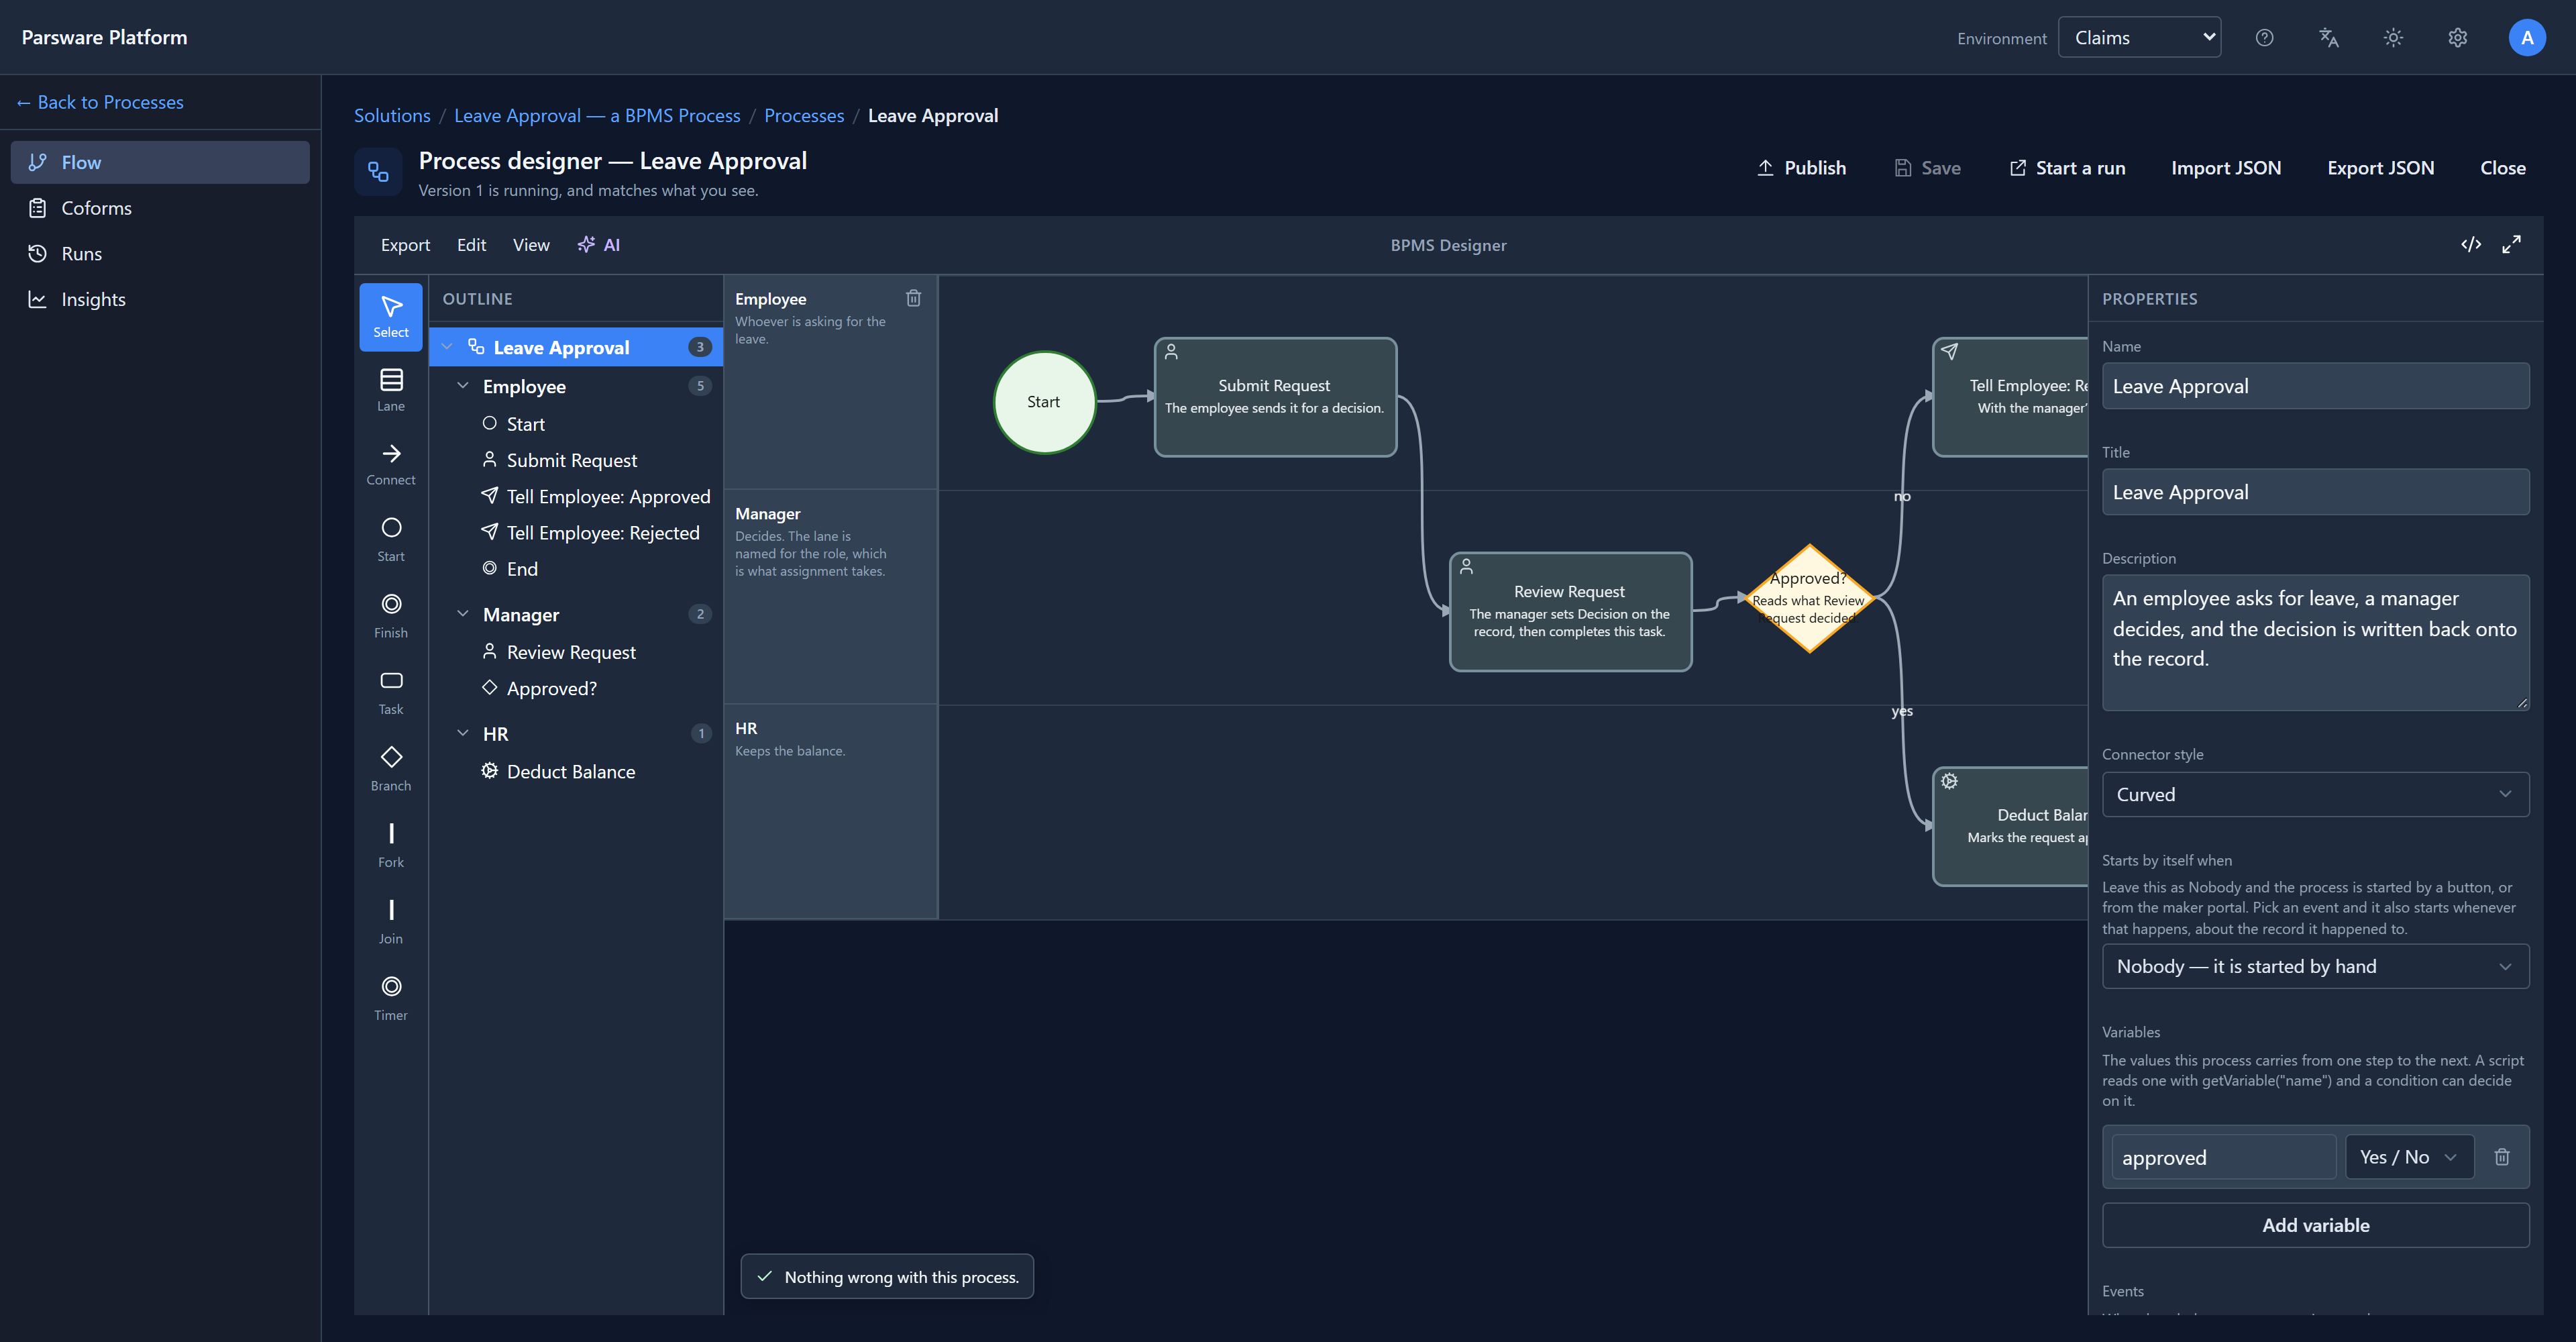
Around the designer itself:
- On the left, Flow is the drawing. Coforms are the short forms people fill in to finish a step, Runs are the times this process has actually run, and Insights is how it's doing.
- Along the top, Save keeps your drawing and Publish makes it the version that runs. The line under the title says which version is running and whether it matches what you see. Import JSON and Export JSON move the process as a file.
The button at the top right of the designer (the two arrows) gives it the whole window. We used it for the rest of the pictures.
The whole process
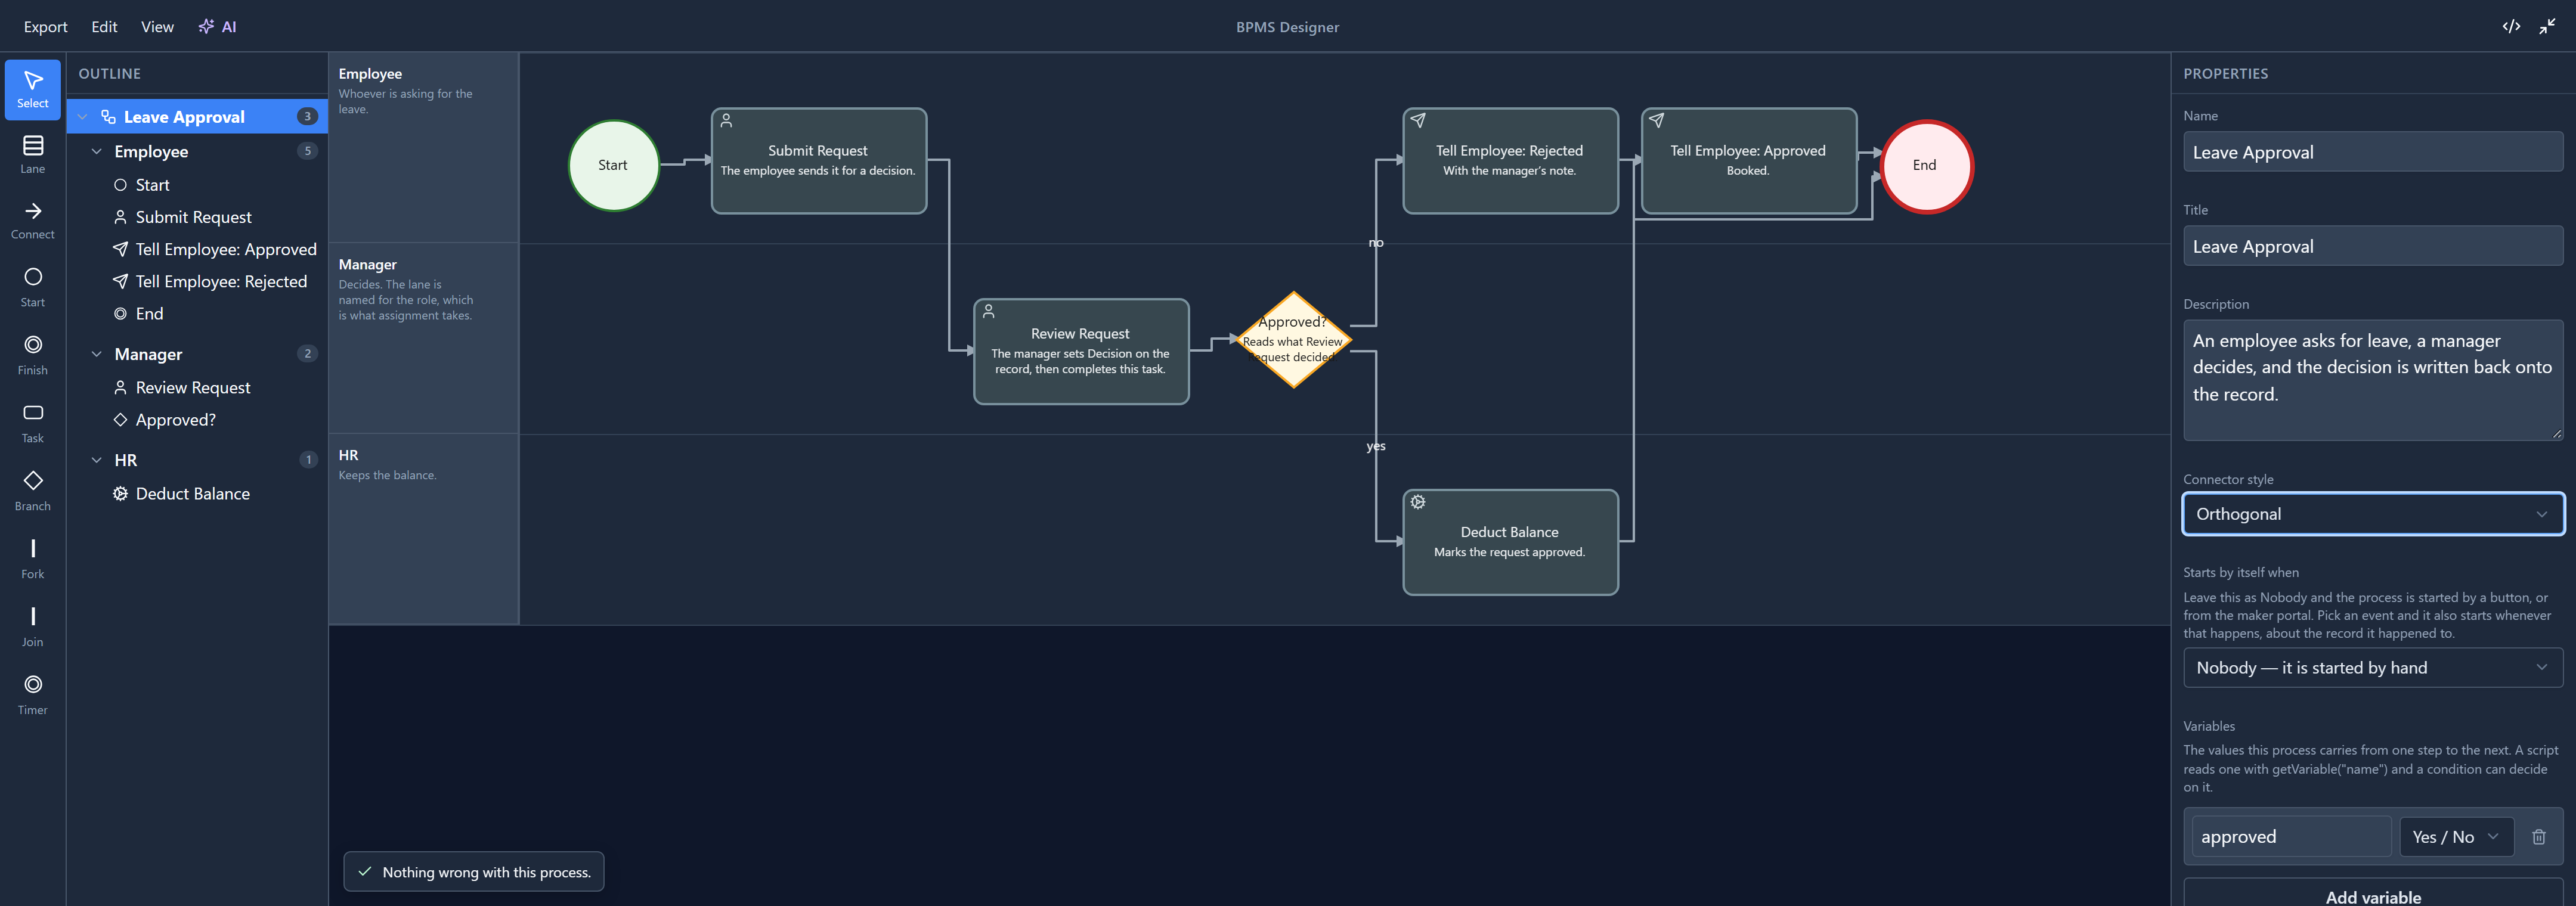
Read it left to right. The employee submits a request. The manager reviews it. A branch, Approved?, sends it one of two ways: yes to HR, who deduct the balance, then a message saying it's approved; no straight to a message saying it isn't. Both messages end at End.
The designer has four regions:
- The palette, on the far left: Select, Lane, Connect, and the shapes you can add: Start, Finish, Task, Branch, Fork, Join and Timer.
- The outline, beside it: the process as a tree. The root, its lanes, and the steps in each lane, with a count. Selecting something here selects it on the canvas, and the other way round.
- The canvas, in the middle, with one swimlane per role: Employee, Manager, HR. A step belongs to the lane it sits in.
- The properties panel, on the right: everything about whatever is selected. With the root selected, that's the process's name and description, its Connector style, what starts it, its Variables and its Events.
The picture above uses Orthogonal connectors, chosen under Connector style. The sample ships with Curved, which draws each connection as one smooth curve from step to step. Curves don't go around the steps in their way, so here the curve from Rejected to End passes behind Approved and looks as if it ends there. Orthogonal connectors are routed around the steps.
Fixed while writing this: orthogonal connectors didn't go around a step either when the step they ended at sat close behind it, as End does behind Approved here. They fell back to a straight line through it. Now they go around.
The canvas doesn't zoom yet, so a wide process needs the full window to be seen whole.
Selecting a step
Click Review Request, on the canvas or in the outline:
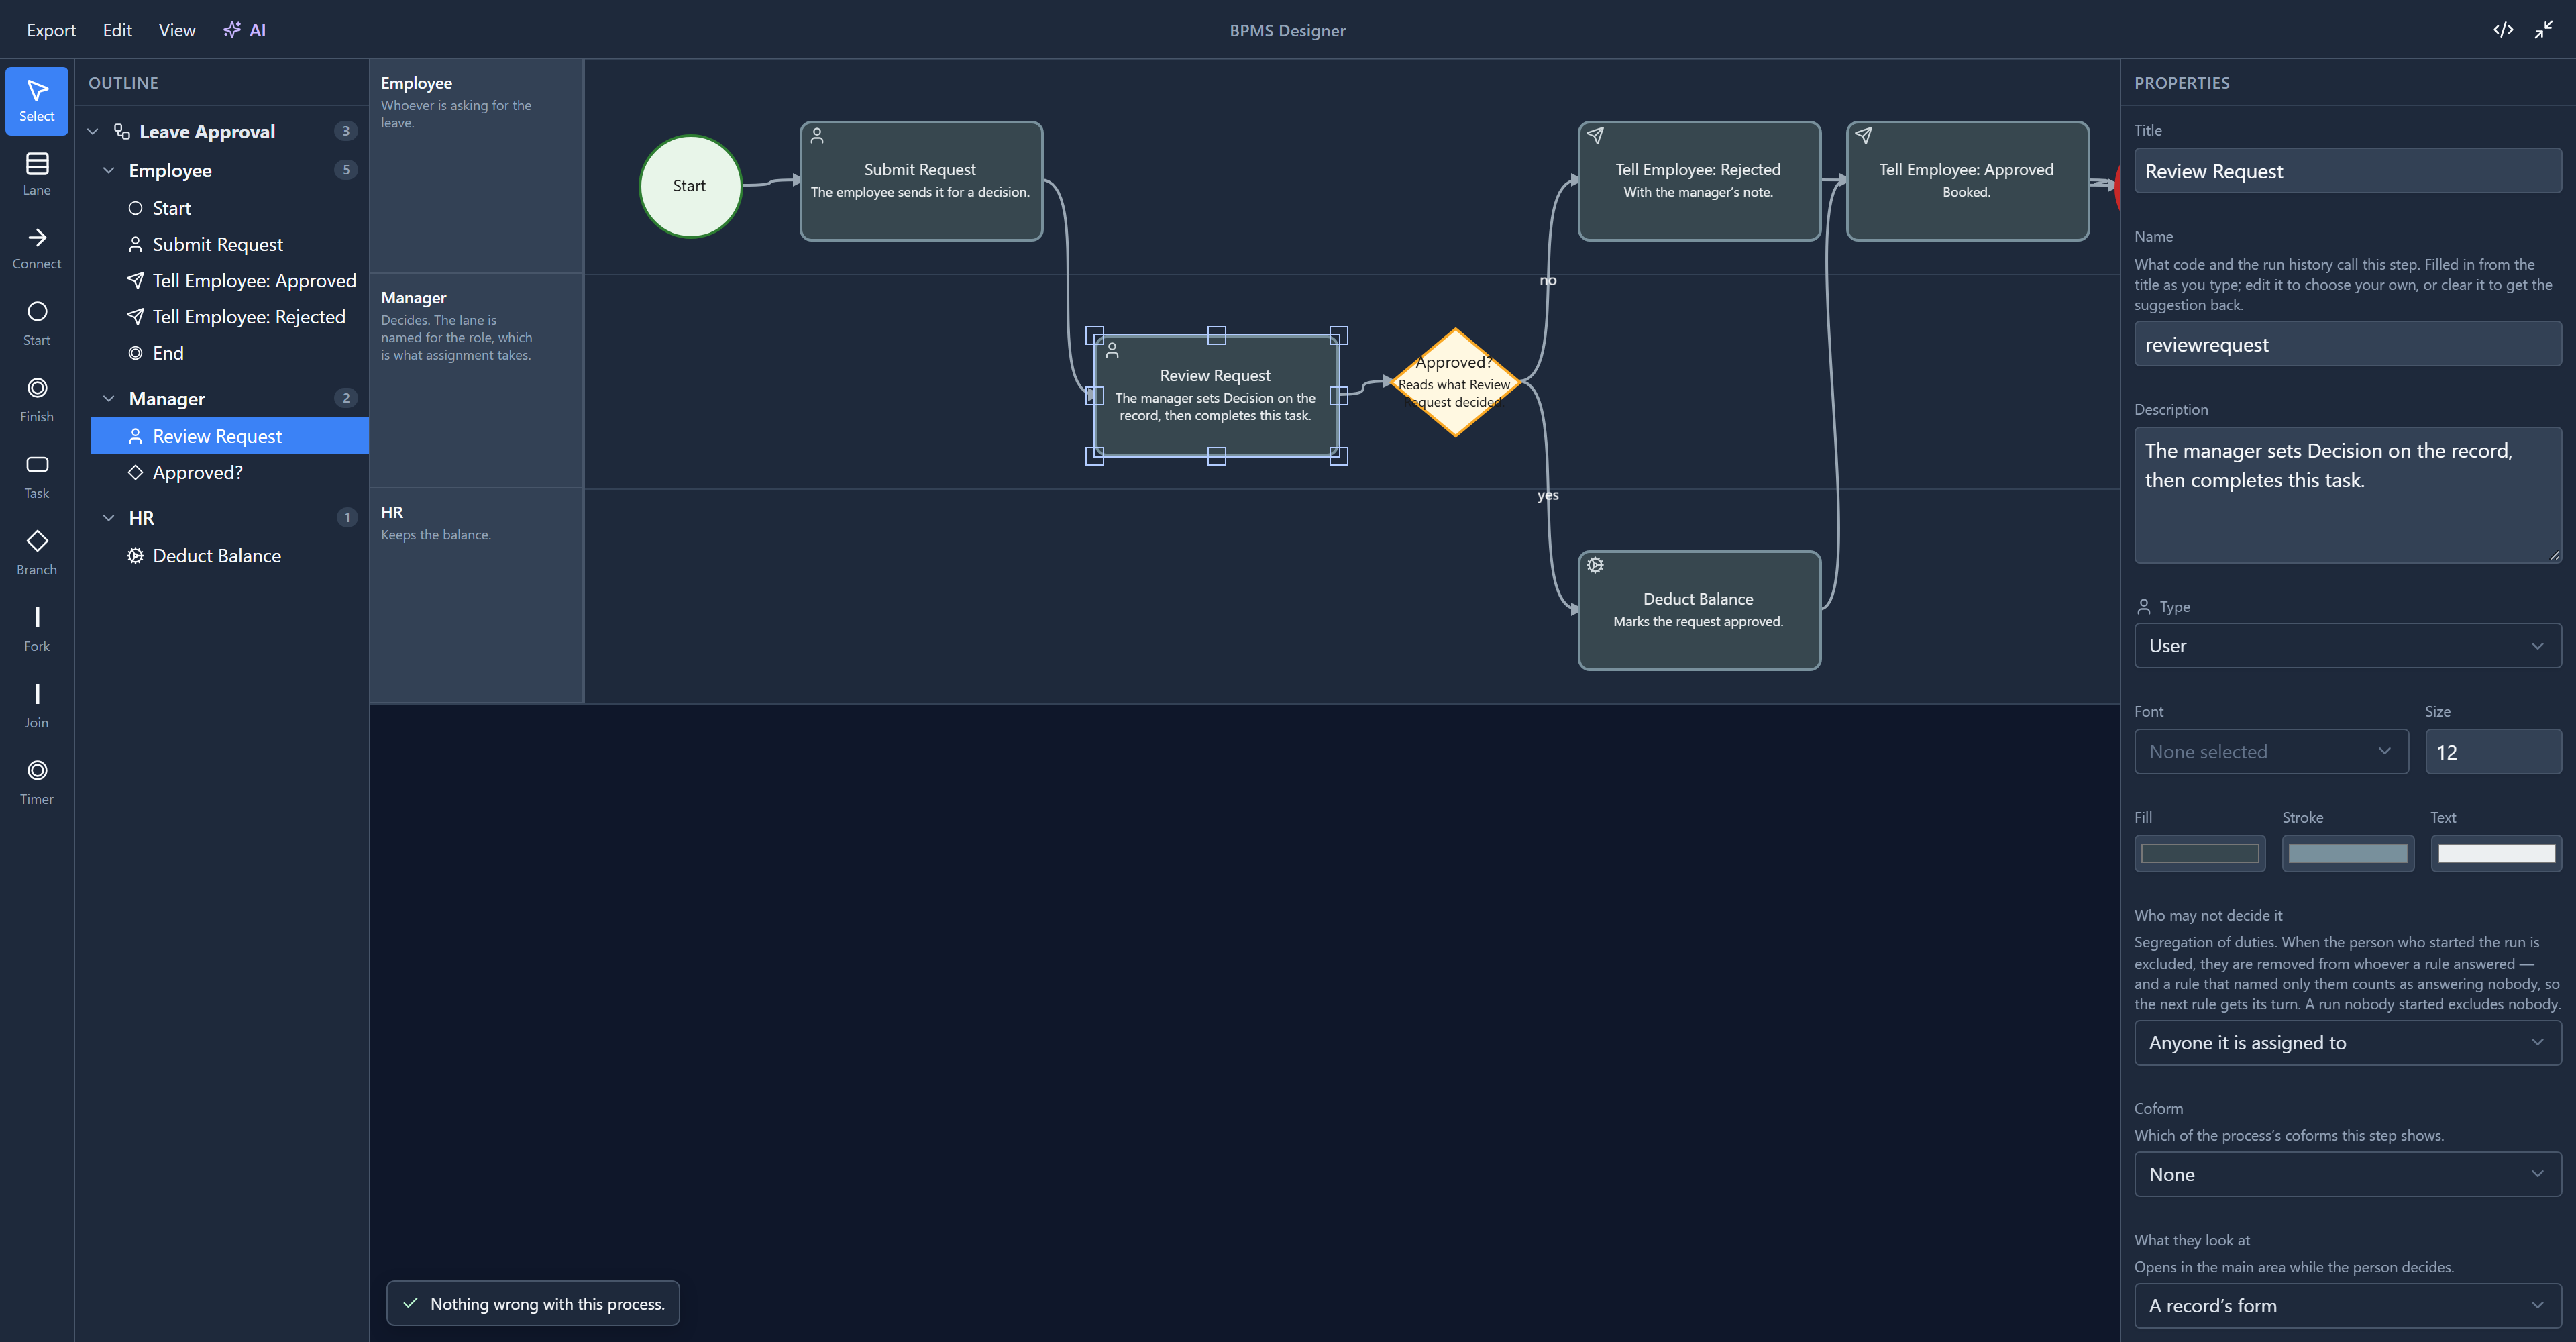
A step has a Title, which is what the box says, and a Name, which is what code and the run history call it. The name fills in from the title as you type. Its Type is User, meaning a person does it, and the small person icon on the box says the same. Further down are who may not decide it, which coform it shows, what the person looks at while they decide, a deadline, and the Code the step runs, including Assigned to: who gets the task.
The later articles in this series take each of these in turn.
Adding a step
Drag a shape from the palette onto a lane. We dropped a Task into the HR lane:
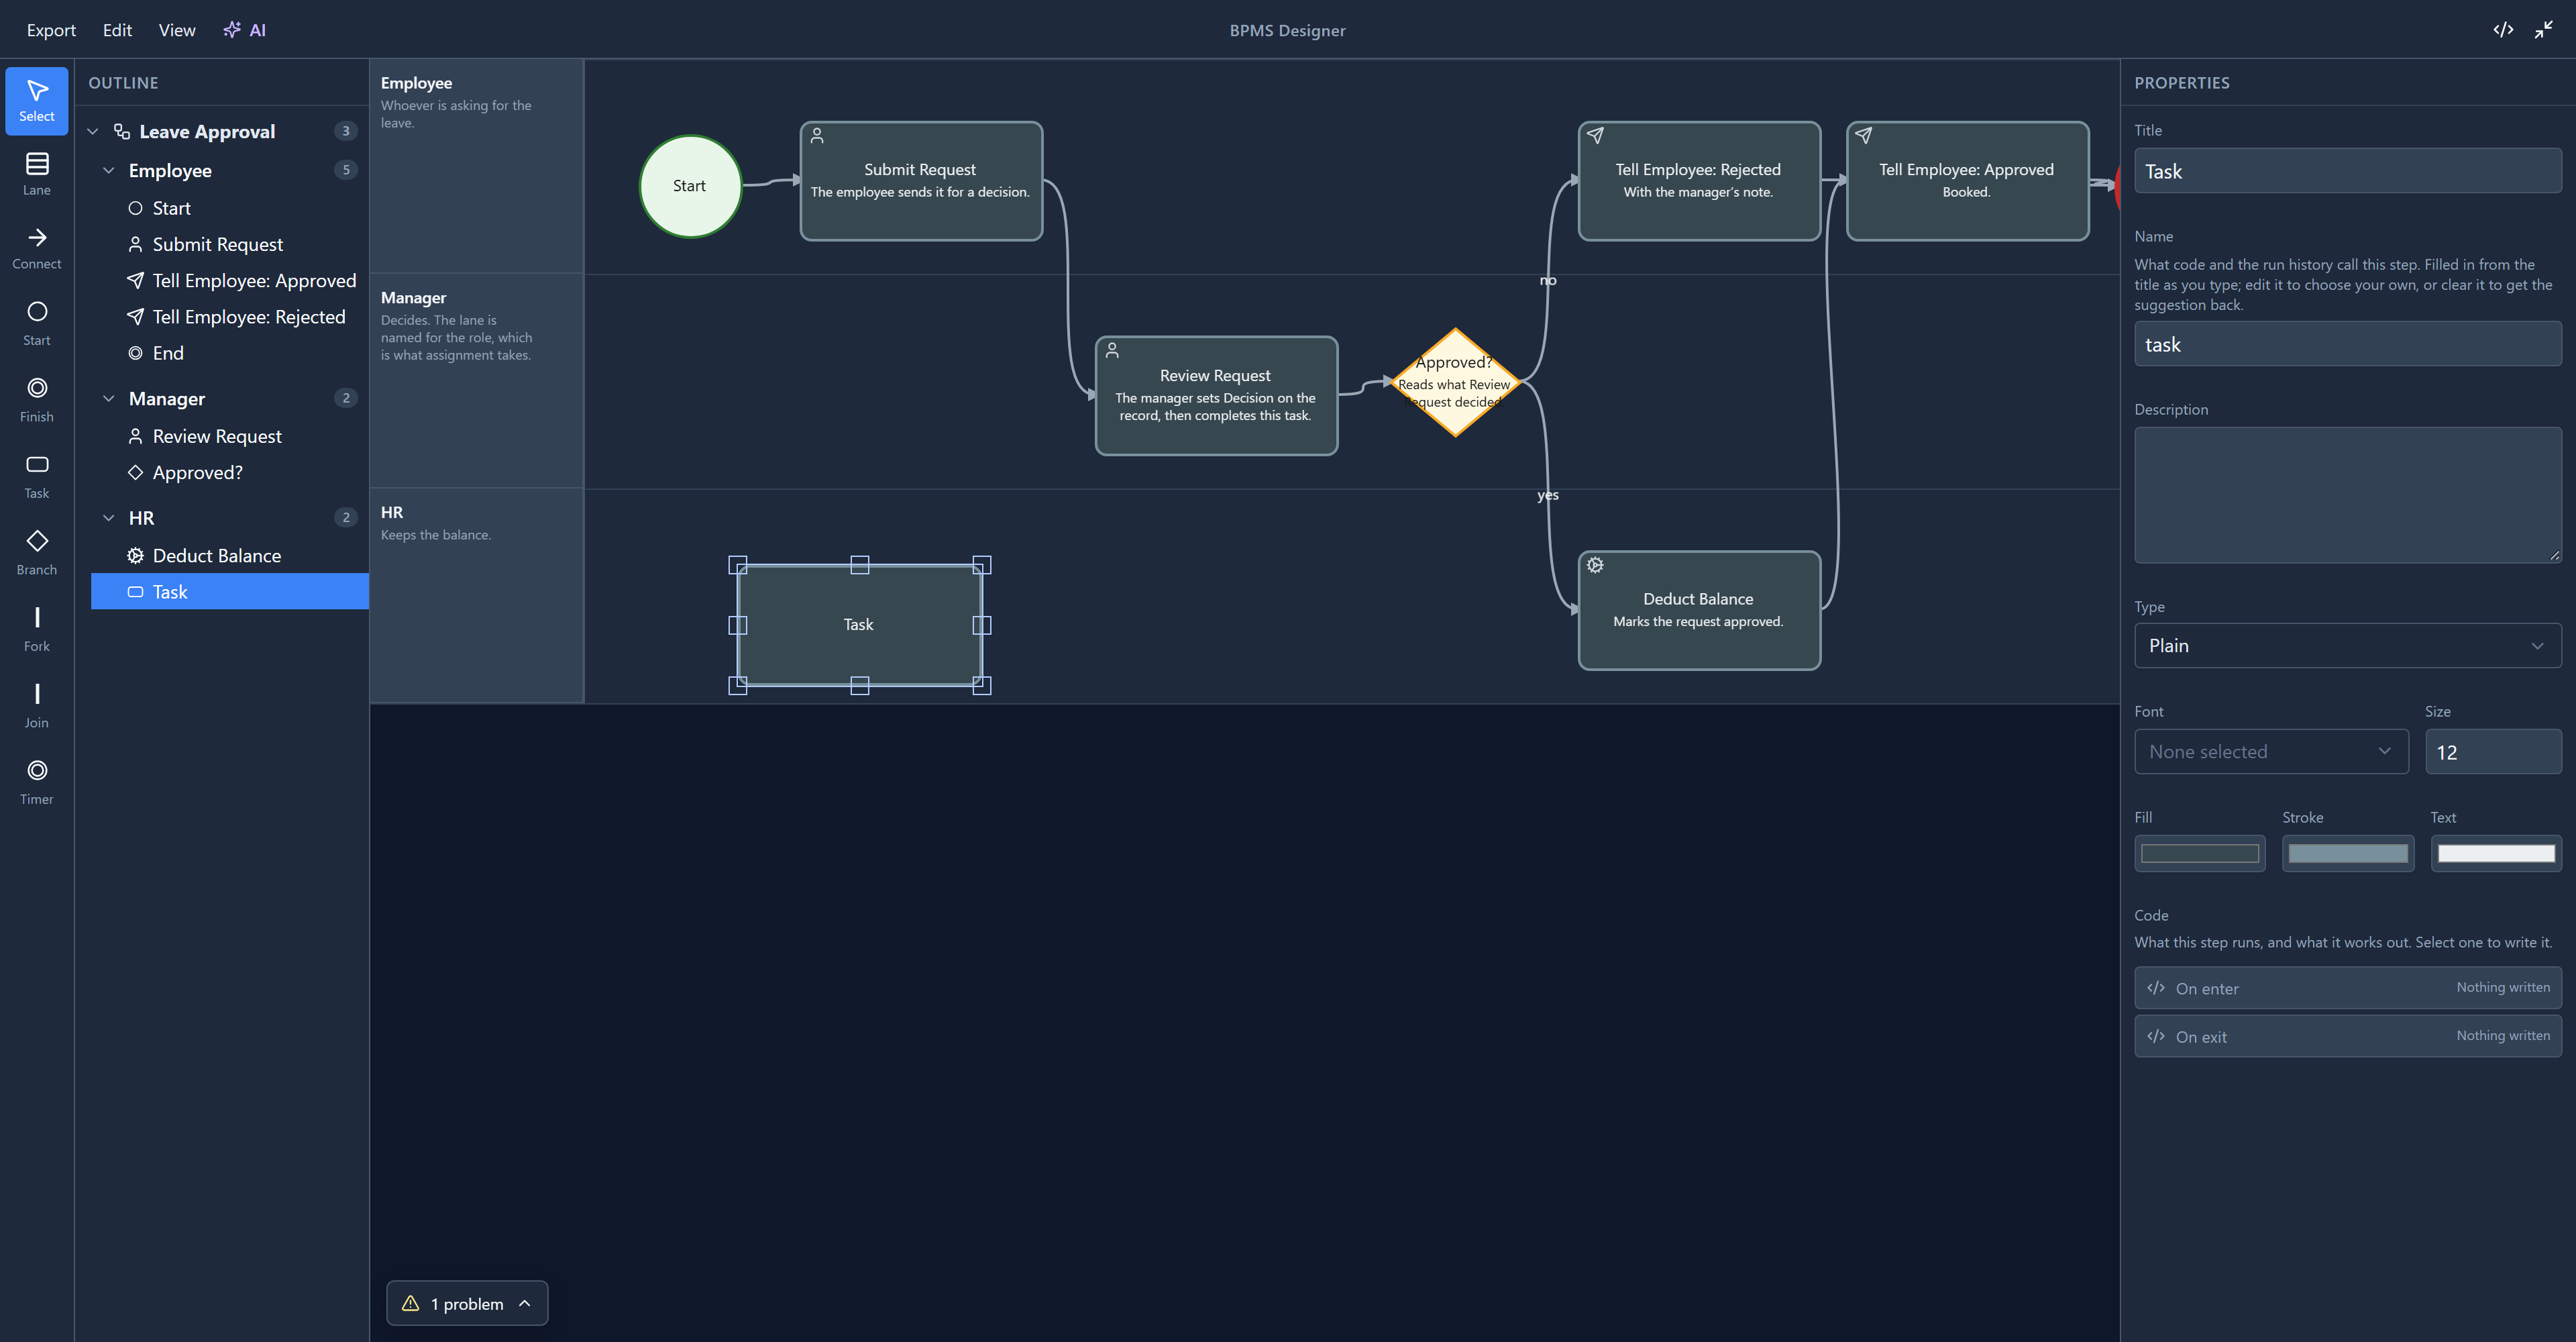
It lands selected, with its own properties open, ready to name. The outline gains a line under HR.
Fixed while writing this: a step you dropped used to be highlighted on the canvas while the properties panel went on showing the process root, so you had to click it again to edit it.
The problems panel
Notice the bottom left: 1 problem. Open it:
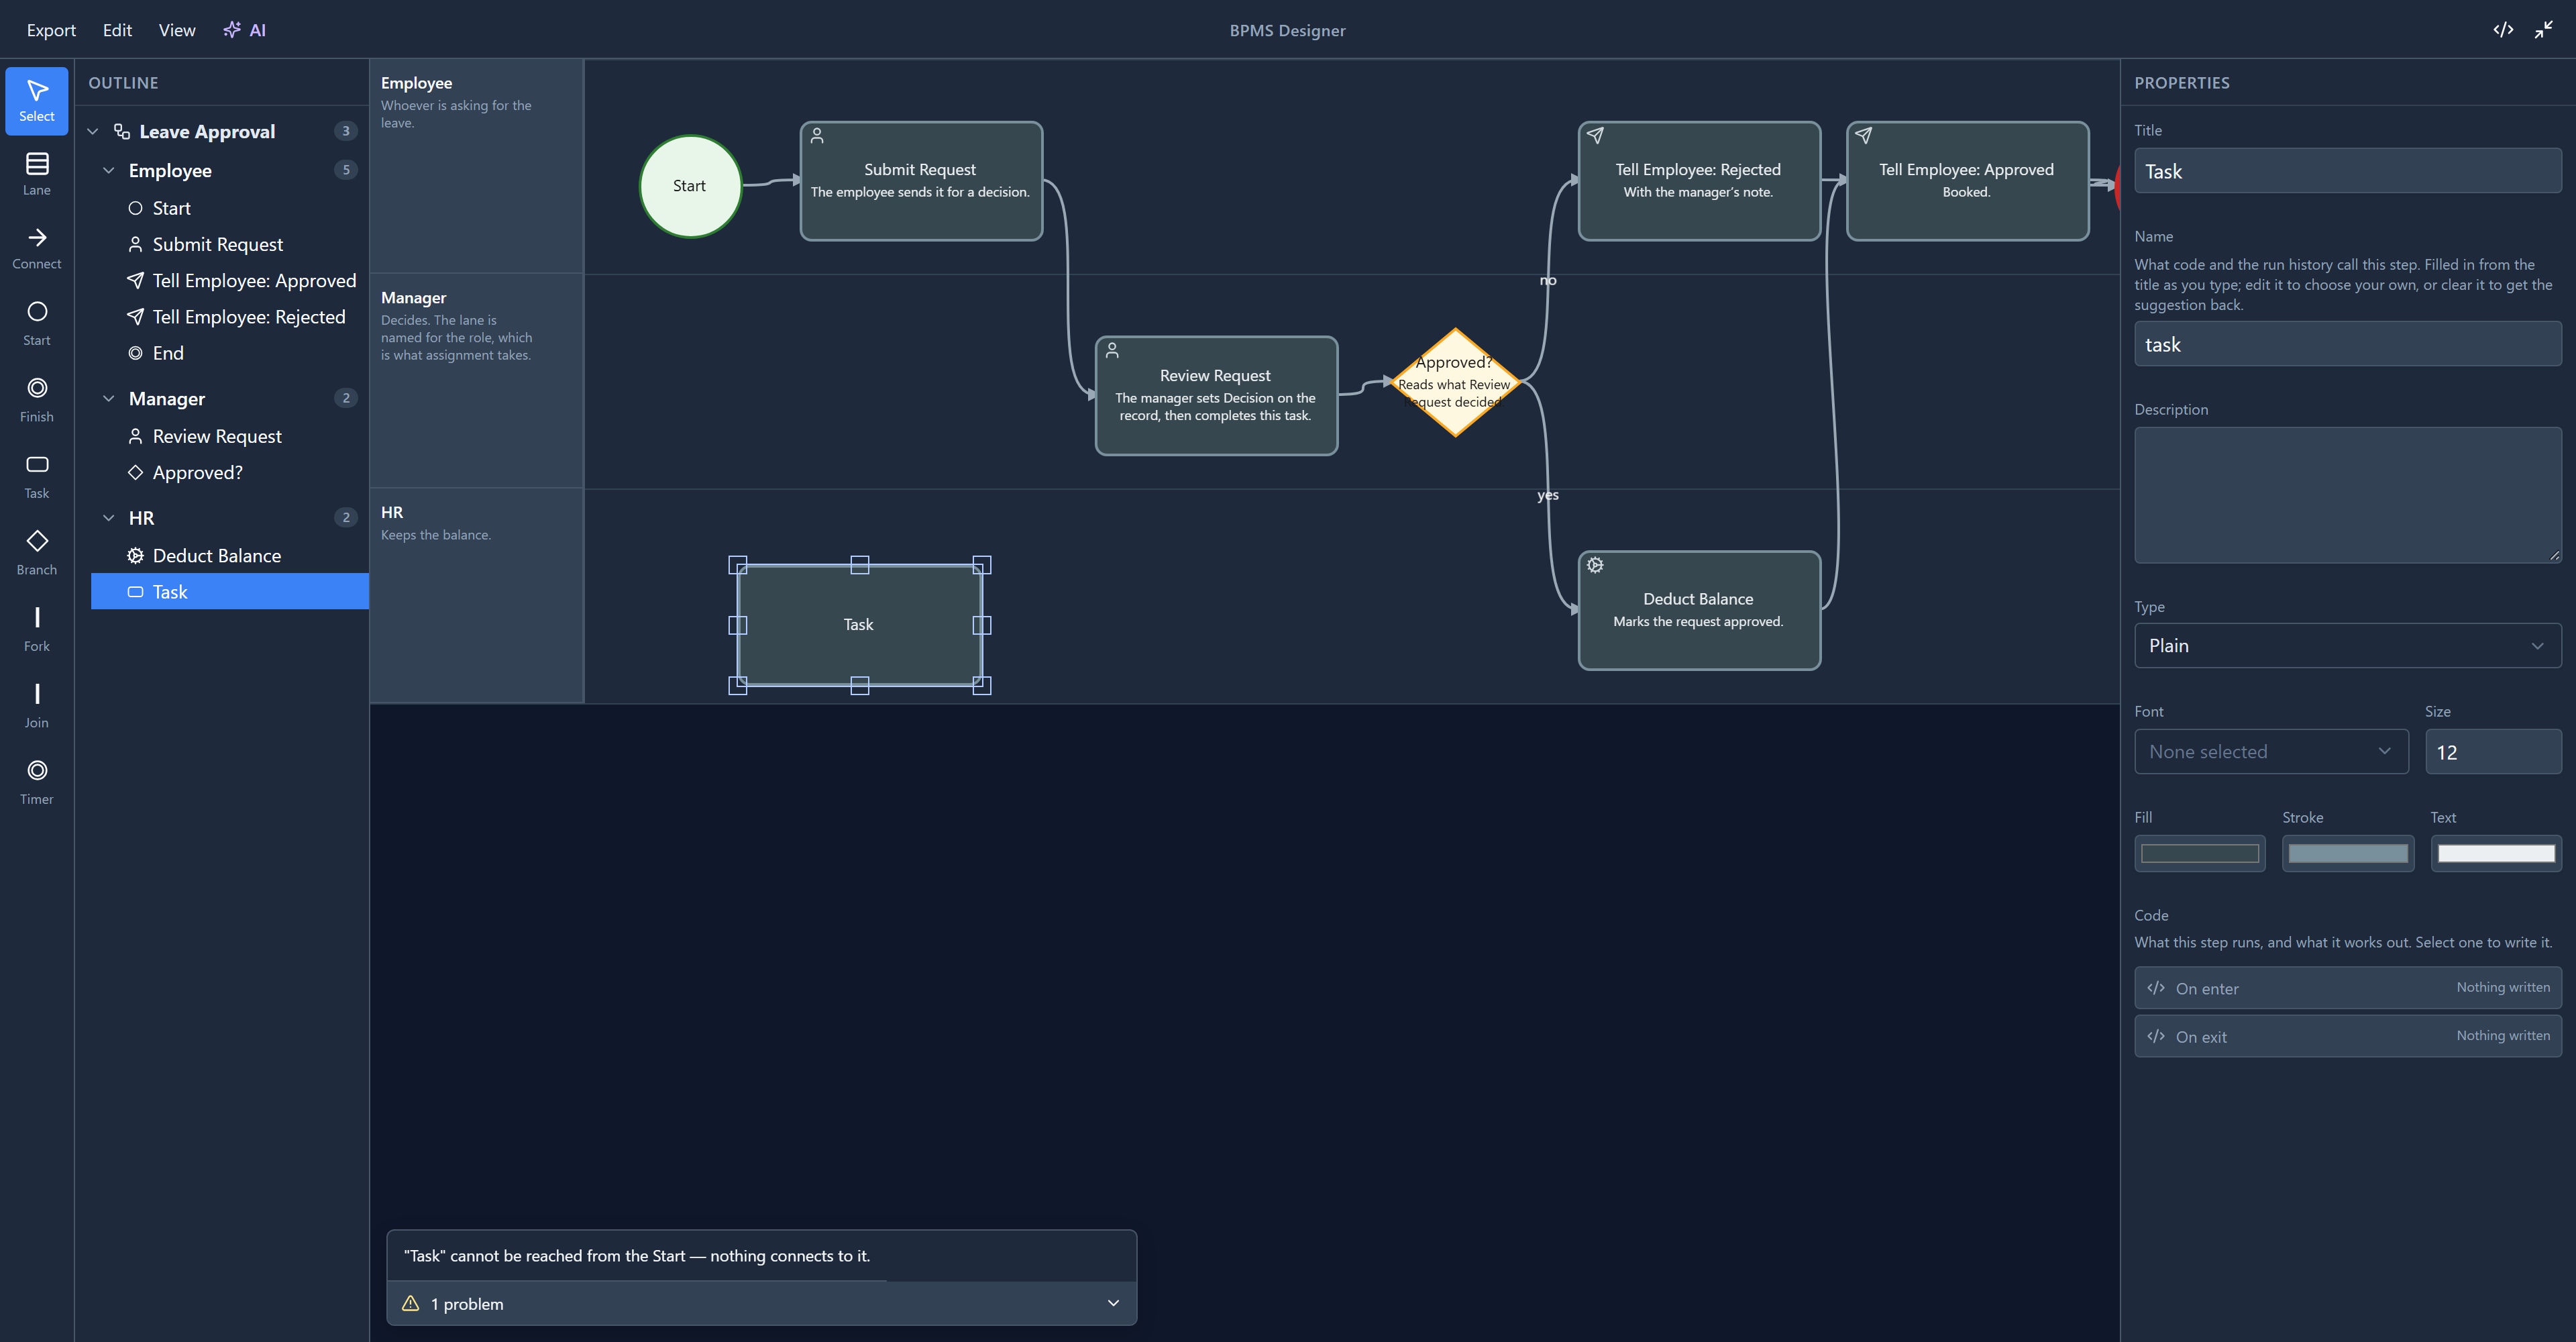
The designer checks the process as you draw it, not when you publish, and not when somebody's leave request gets stuck. A new task with nothing leading to it can never run, so it says so. Other things it catches: a branch output with no condition, a step from which no finish can be reached, a script naming a variable nothing declares.
Select the new task, press Delete, confirm, and the panel is back to Nothing wrong with this process:
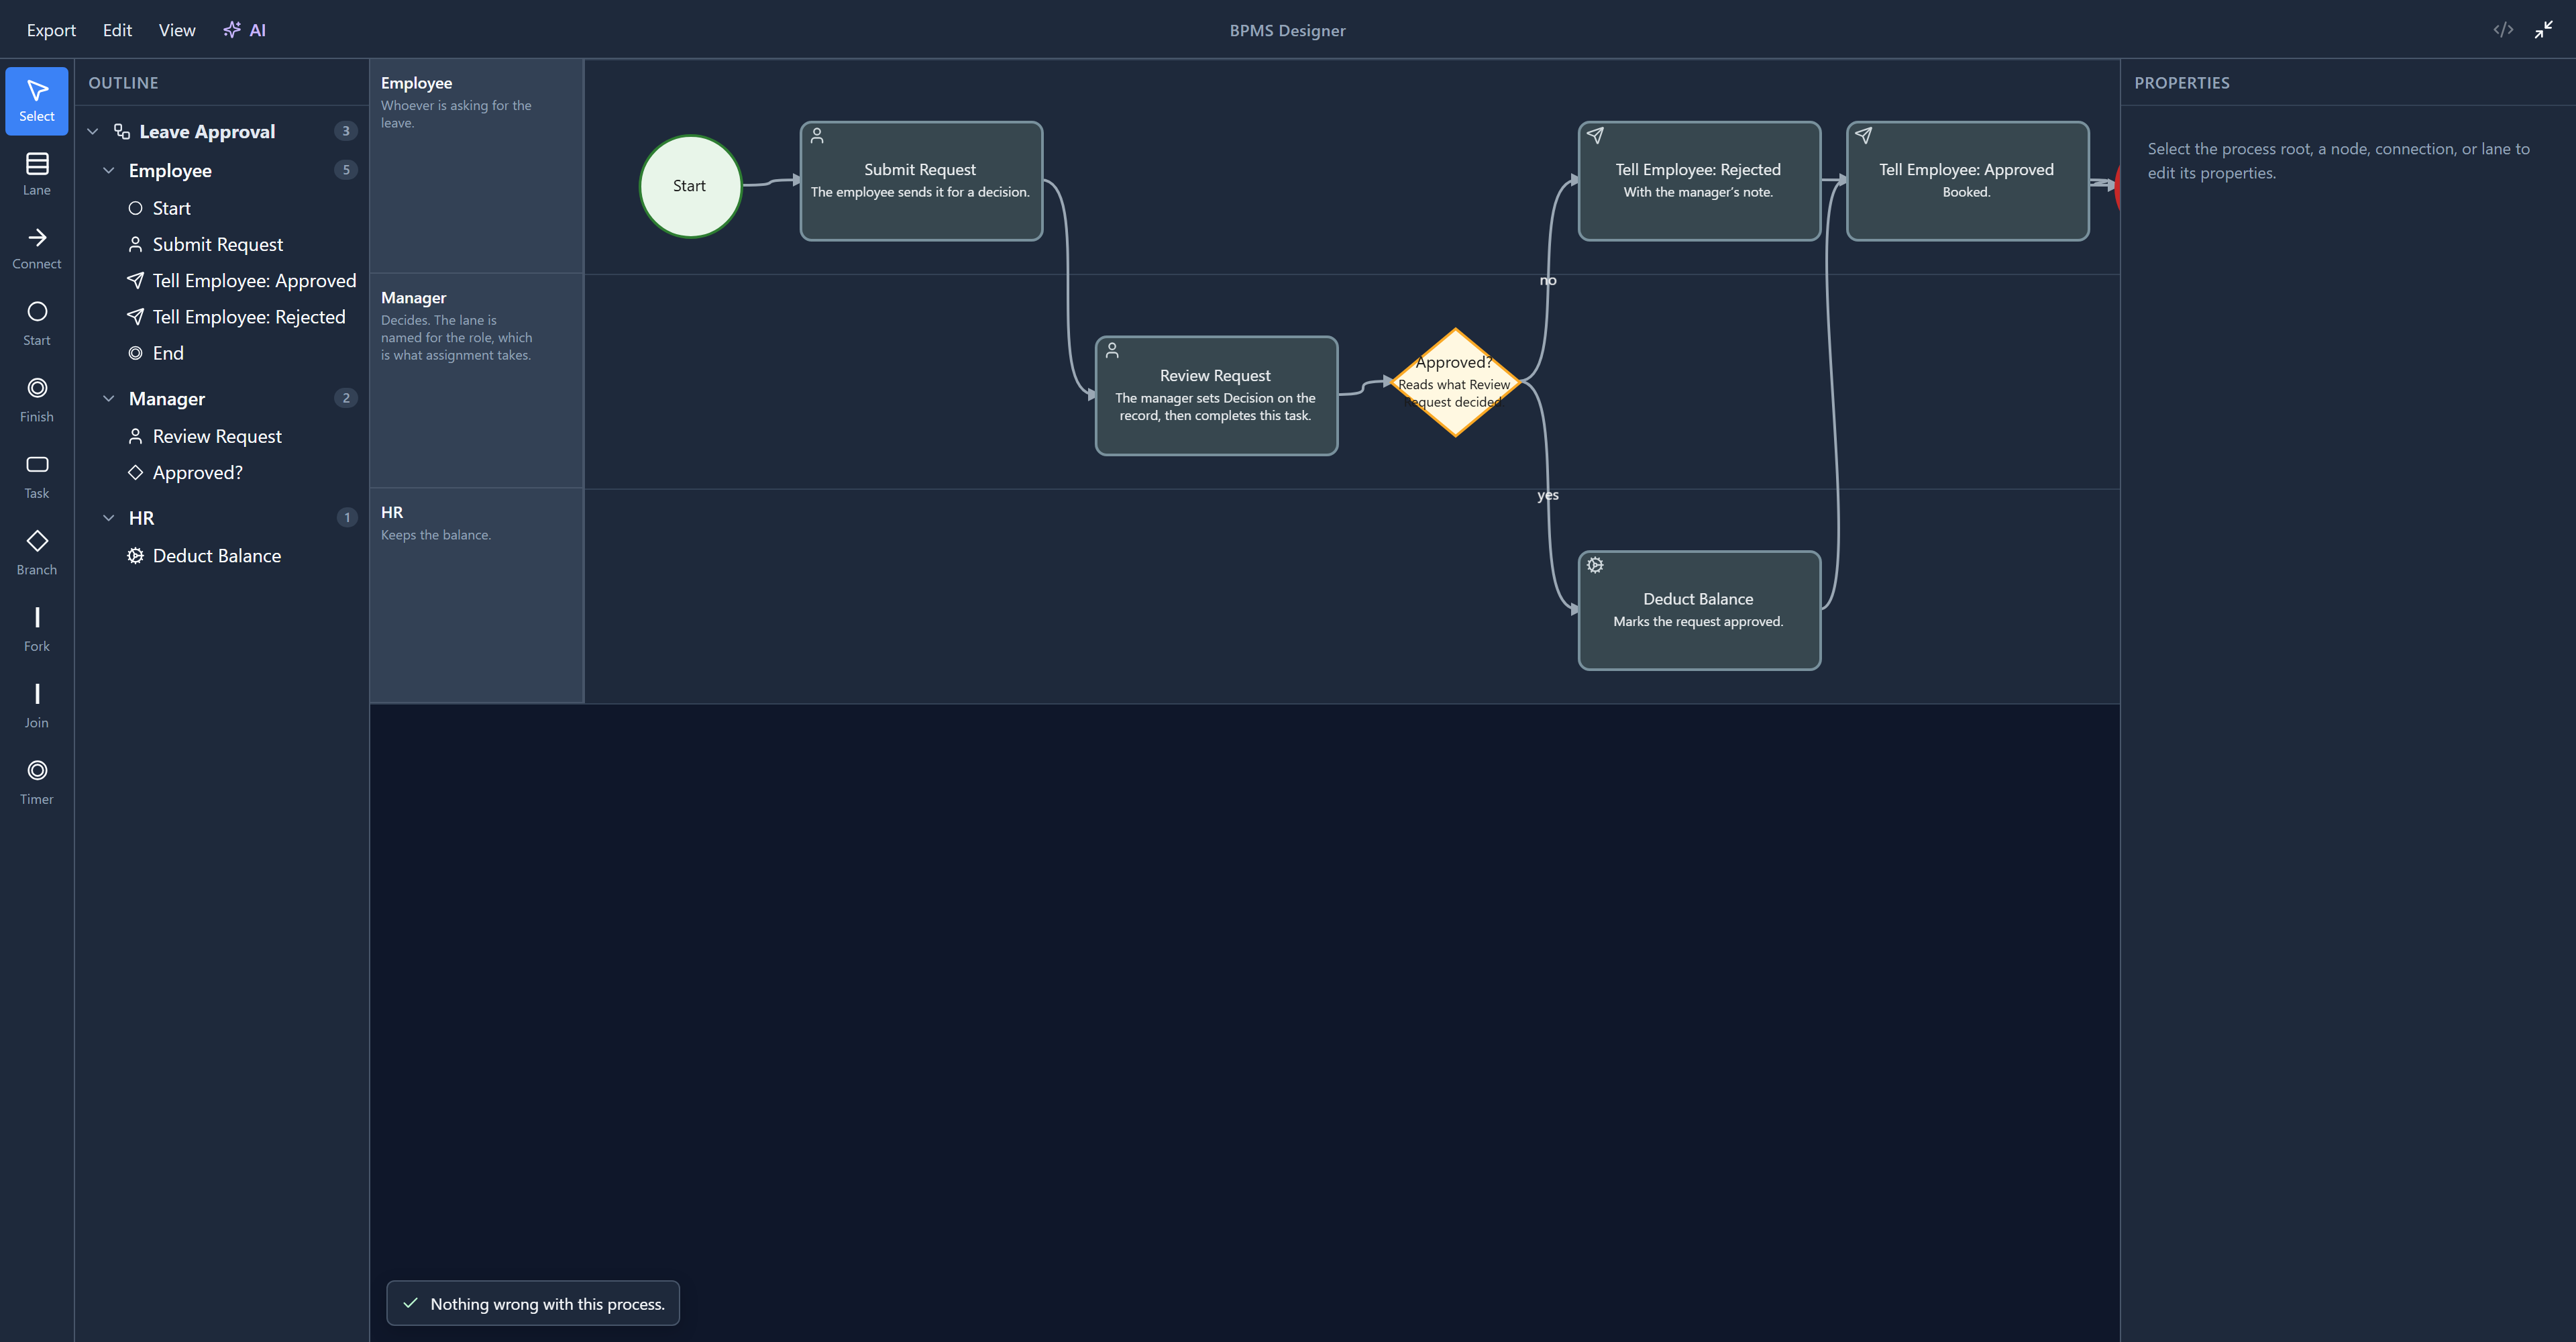
We didn't save any of this. The sample is installed as a managed solution, and closing the designer without saving leaves it as it was.
Try it
Select the process root in the outline and switch Connector style between Curved and Orthogonal, watching the line from Tell Employee: Rejected to End. Then click each lane in the outline: a lane has its own properties, and one of them, Role, is what the next article is about.
Next: swimlanes and roles, and who a lane's work goes to.