Parsware Platform
Connecting and arranging
You drag from one step to another to connect them, the designer draws the corners, and View → Auto arrange tidies the whole diagram without moving work between lanes. Trying it for this article found four things to fix: two kinds of overlapping lines, a drag that drew nothing, and a hint that was always in English.
Cet article n’est disponible qu’en anglais.
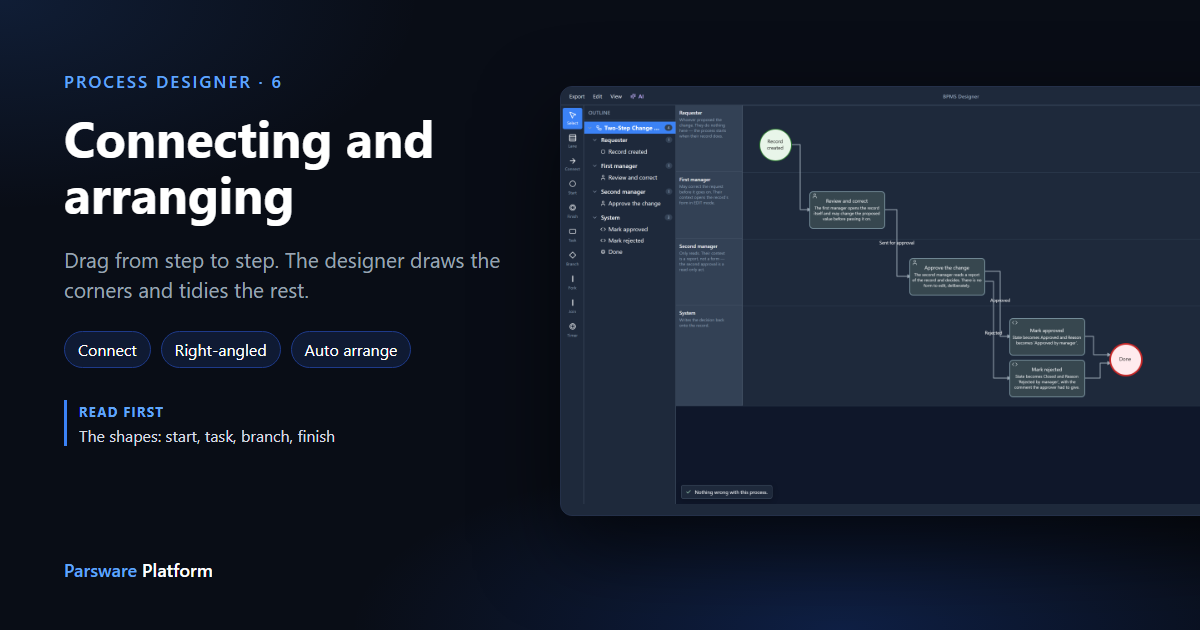
A process is steps and the connections between them. In the designer you never draw a line yourself: you say which two steps are connected, and the designer works out how to draw it. This article covers connecting steps, the two connector styles, routing around steps, and Auto arrange.
We used the Two-Step Record Approval sample, from
samples/solutions/bpms-two-step-record-approval. Open its process, Two-Step Change Approval.
We saved nothing, so the sample stays as it was.
Connect two steps
Choose Connect in the palette on the left. Press on the step a connection should leave, drag to the step it should reach, and let go.
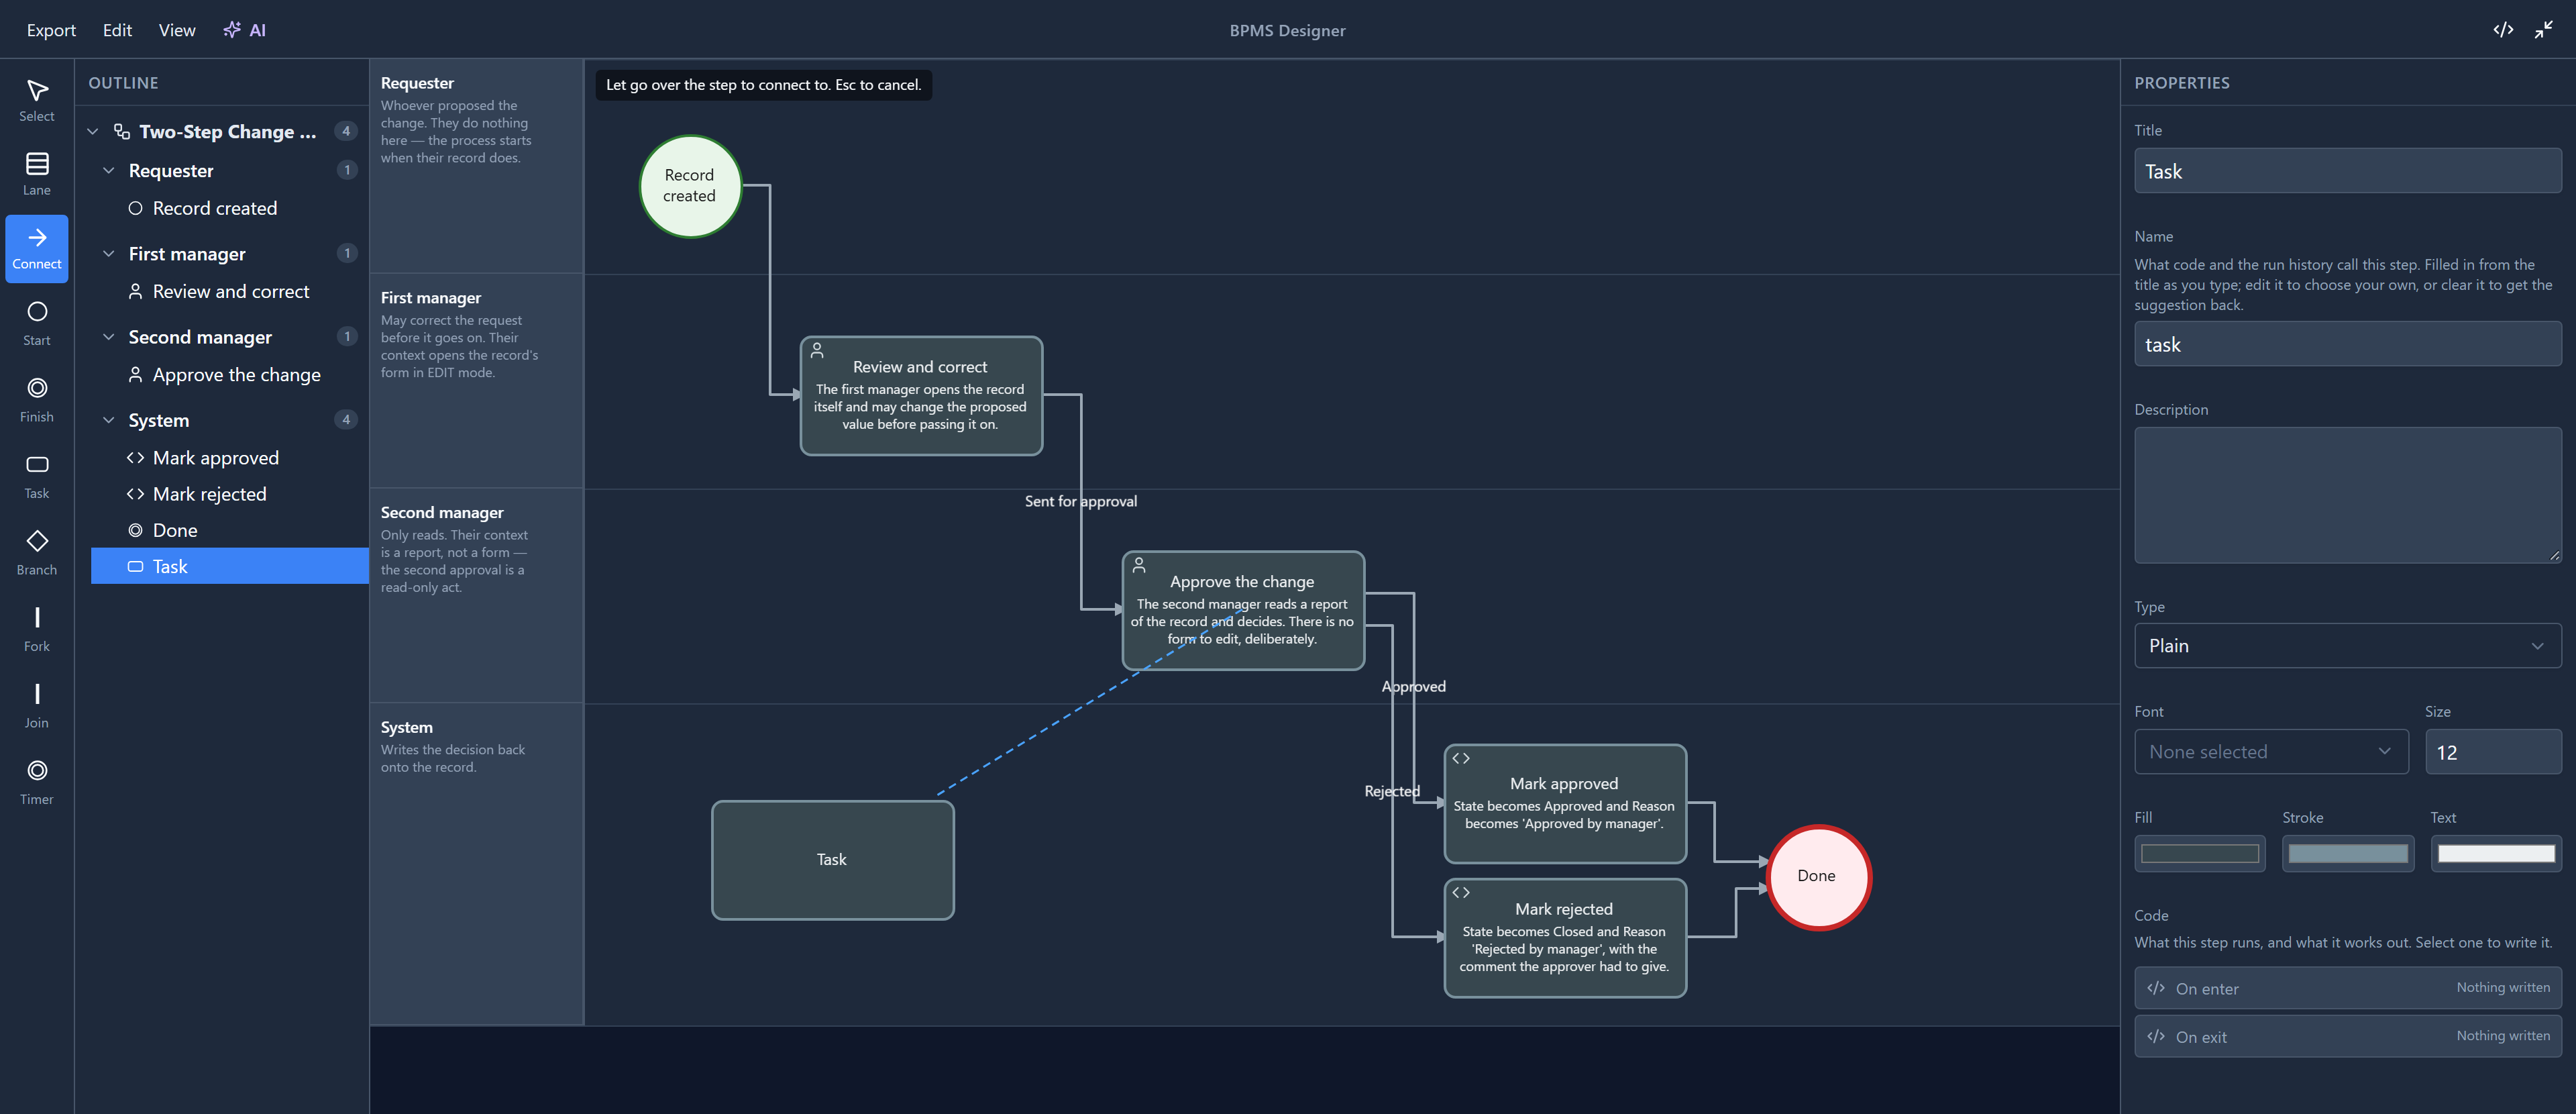
While you drag, a dashed line runs from the step you started on to the pointer. That line is new. Until we tried this for the article, nothing was drawn during the drag: the only sign that it was working was the hint at the top of the canvas changing. That hint was also always in English, even for a Persian or Arabic maker. It's translated now.
Let go over the step and the connection is there:
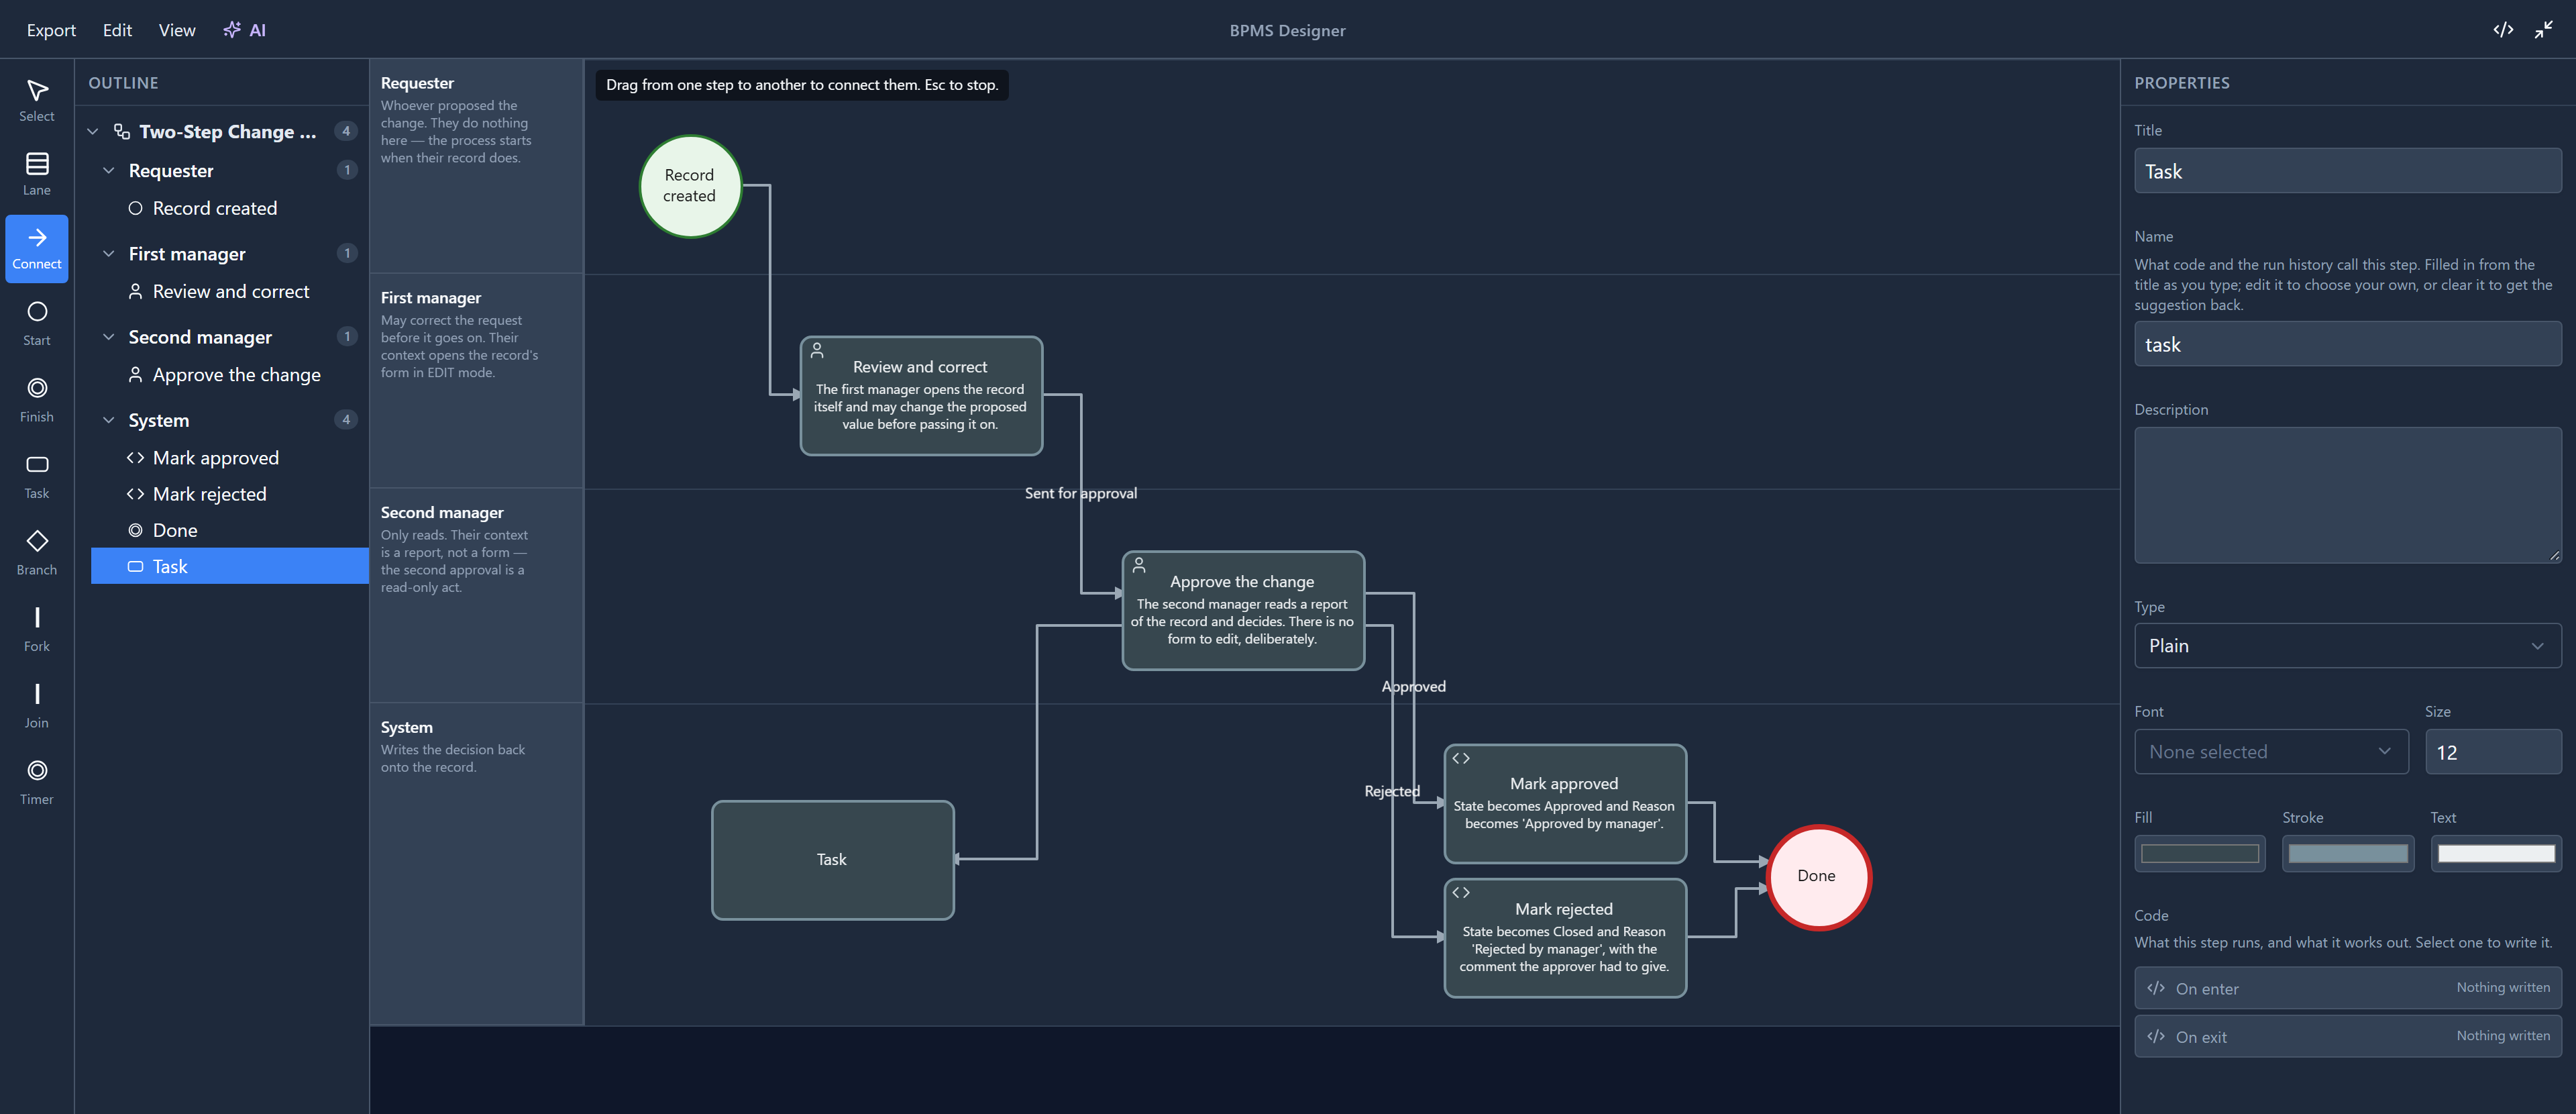
The tool stays on, so you can connect several pairs in a row. Press Esc, or V, to go back to selecting.
Look at where the new connection leaves Approve the change: on its left side, the same side Sent for approval arrives on. They used to share the middle of that side, so the two ran along the same line with an arrowhead half way along. The designer now spreads everything on a side, whichever way it goes, so they leave and arrive at two different points.
Two connector styles
Select the process itself, in the outline or by clicking an empty part of the canvas. Connector style is on its properties:
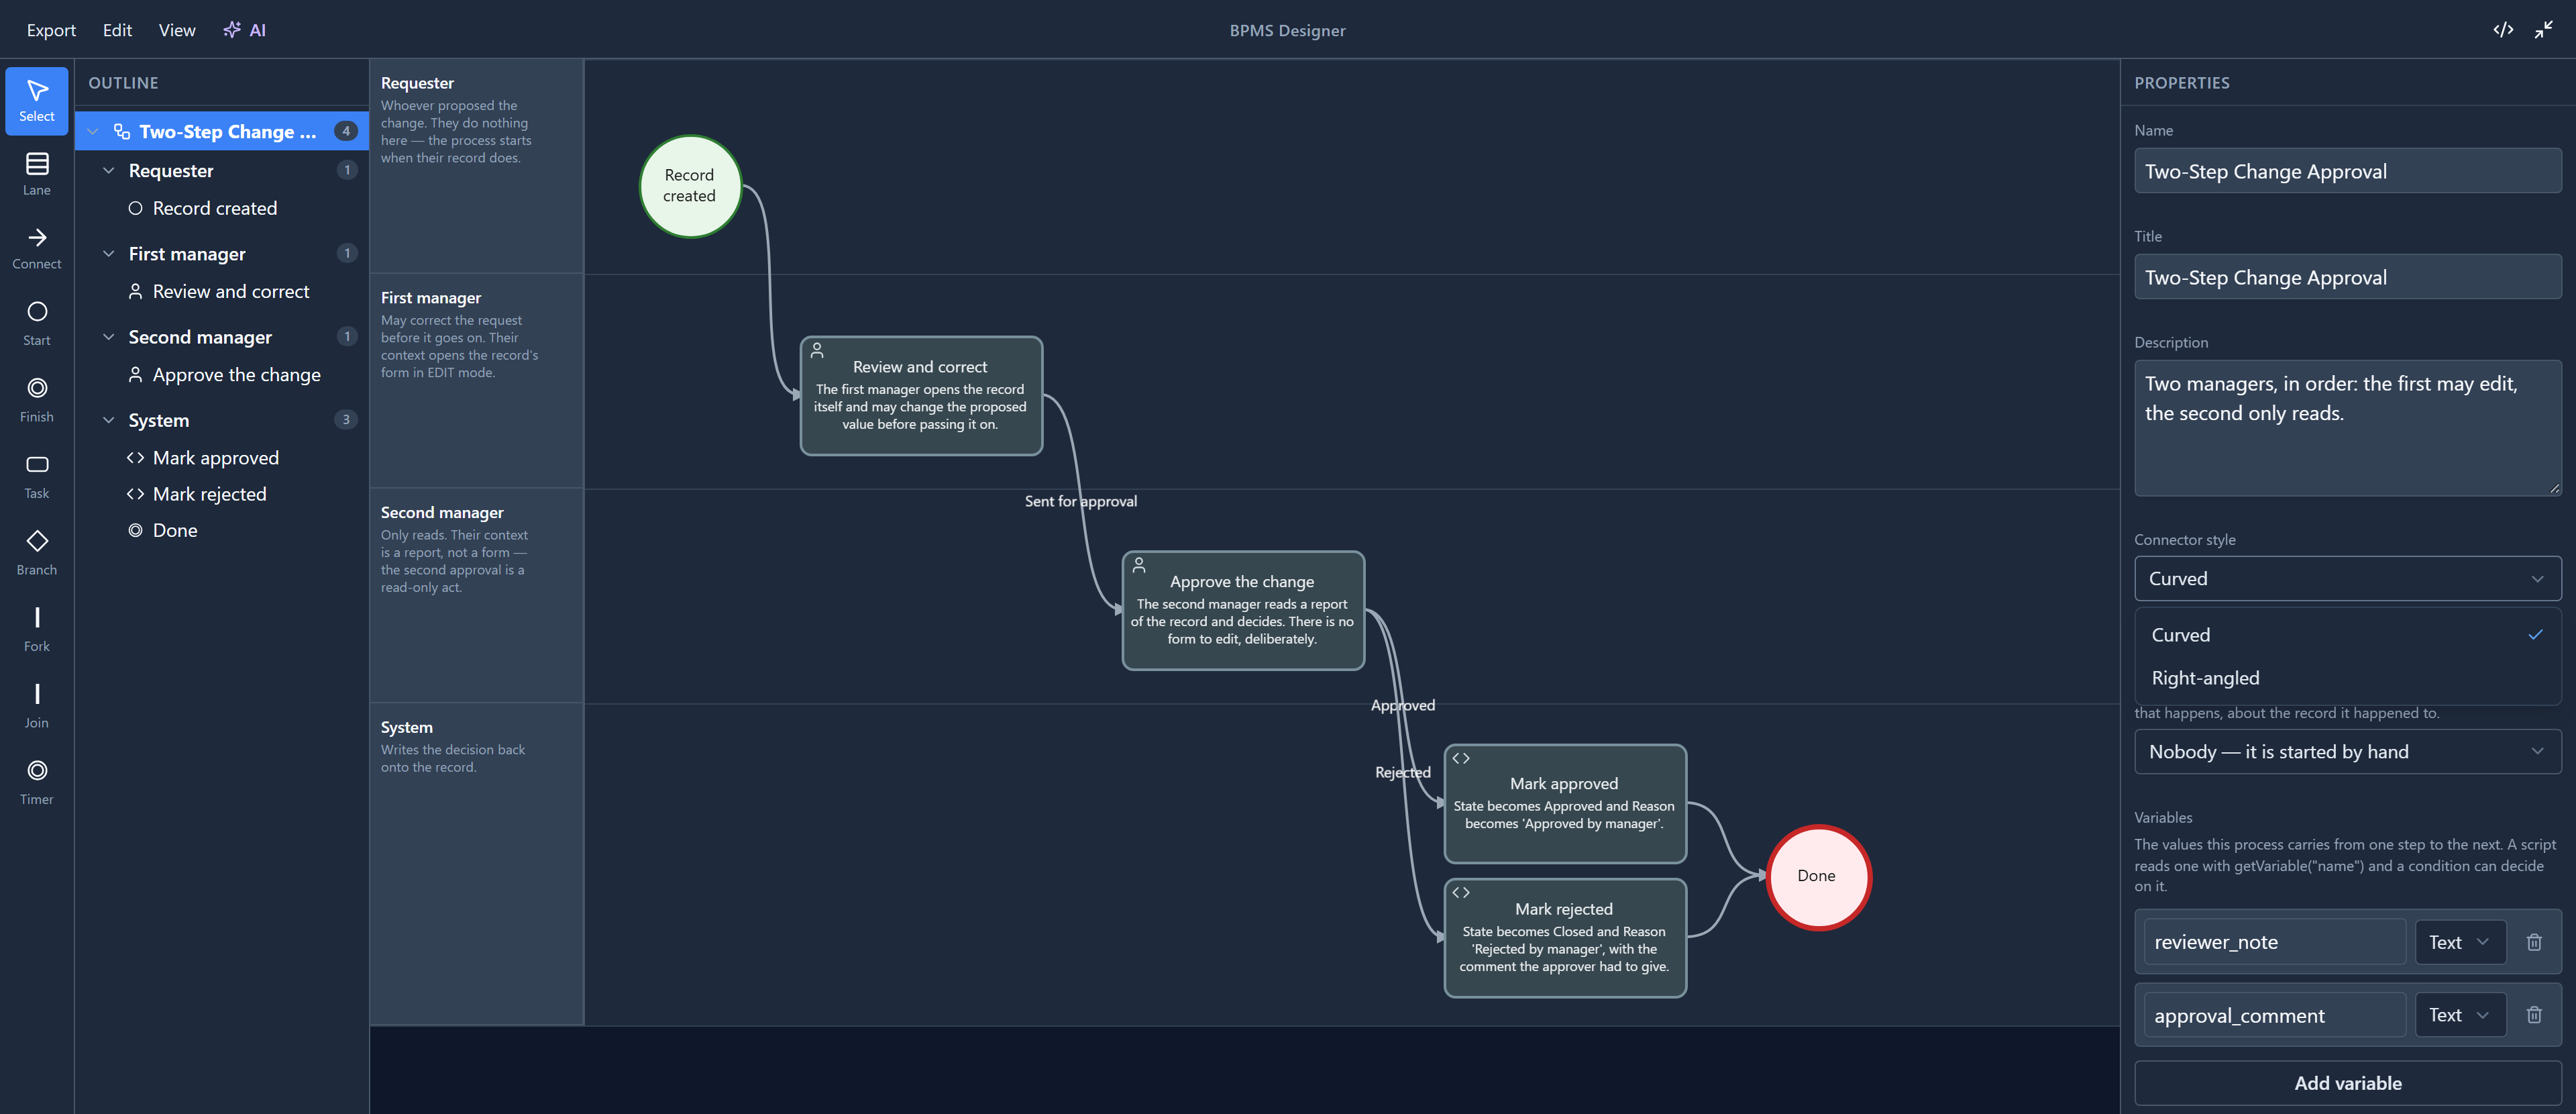
- Curved, the default. Each connection is a smooth curve from one step to the other.
- Right-angled. Each connection is made of straight lines with square corners.
It applies to the whole diagram, because a diagram that mixes the two looks like a mistake rather than a choice. The second option used to be called Orthogonal. It's Right-angled now in English, Spanish and French, which is what the other four languages already said.
Here's the sample with right-angled connectors:
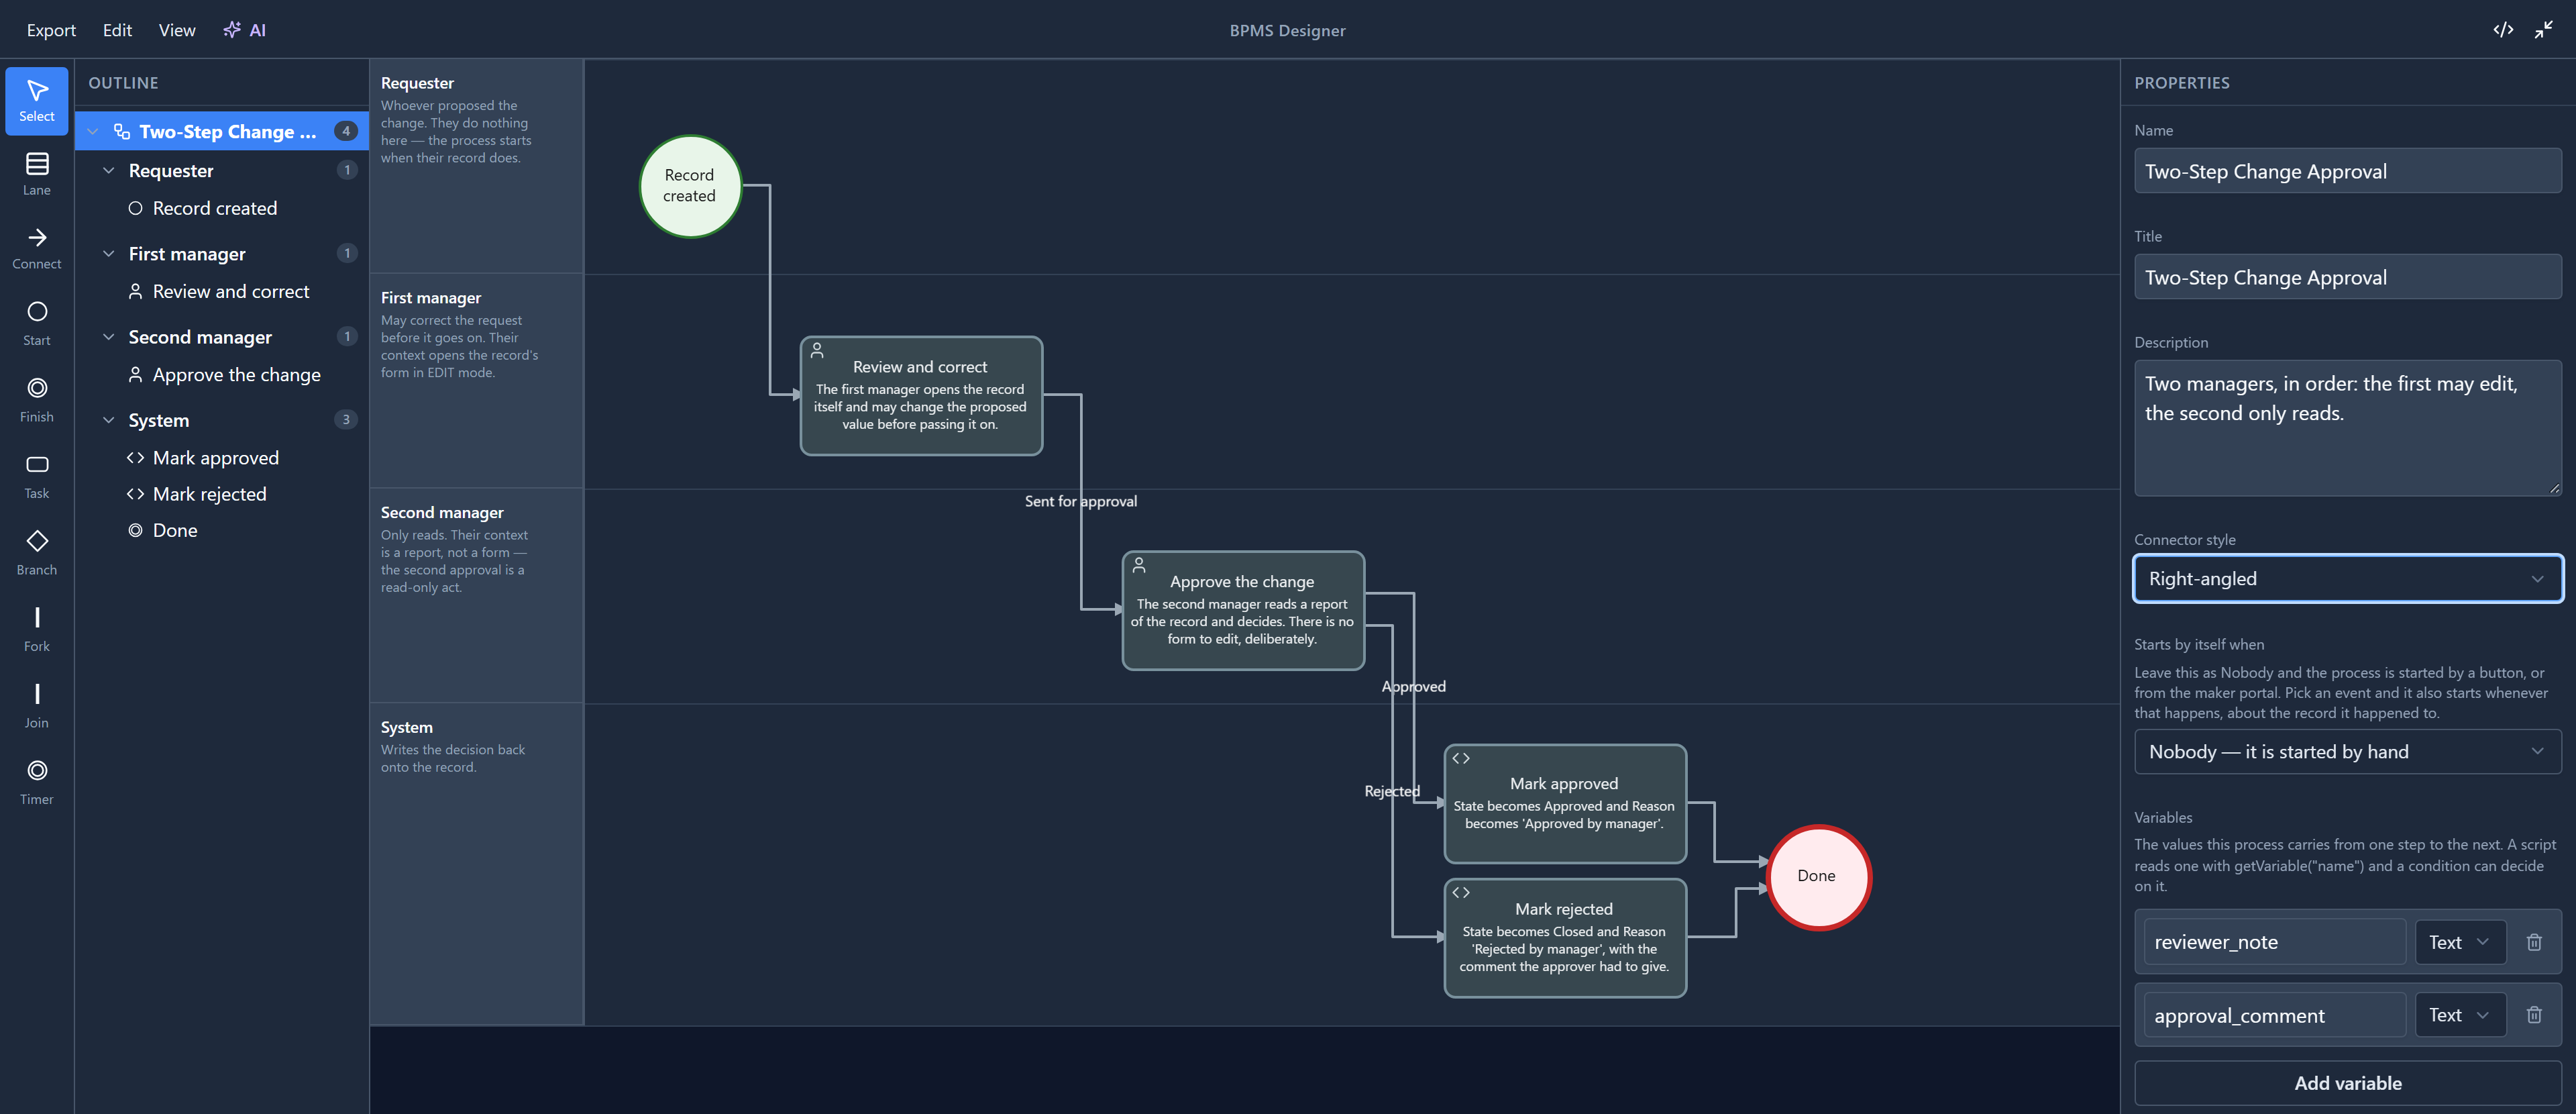
Approved and Rejected both leave the right side of Approve the change and both go down. They used to turn at the same place and run down one shared line, so you couldn't tell which label belonged to which connection. Each now has its own line, and they never cross: the one that leaves higher turns later.
Routing around a step
Right-angled connections go around a step that's in the way. Curved ones don't. To see it, we moved Review and correct to the right, so the connection from Record created turns once:
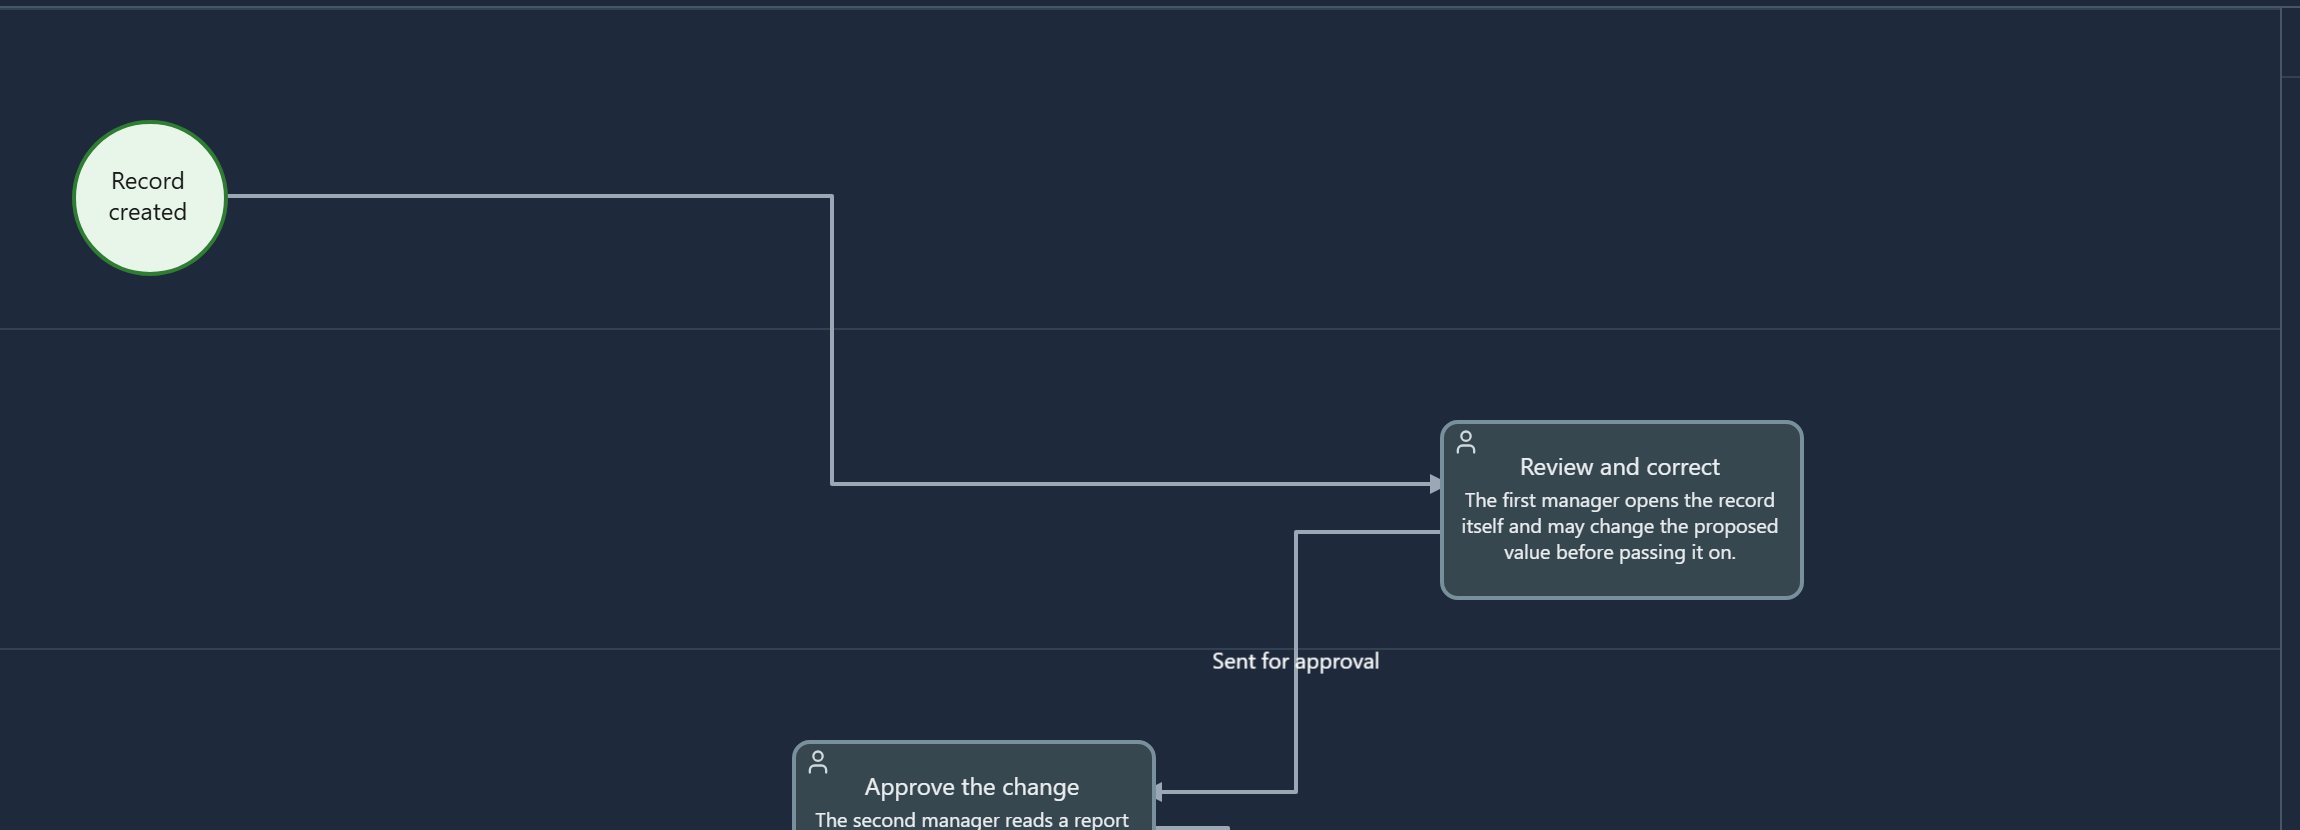
Then we dropped a new task where that corner was:
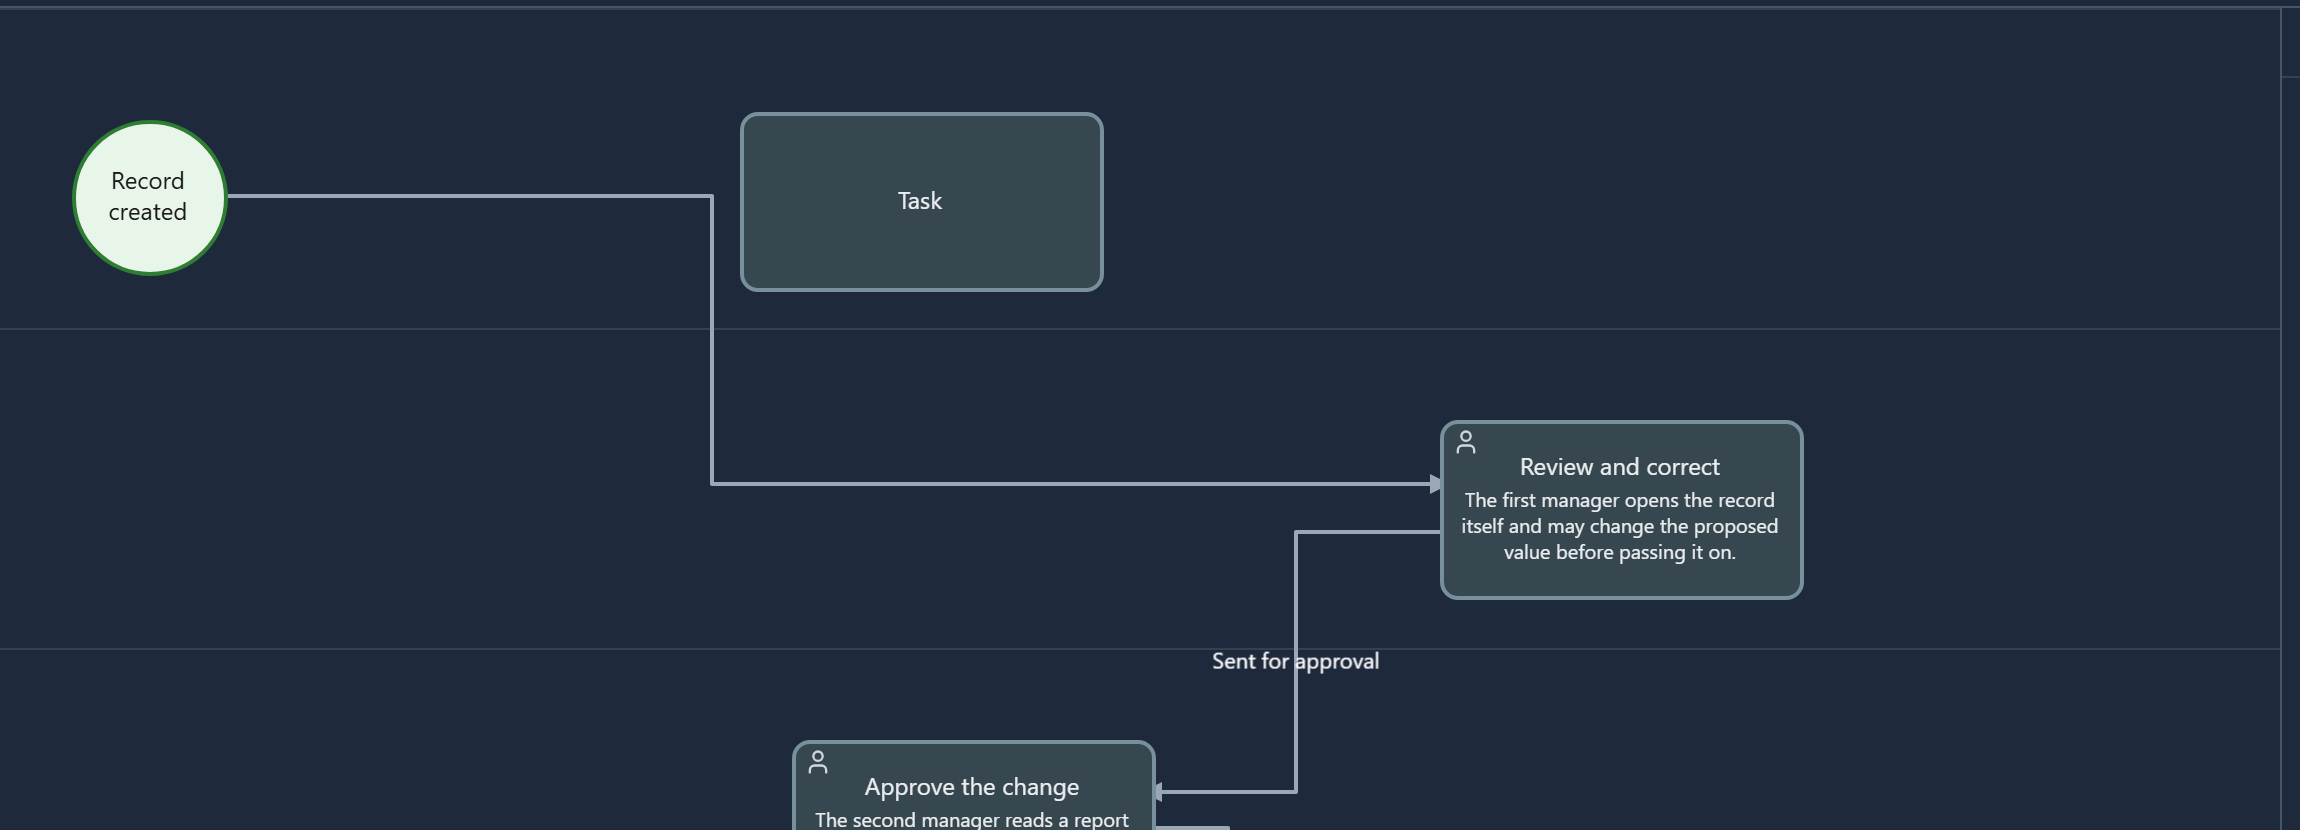
The corner moves so the line passes beside the task rather than through it. You don't do anything; the designer re-routes every connection whenever a step moves.
There has to be room for it. A step squeezed into a gap narrower than itself can't be gone around, and the line passes behind it. The fix is to move the step.
A curve is drawn straight from one step to the other, wherever the steps around it are. In a crowded diagram that can make a connection look as if it goes somewhere it doesn't. The Leave Approval sample had exactly this: Tell Employee: Rejected sat just left of Tell Employee: Approved, and the curve from Rejected to the end passed through Approved, so the drawing read "rejected, then told it was approved". We moved the two steps apart in the sample.
Auto arrange
To tidy a diagram, choose View → Auto arrange. We made a mess first:
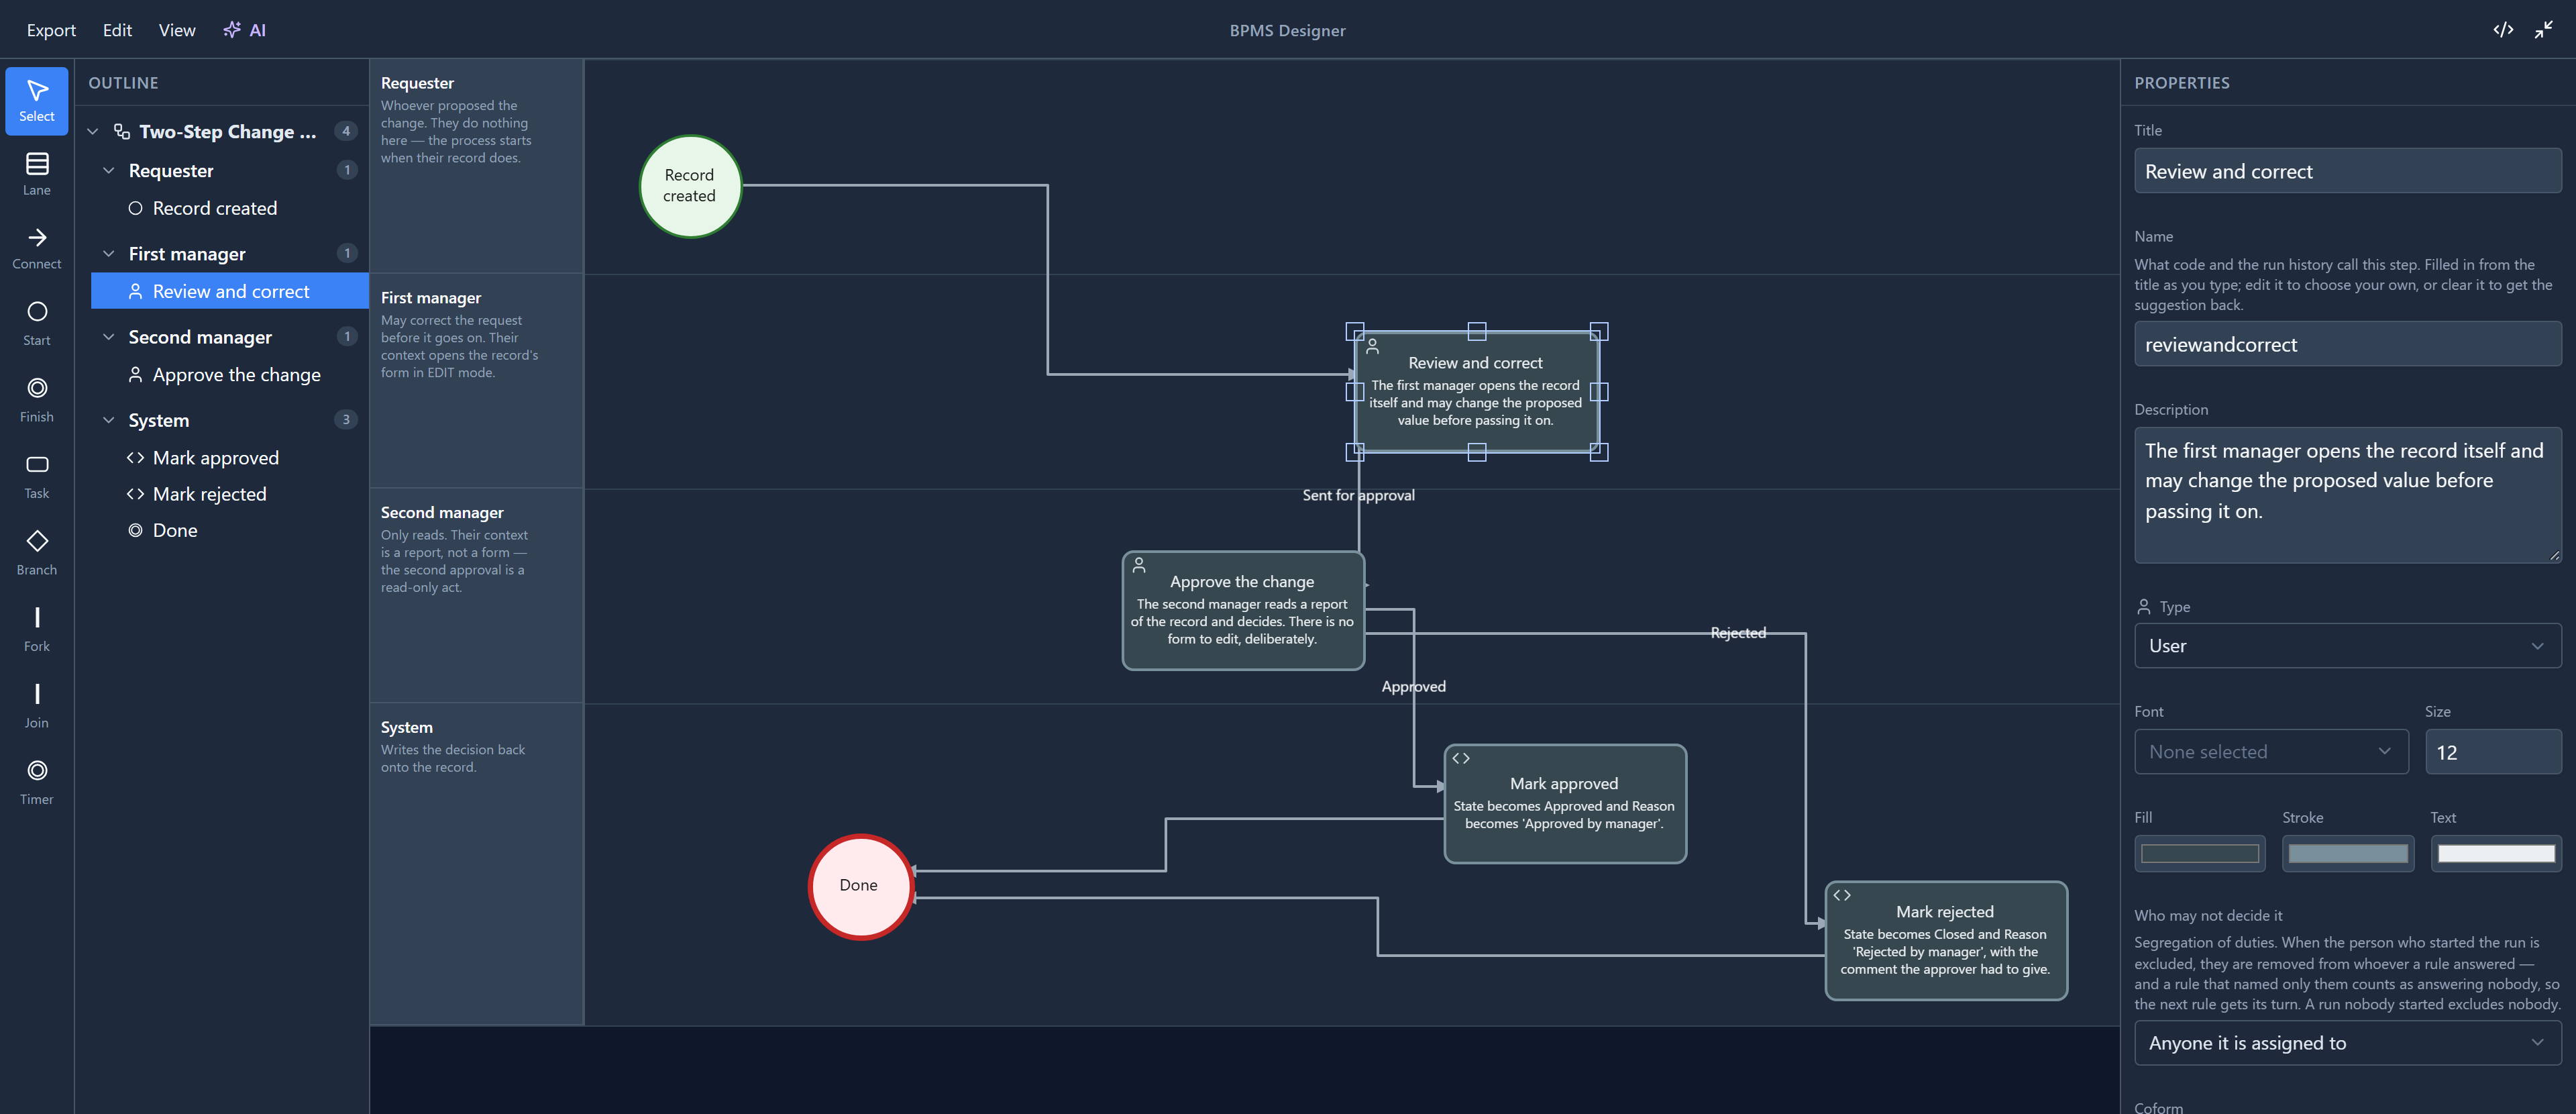
and arranged it:
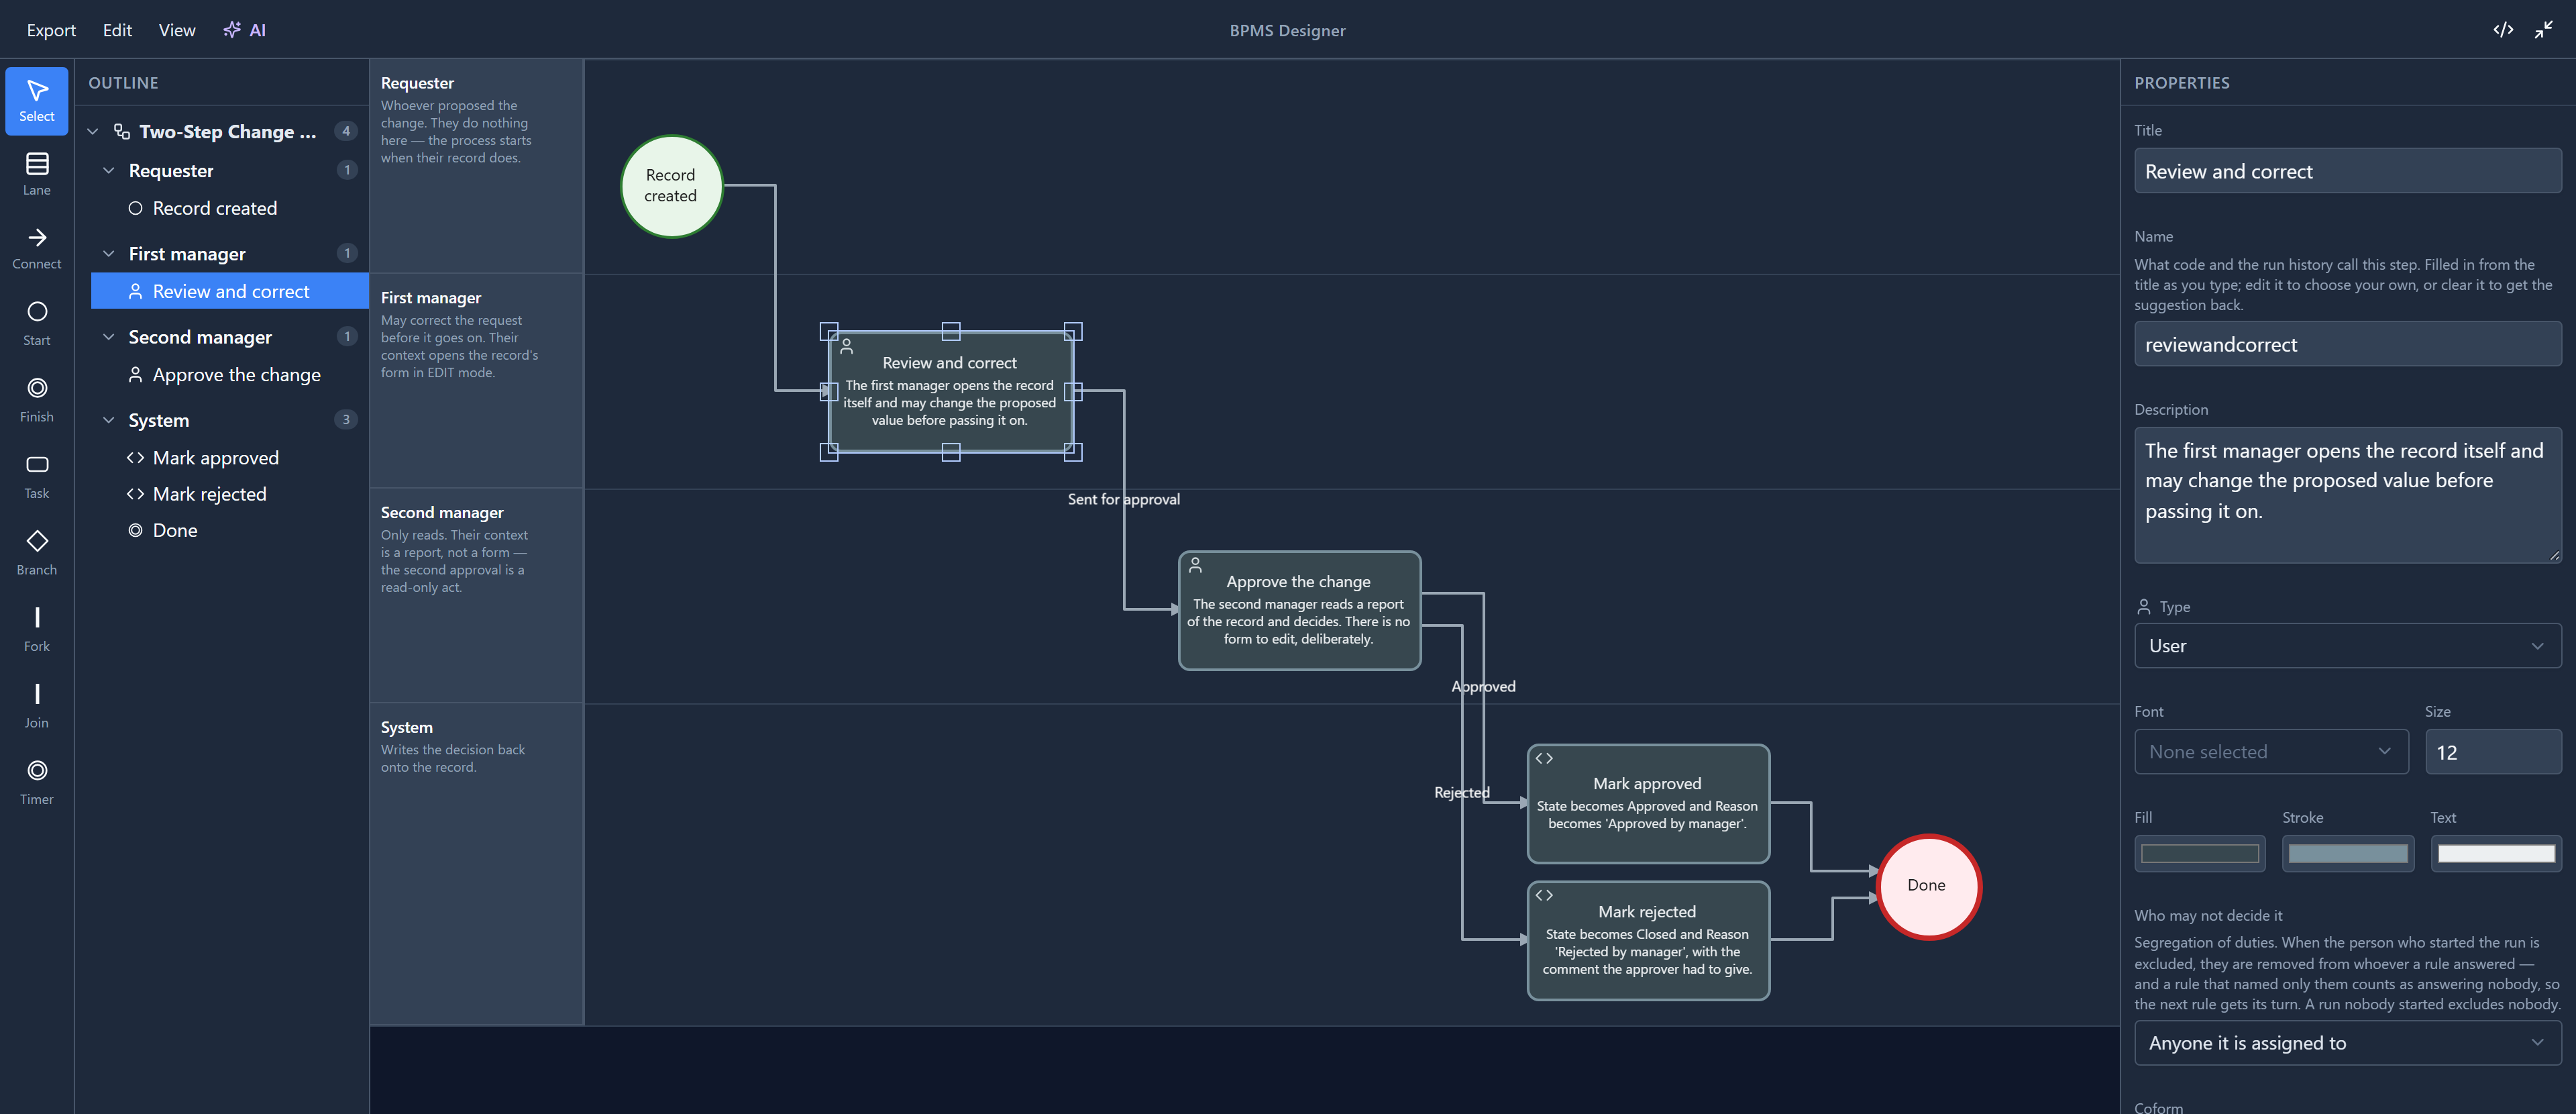
Auto arrange lays the steps out left to right in the order the flow takes them, and every step stays in its own lane. It only moves steps sideways, then re-routes the connections. It never moves a step into another lane, because a step's lane is who does the work, and tidying a drawing mustn't change that.
It arranges by the connections, so it needs some. A diagram of steps that aren't connected yet has no order to arrange them in, and nothing moves.
Edit → Undo takes an arrangement back if you preferred your own.
Try it
Switch Connector style to Right-angled, then drag a step into the middle of a connection and watch it move out of the way. Then choose View → Auto arrange. Close without saving to leave the sample as it was.
Next: branch conditions, the code that decides which way a branch goes.