Parsware Platform
Build your first table and view in Parsware
A step-by-step walkthrough, from an empty solution to a working app. Create a table, add five kinds of field, build a filtered view, and open it with real rows in about ten minutes.
Este artículo solo está disponible en inglés.
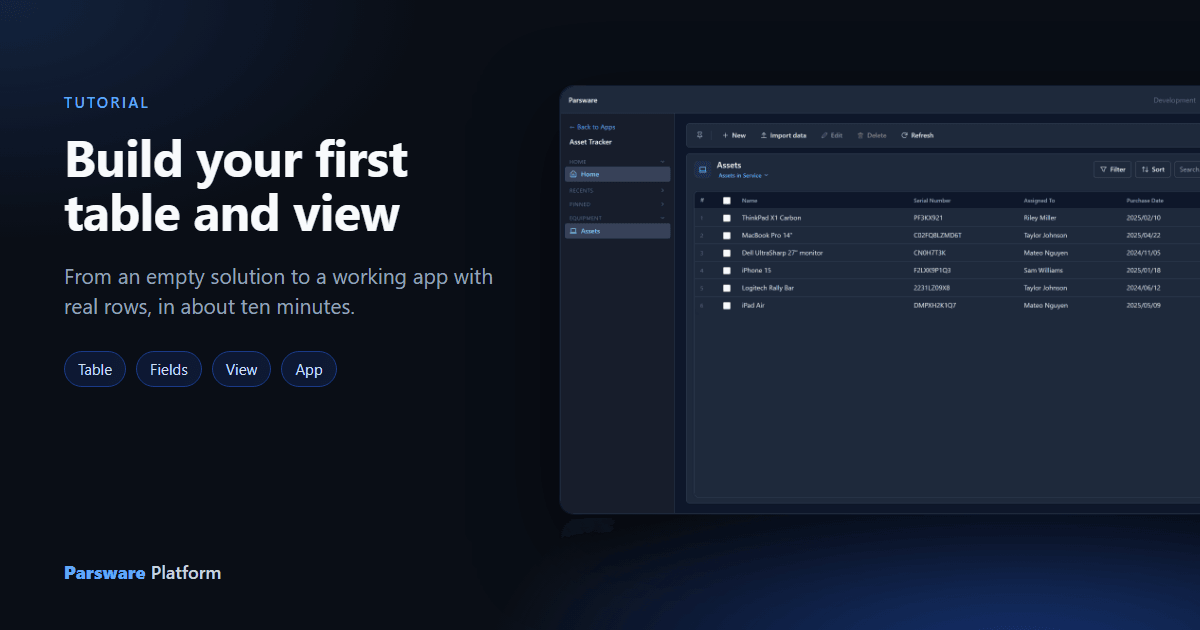
Most business apps start the same way: a list of things someone needs to keep track of. In this walkthrough we build one from nothing, a register of the company's equipment. We make a table, add fields to it, build a view that shows the right columns and rows, and open the result in an app.
Every picture below is the real product, captured while this walkthrough was being run.
Before you start
You need a solution to work in. A solution is the package your work lives in. It is what you later move from a development environment to test and production. Every solution belongs to a publisher, and the publisher's prefix is put in front of everything you create, so your names never clash with someone else's.
In this walkthrough the solution is called Sales, and its publisher's prefix is con_. Open
Solutions, then open your solution.
Step 1: Create the table
In the solution, choose Tables in the left rail, then New.
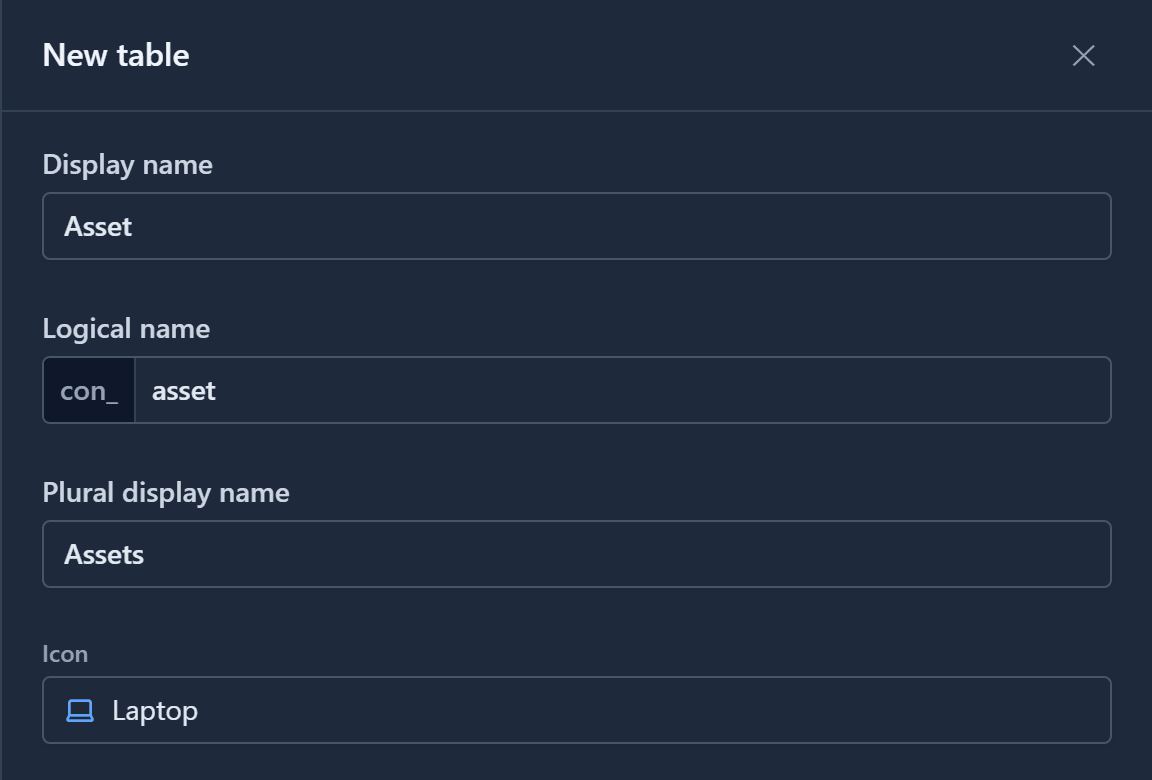
- Display name:
Asset, which is what people see. - Logical name: fills itself in as you type, with the prefix in front:
con_asset. This is the name scripts, reports and the API use, and it can't be changed later, so check it now. - Plural display name:
Assets, used for lists and navigation. - Icon: optional. Search the icon library for one that fits. We chose Laptop.
Choose Save. The table's Fields page opens with one field already there: Name, the primary field every table has. Two other things were also created for you: a main form and an All Assets view. So the table is usable straight away, before you design anything.
Step 2: Add fields
On the Fields page, choose New to open the field drawer. Each field needs a display name (its logical name fills itself in again) and a data type. We'll add five fields, each of a different type, to show the range.
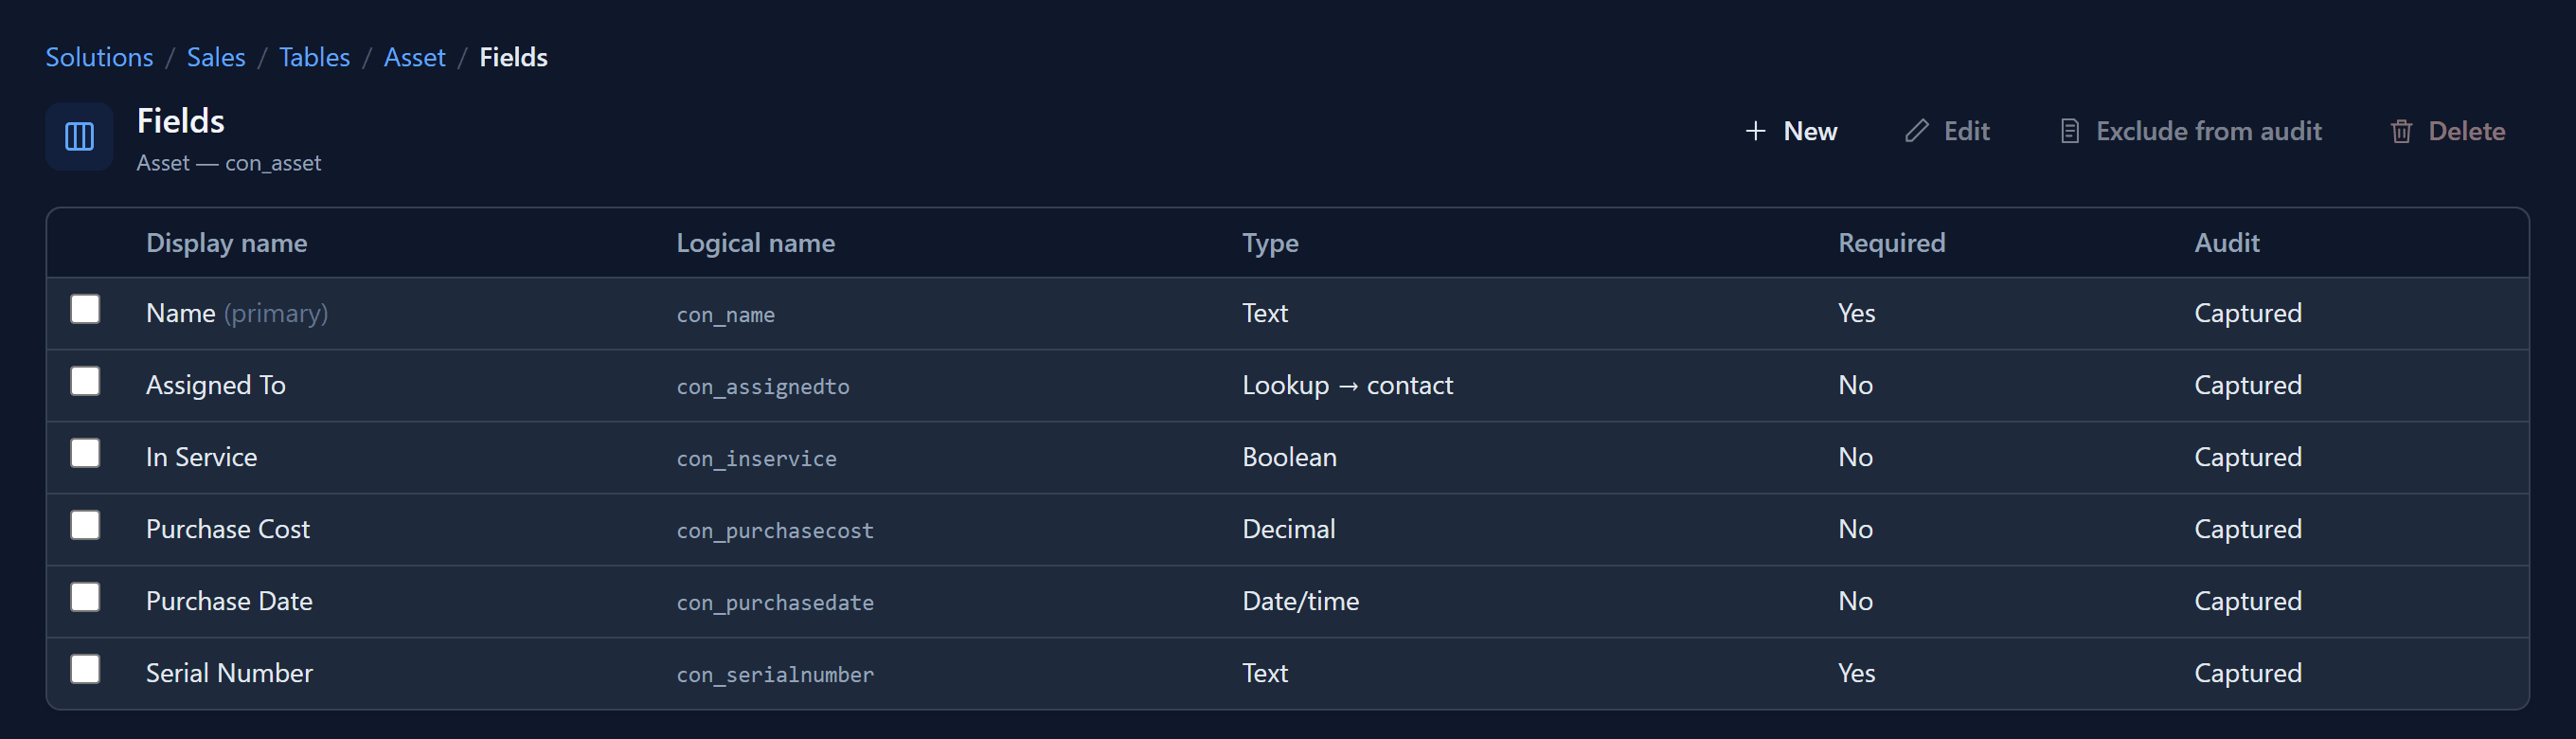
Serial Number: text, required.
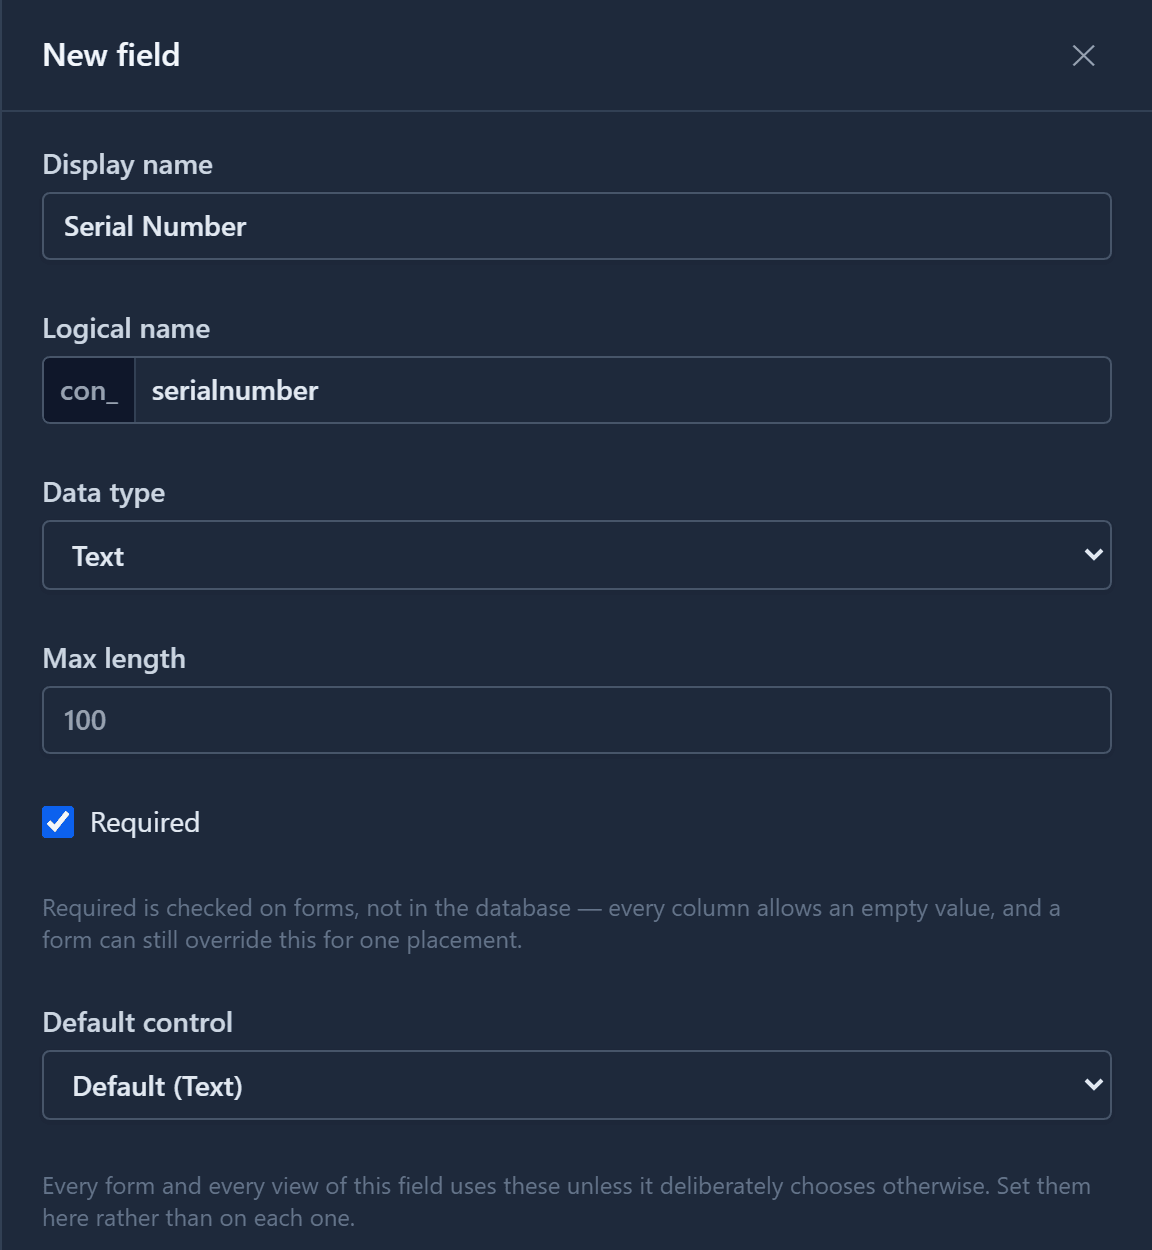
Tick Required. As the note under it says, required is enforced on forms, not in the database. The column still accepts an empty value, and a single form can relax the rule where it needs to.
Choose Save & New to go straight on to the next field. Then add:
| Field | Data type | Setting worth changing |
|---|---|---|
| Purchase Date | Date/time | Default control set to Date, because the time of day doesn't matter here. Persian date controls are available in the same list. |
| Purchase Cost | Decimal | Precision and Scale set how many digits the number has in total and after the decimal point. |
| In Service | Boolean | Shown as a check box by default, or as a toggle. |
| Assigned To | Lookup | Related table set to Contact. |
Assigned To is the most useful of these. A lookup doesn't store a name typed by hand. It points at an actual Contact record, so the app offers a searchable list of real people, and every asset stays linked to the person's record even if their name changes.
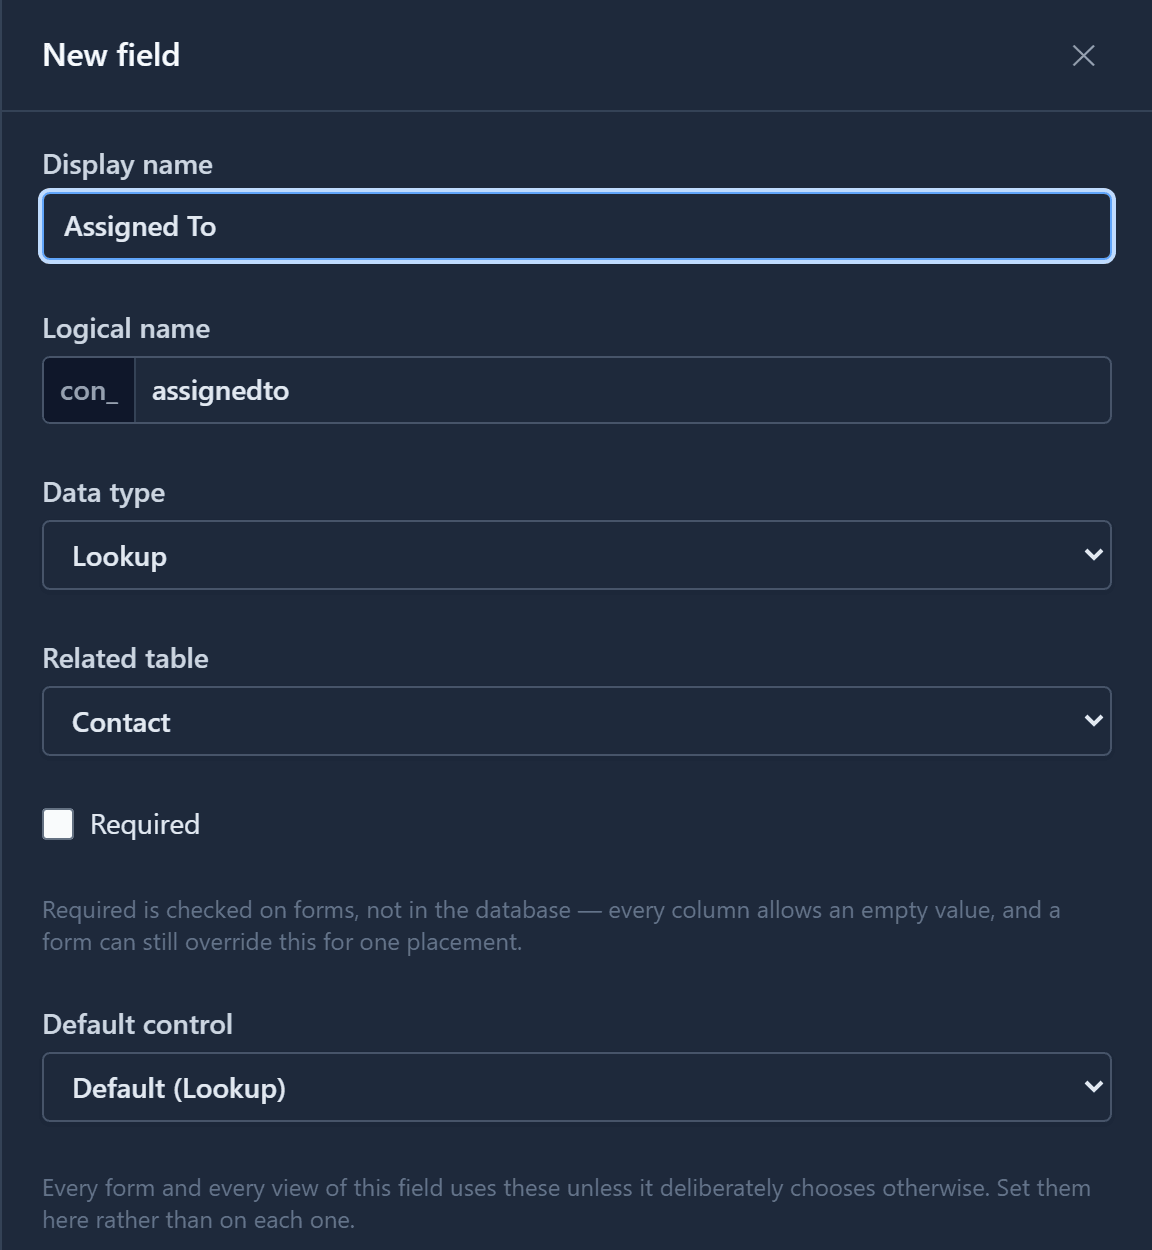
The Default control on every field is set once, here. Every form and view that shows the field uses it unless it deliberately chooses otherwise, so you don't have to set it again on each one.
After the fifth field, the table looks like this:
Step 3: Build a view
A view decides two things: which columns a list shows, and which rows it includes. We'll make one that lists only the equipment still in use.
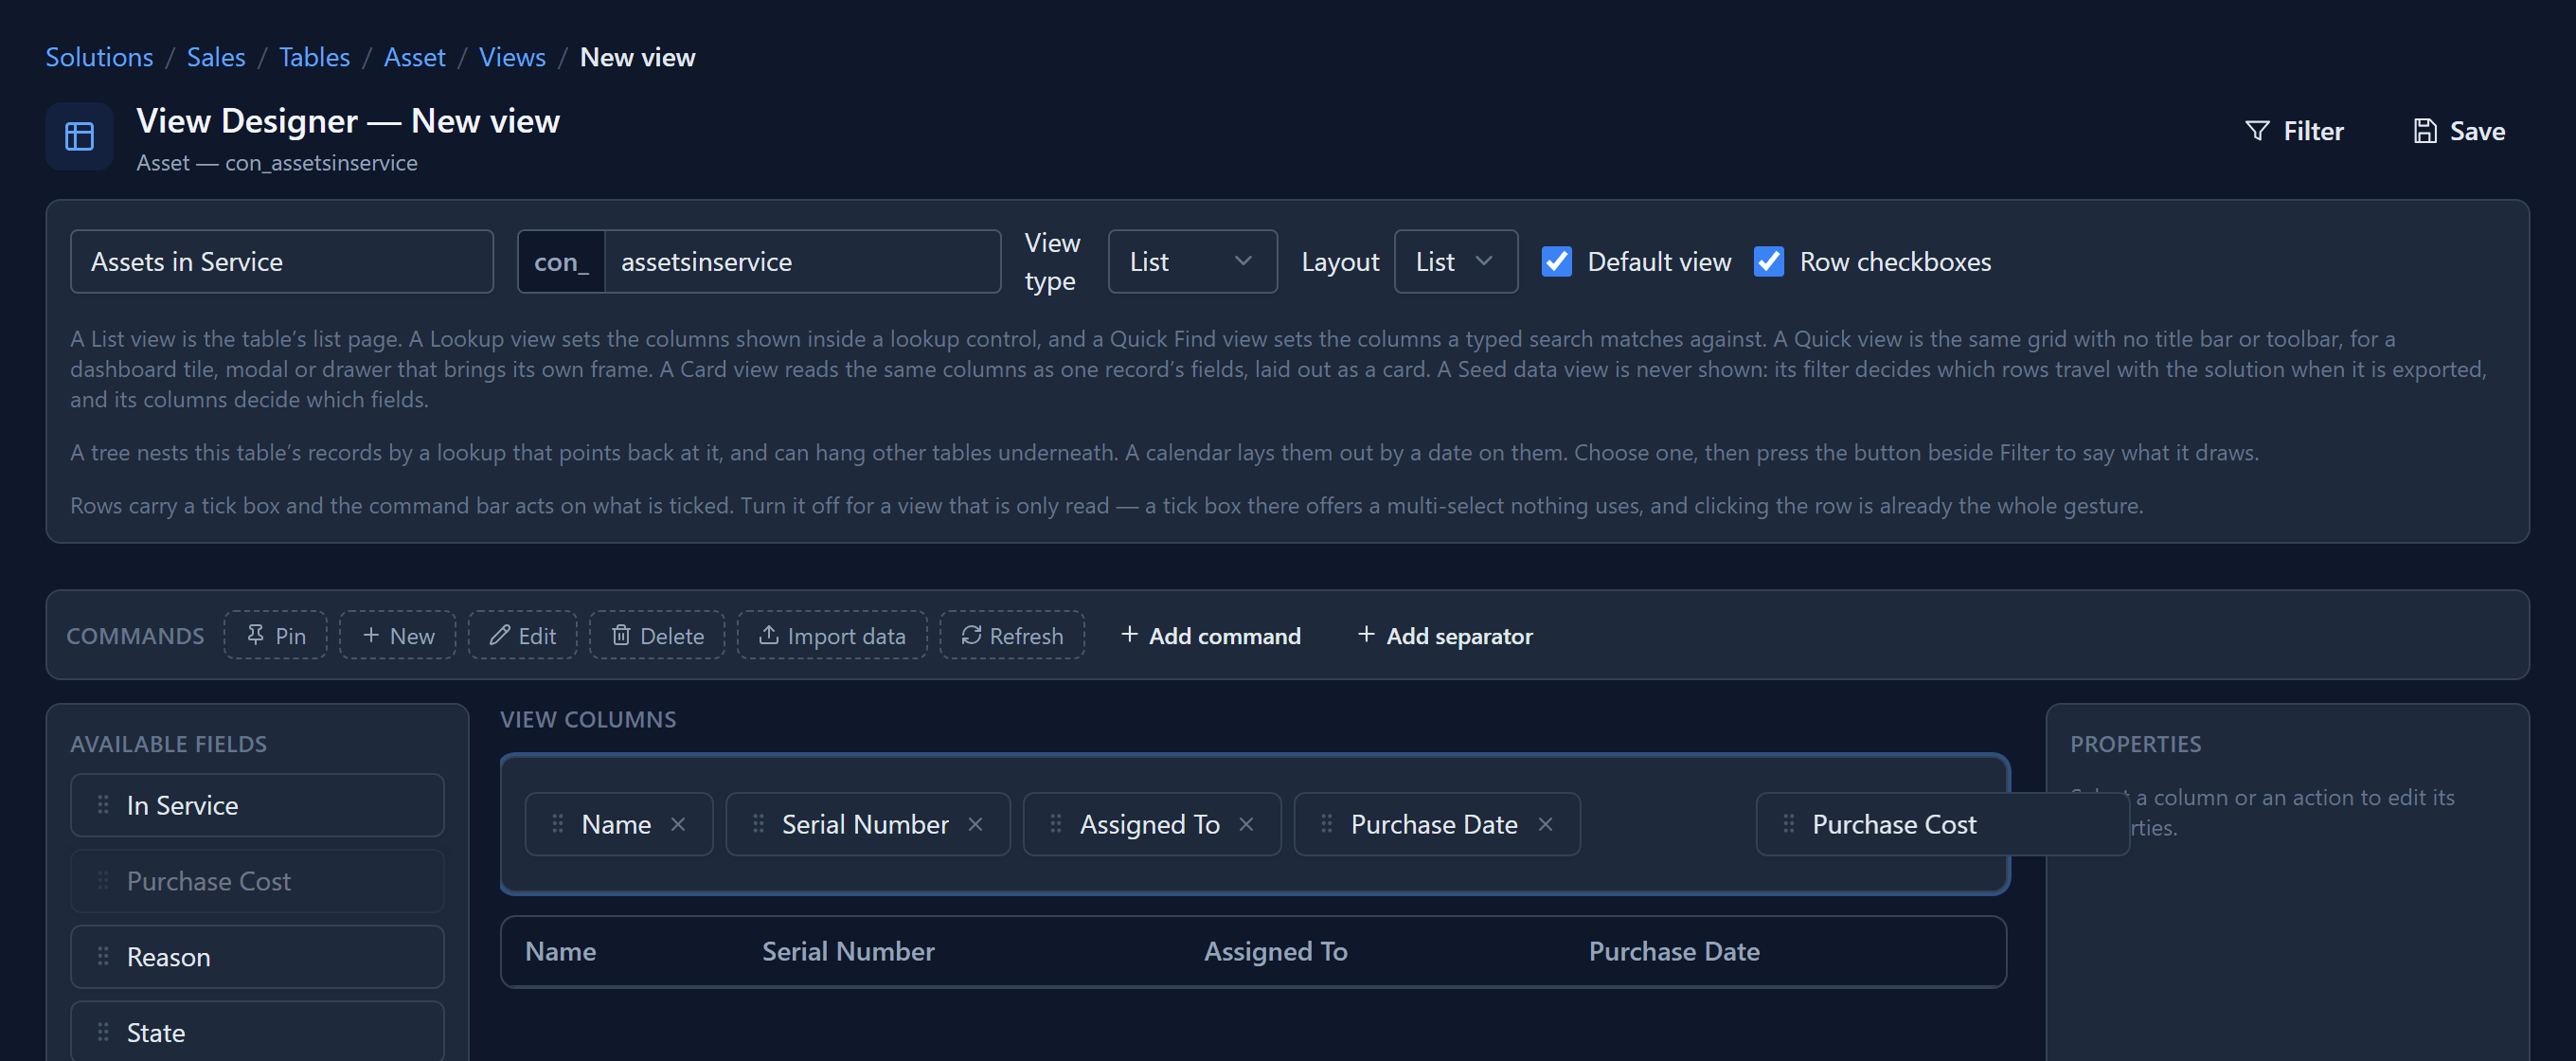
Choose Views in the table's left rail, then New. Name it Assets in Service and tick
Default view, so the app opens this view first.
Columns. The table's fields are listed on the left under Available fields. Drag each field into View columns, in the order you want the columns to appear. The preview underneath updates as you go. Drag a column back out to remove it, or along the row to move it.
Rows. Choose Filter at the top of the designer, then Add condition. Set it to In Service, Equals, Yes, then choose Apply.
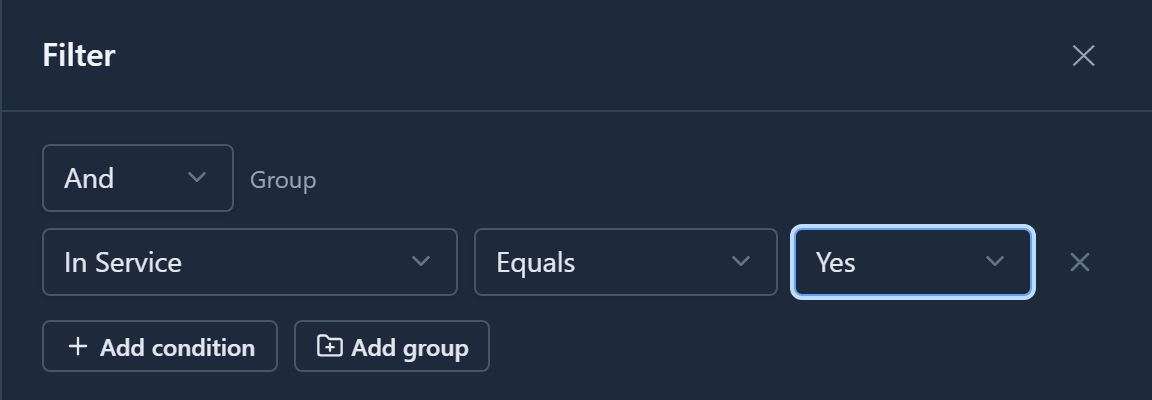
Conditions can be grouped with And and Or to build more complex filters. One is enough here. Choose Save.
Step 4: Put it in an app
A table becomes something people use when it is in an app. In the solution, choose Apps, then New.
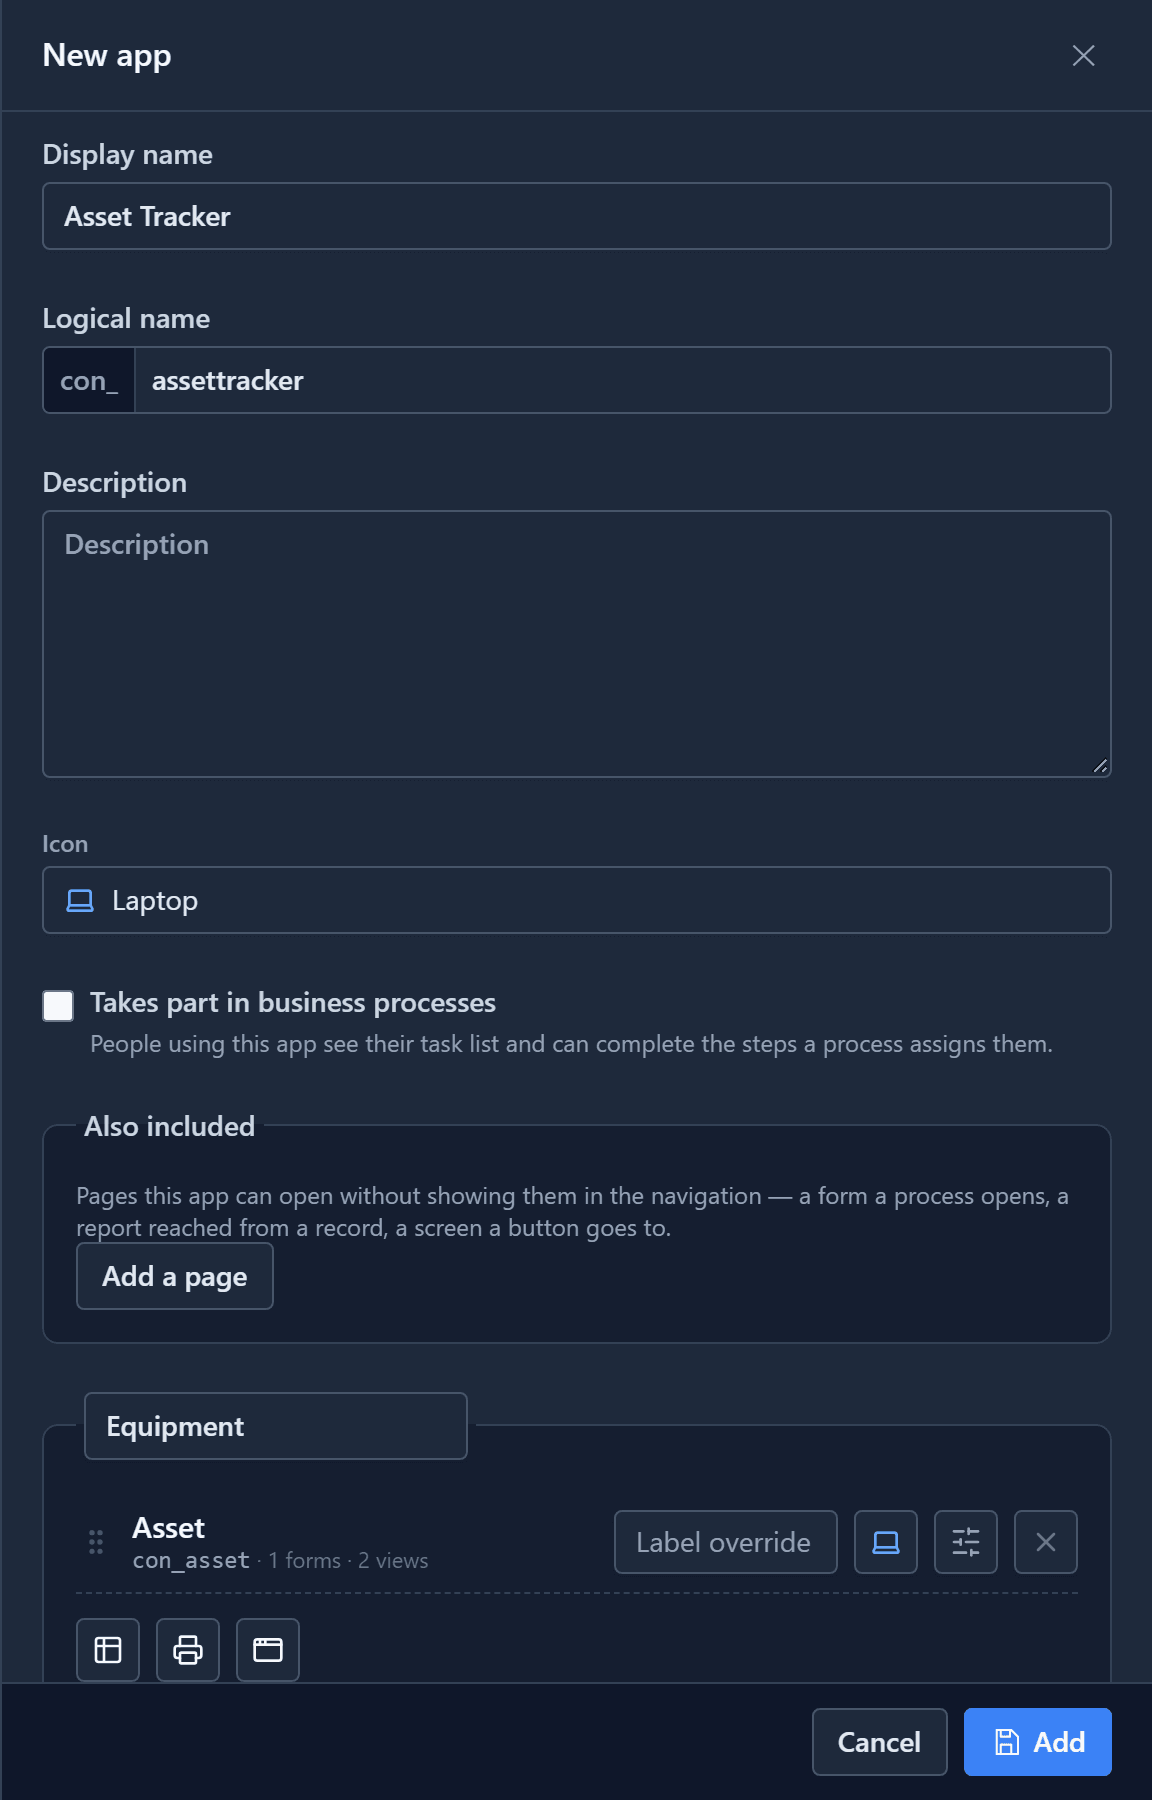
Name the app Asset Tracker. Under the navigation, name the first group Equipment, and add the
Asset table to it with the table button. The picker filters as you type, so a long list of
tables is no problem. Set Home page to Asset and choose Add.
The result
Open the app from the environment's app list. Add a few assets with New on the command bar, or use Import data to bring them in from a CSV file. We added eight, two of them no longer in service.
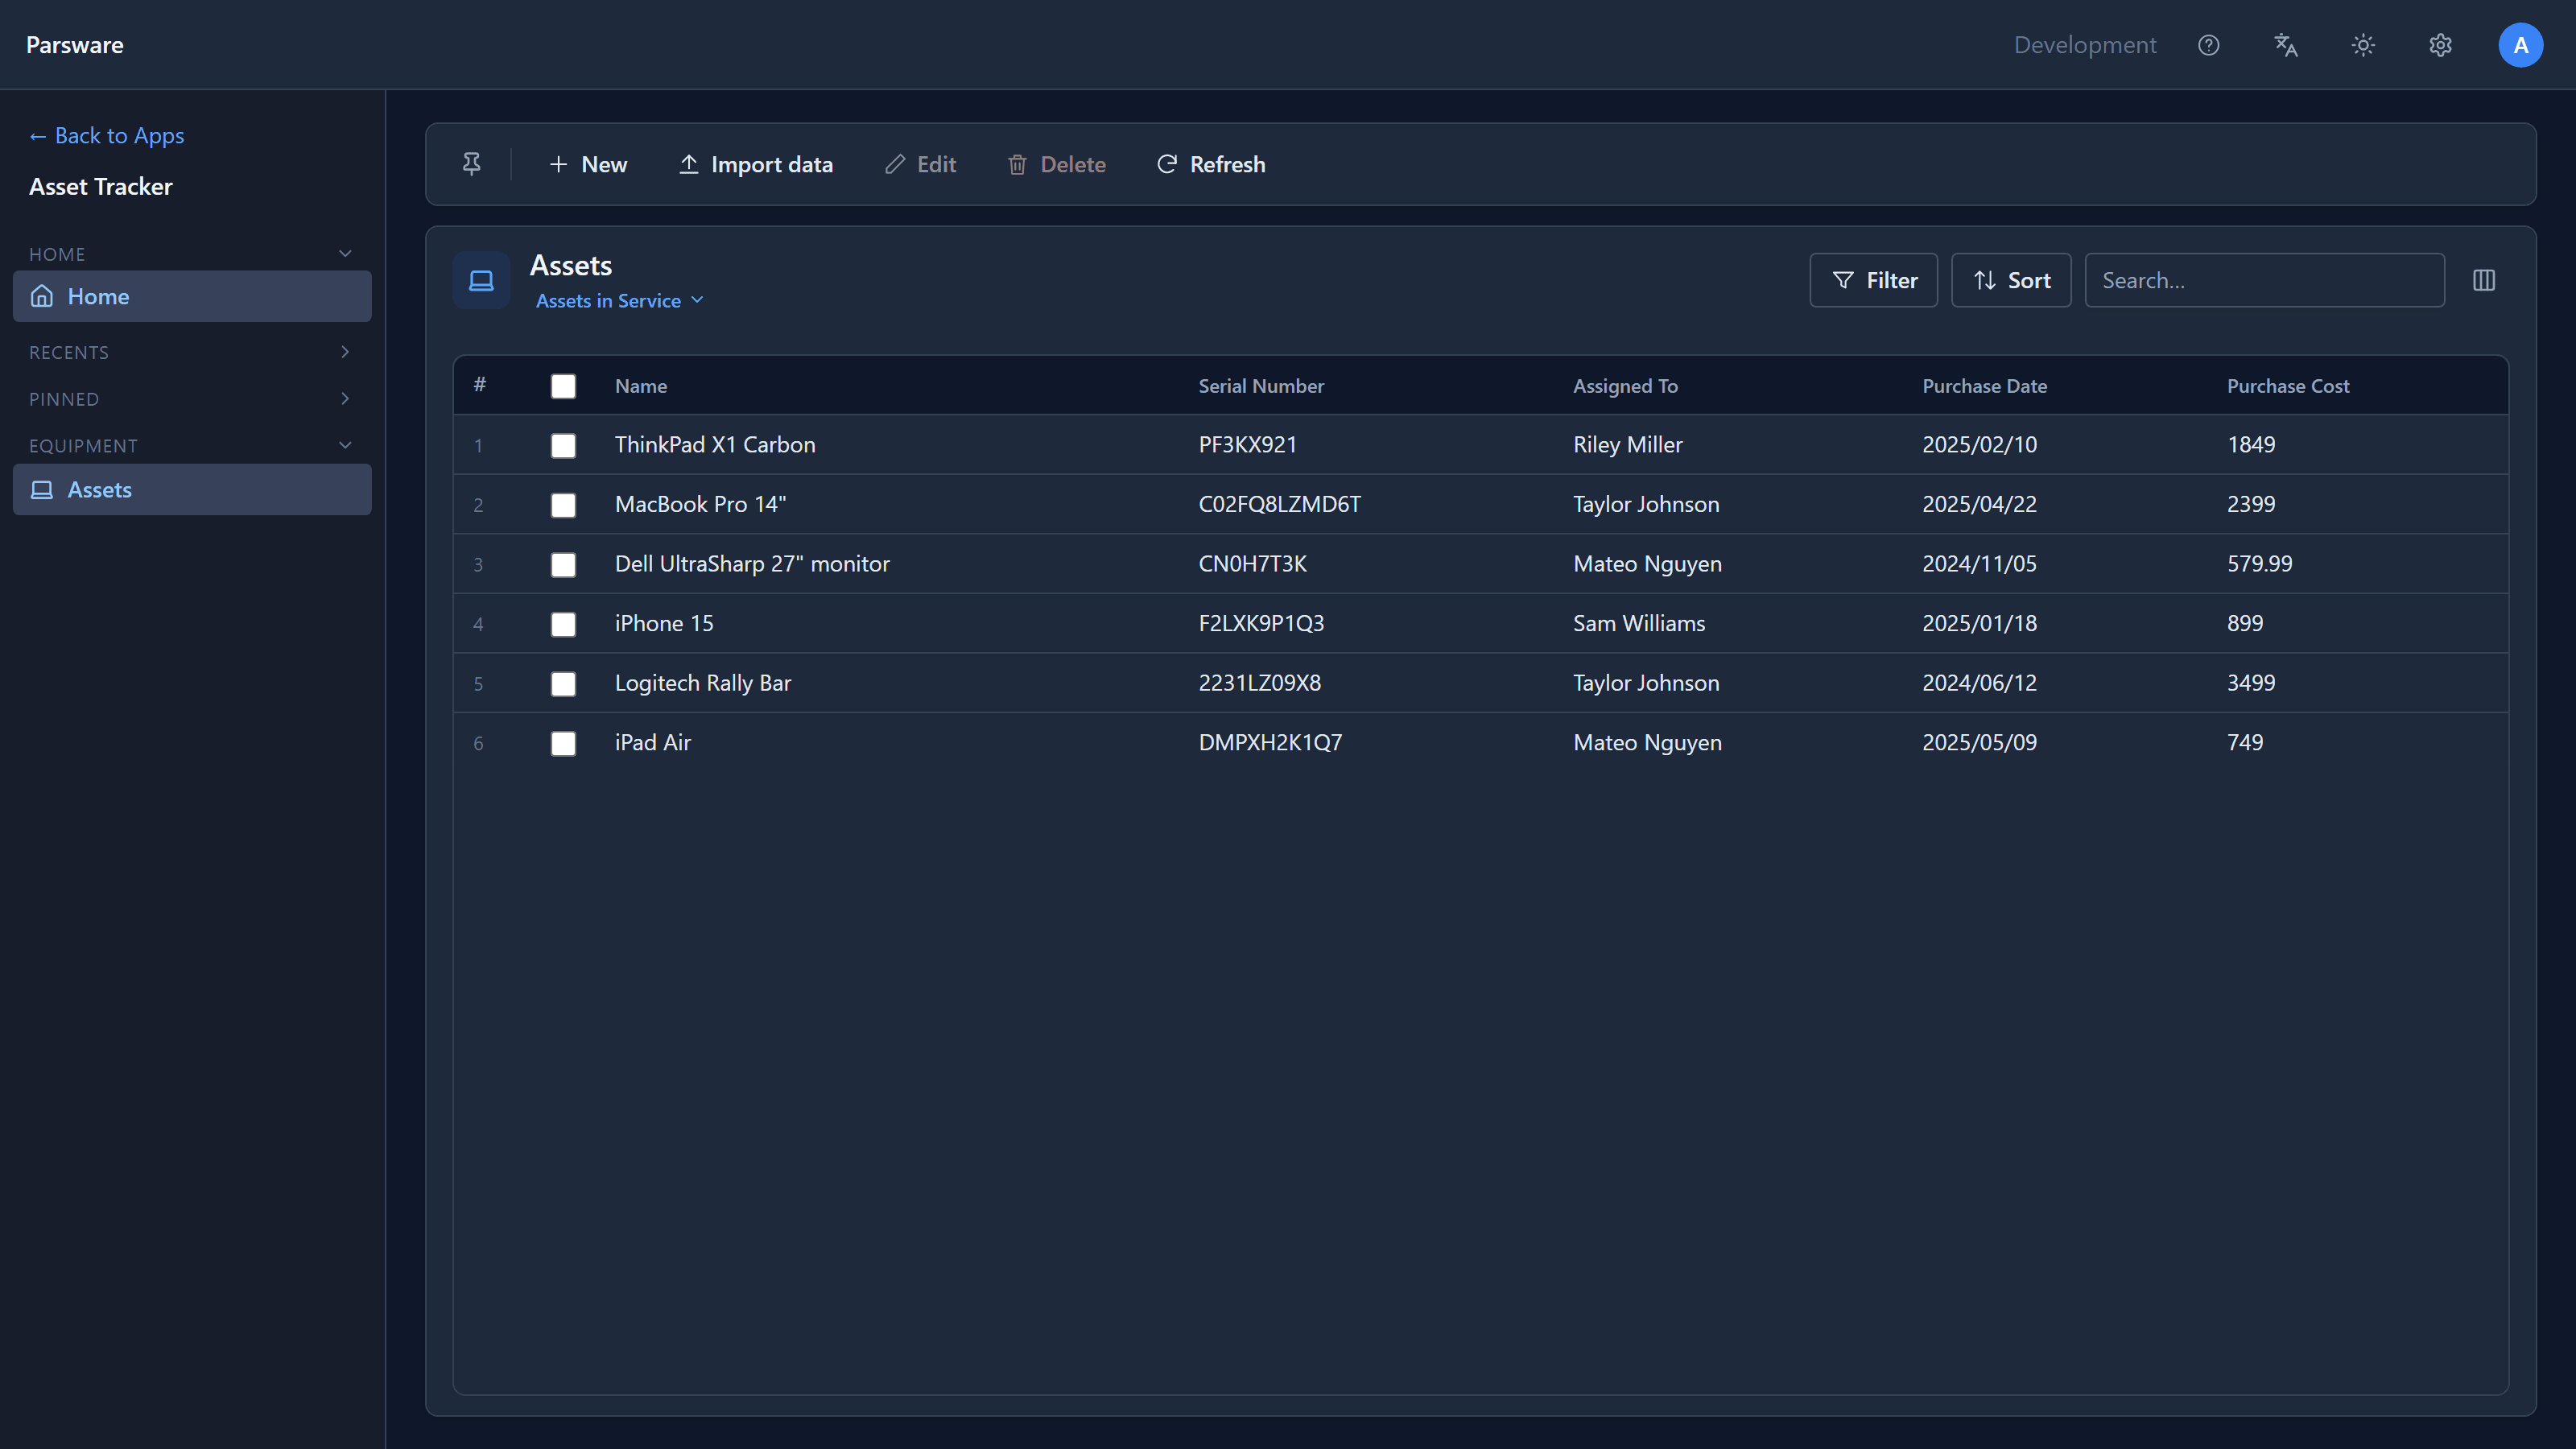
The app opens on Assets in Service. It shows the five columns in the order we set, the contact each asset is assigned to, and six rows: the two out-of-service assets are filtered out. All Assets is still available from the view picker under the title, for when you need to see everything.
What we built
- A table with a primary field, created with a form and a default view.
- Five fields, each a different type: text, date, decimal, yes/no and a lookup to another table.
- A view with chosen columns and a filter, set as the default.
- An app that puts it in front of the people who need it.
All of it lives in the solution, so it moves to your test and production environments as one package, with the same names, columns and filter.
Next: give Asset a form that fits the job, or add a business rule that stops an asset being assigned while it is out of service.